I have been always wanting to add a Solar PV array to my house and recently, it made sense and I purchased a modest (7.5kw) system for my house. It has been as much of an IT journey of integration and extracting value from disparate systems has it been of reducing my carbon footprint.
When comparing systems, what is important to me, may not be important to you and I had two non-negotiables.
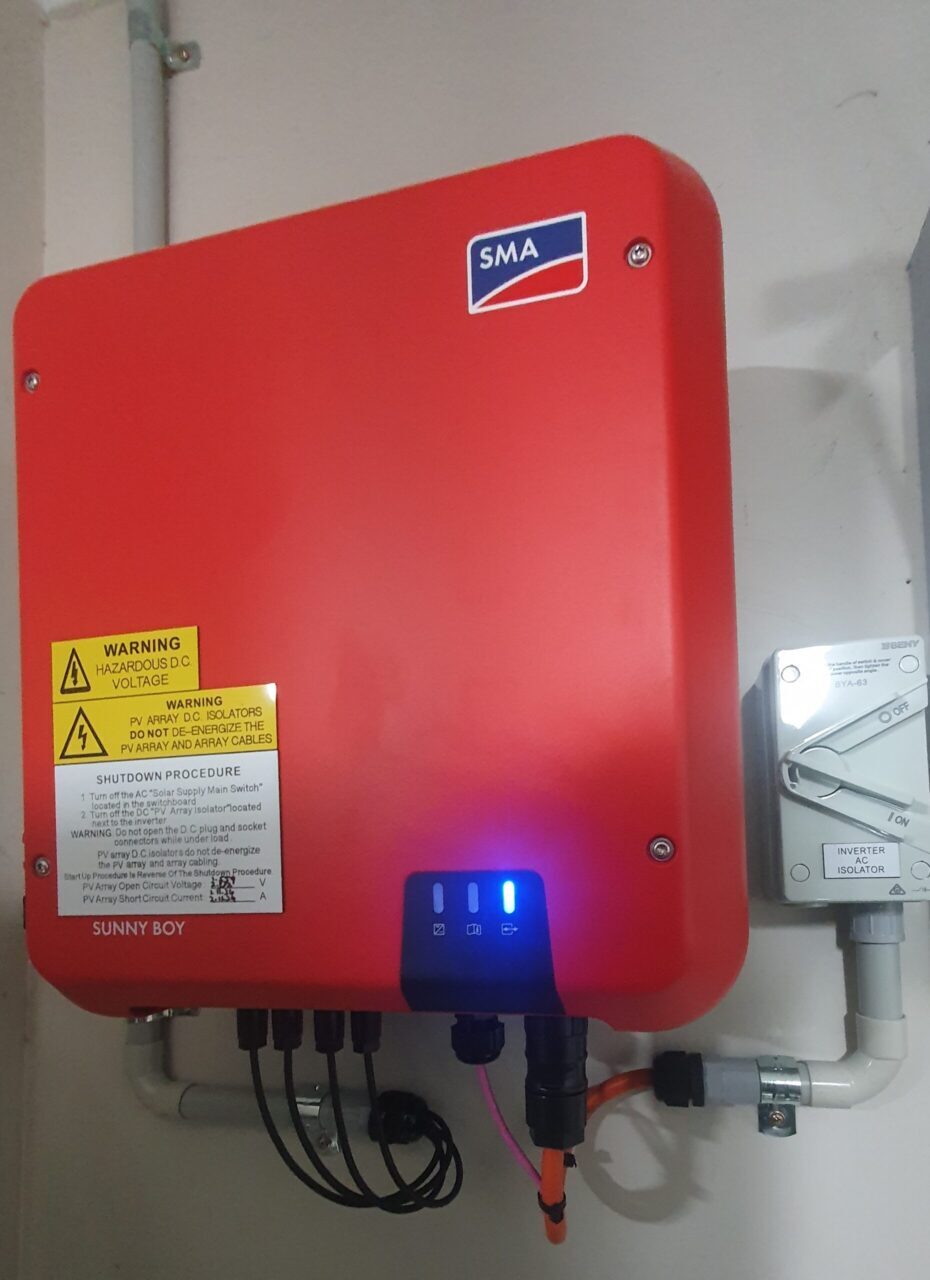
- Stealth installation: I wanted an installation that can’t be seen. If there is one theme for my house, it is ‘stealth mode’, my house needs to look like normal house and as such I wanted zero exposed conduits externally and for my solar inverter to be behind my telco rack in my garage (25-30m) from my switchboard. Sounds easy enough, but the reality is, time is money and running cables down inner walls on a double story, removing tiles, and so on does add to time. Lastly on this theme, I did not want the solar panels to be visible from the street, which limited my system size but is more than enough to meet my families current needs.
- Data based decisions: As I type this, my house’s I/O, numbers well over 100 (in the forms of devices such as relays/Sonoff’s controlling GPO’s and sensor inputs in the form of temperature, humidity, motion, magnetic proximity, laser, rain). But whilst motion & temperature are the primary signals for triggering devices, power generation & consumption would add more color and richness to my decisions. Because of this, I wanted a solution that would not just expose the inverter telemetry but also expose metrics such as grid consumption, which a solar inverter has no access to given it sits behind your meter.
Why I Chose A SMA Inverter?
After doing my research I ended up choosing a SMA inverter due to the rich integration with Home Assistant. The manufacturer provided integration provides telemetry to Home Assistant from the invertor’s HTTP interface, and if the inverter is paired to the SMA Energy Meter it provides additional metrics that one could only get from a clamp style meter placed in the meter box, and its the later device which I need to deem grid consumption.
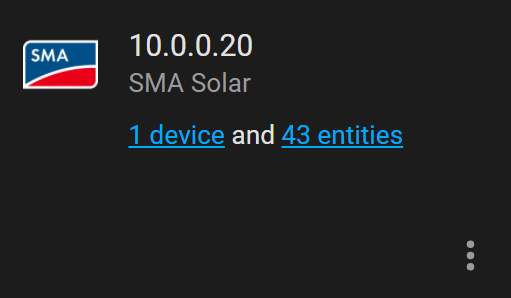
This integration provided 43 metrics, data gold!
Moving past the Home Assistant integration there is the SMA Developer website that provide API and integration details that many have built products around. This helps build the eco-system, and speaking of eco-system, what caught my eye was a great add-on by Johann Kellerman to speak to the SMA Energy Meter via ‘SpeedWire’ and push telemetry on to a MQTT topic. In debugging why my metering device was not working (see below) I did set this up, but ultimately I didn’t use this.
The summary is, I chose an SMA as I was hedging my integration bets in multiple camps to get the data I need and with so many irons in the fire, I was increasing my chances of success.
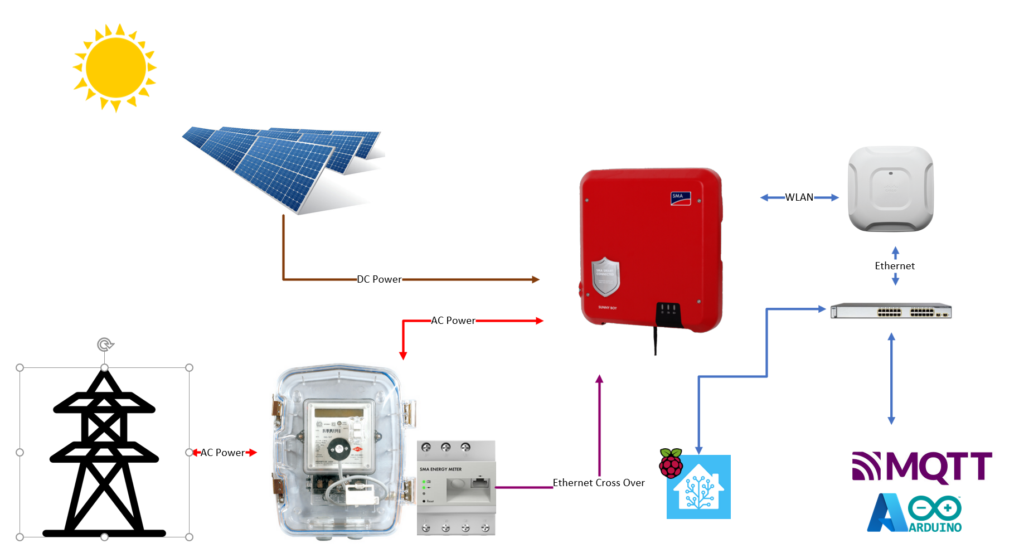
Solution Design
In terms of products I settled with the following
What I Want To Do With The Data?
I have some pretty simple needs that I want to accomplish but in essence I want to capture all the telemetry derived from this system and use this telemetry in conjunction with my other sensors to make data based decision on when to turn appliances off and on based on PV generation and ultimately reduce the power I draw from the grid.
The signal I want to send to my control systems is ultimately; when is power ‘free’ and when is there headroom to consume almost any amount of power? Then I want to drop a message on on my MQTT bus which will be consumed by my subscribers (Home Assistant / PLC / Arduino Mega)
And in order to do this I want to capture at the very least these metrics.
- PV Generation
- Grid Draw
- Feed In
And from these 3 I can calculate house consumption vis this simple equation.
Consumption = PV Generation - FeedIn + Grid Draw
Wiring Things Up. Logically Speaking..
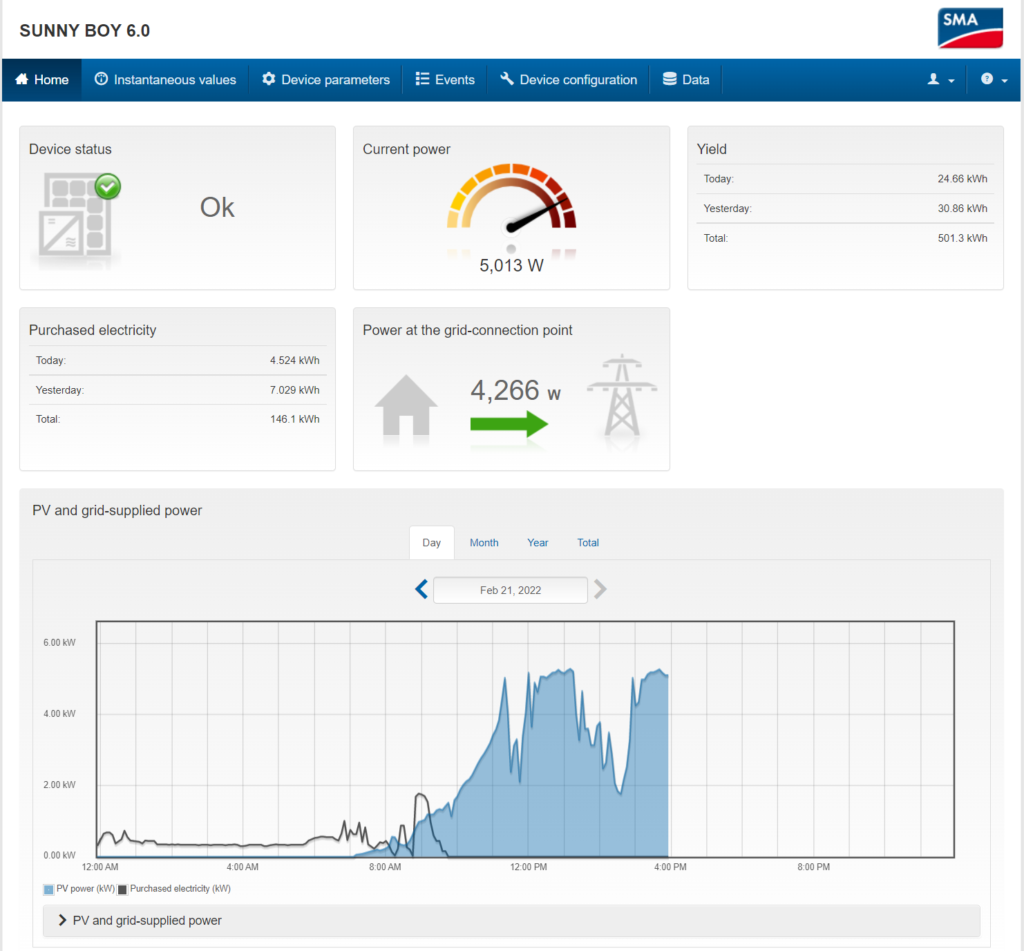
Solar system installed, but how can I start providing those upstream signals to my appliances? The inverter runs ennexOs and like any modern OS, there is an IAM component. After obtaining ‘Installer’ level access I was able to deem there was a communications problem between the SMA Energy Meter 2.0 and and the Sunny Boy 6.0 inverter. The data I expected to see in the standard web-interface, just was not there. This data can be found here.
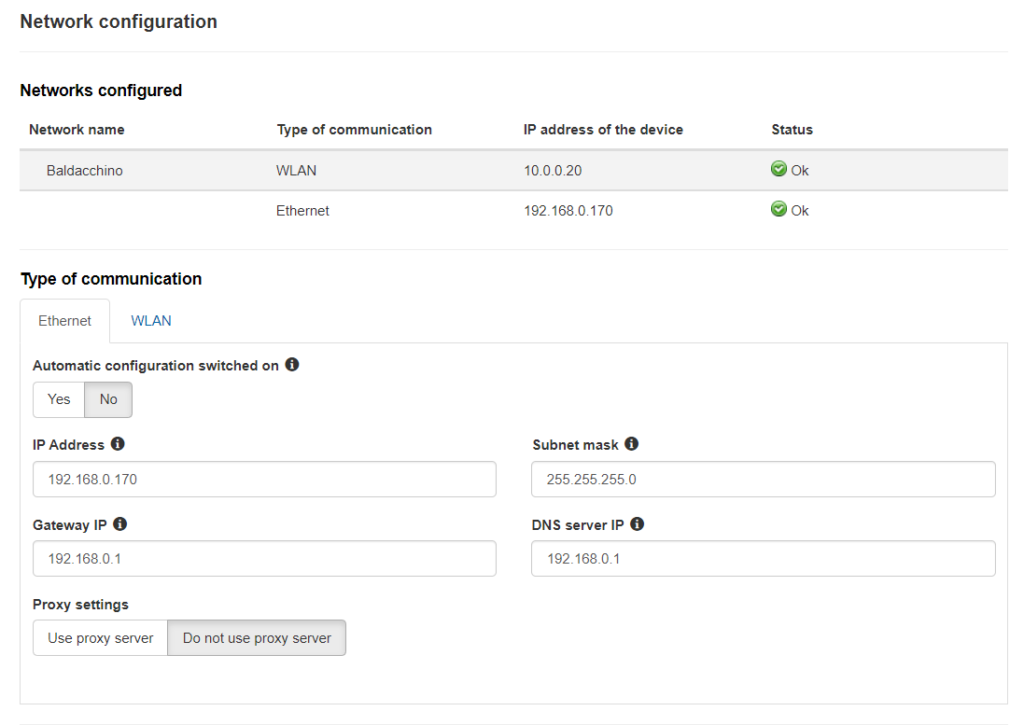
Whilst there was a physical link, their was no IP communication, and after some basic debugging I deemed their is no DHCP server running on the inverter, a static definition quickly sorted this out.
My topology for connection is as follows.
- Ethernet Interface (Static IP): Cross Over Cable : SMA Energy Meter 2.0 –> SMA Sunny Boy 6.0 Inverter : 192.168.0.x/24
- WLAN Interface (Static IP) : SMA Sunny Boy 6.0 –> LAN : 10.0.0.x/24
Home Assistant Configuration
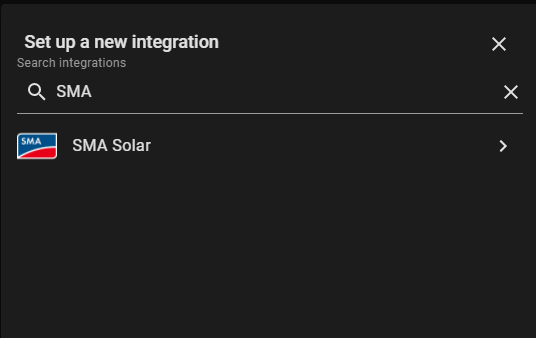
Installation of the SMA integration follows the familiar path of adding any other integration to Home Assistant.
Configuration –> Devices & Services –> Add Integration
Search for the integration, which is native and does not require HACS and configure.
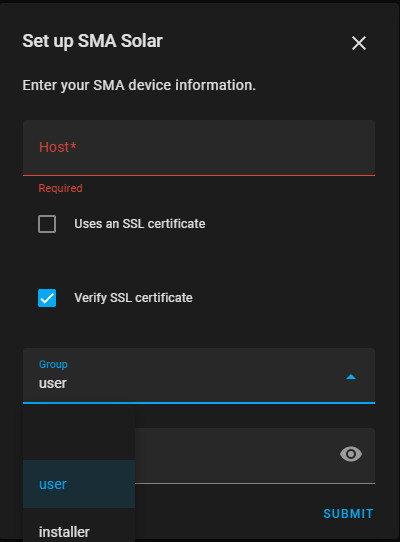
Enter in the Host IP, which in my case is 10.0.0.20, the IAM group, which is ‘Installer’ and the password. Unless you have installed a custom SSL certificate from a trusted certificate authority that is in your Home Assistant’s certificate store, or you have loaded the key-chain from the self-signed certificate, if you do connect via SSL, ensure you un-tick ‘Verify SSL certificate’ as the SSL/TLS check will fail.
After successful configuration of the integration your device and entities will be available to Home Assistant. On a side note, initially I did not realise initially my Energy Meter 2.0 and Sunny Boy Inverter were not communicating and after configuring this integration, without the Energy Meter 2.0 configured correctly, the entity count was almost half. The integration is surfacing the entities from not only the inverter but from the Energy Meter 2.0
Determining House Consumption
Whilst the SMA integration is very extensive and provides a heap of telemetry, it does not answer the one question I had.
How much power is my house using?
The SMA integration, nor their web-interface allows me to answer this question.
But the entities it exposes in to Home Assistant allow you to calculate this value. So with a bit of entity math, we can create our own sensor and surface this value. The code below in your configuration.yaml will calculate energy consumption. I am calculating energy consumption and storing as a sensor, energy_house_consumption.
sensor:

  - platform: template
    sensors:
      energy_house_consumption:
        value_template: "{{ states('sensor.grid_power') | float - states('sensor.metering_active_power_feed_l1') | float + states('sensor.metering_active_power_draw_l1') | float }}"
LoveLace Dashboard
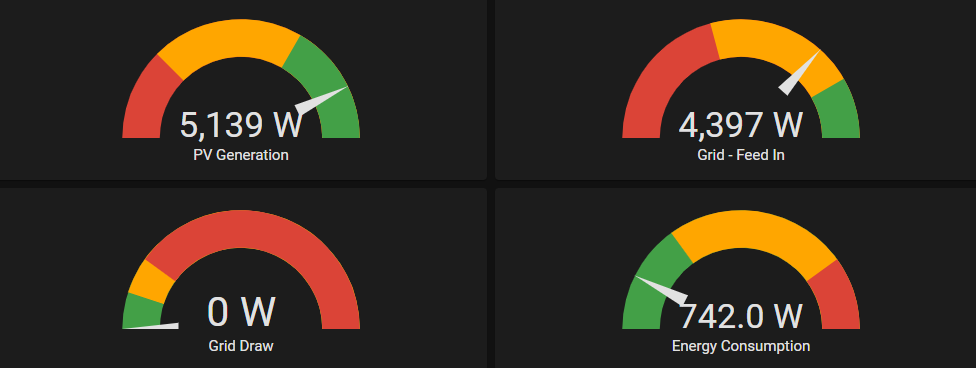
At present I am still trying to figure out what values are important to me, remember there is now 44 (43 provided by the integration, and one I created) data points I can leverage. At present I have all of the other data points in an entity card and just have 4 gauges which provide a high lever overview of system performance.
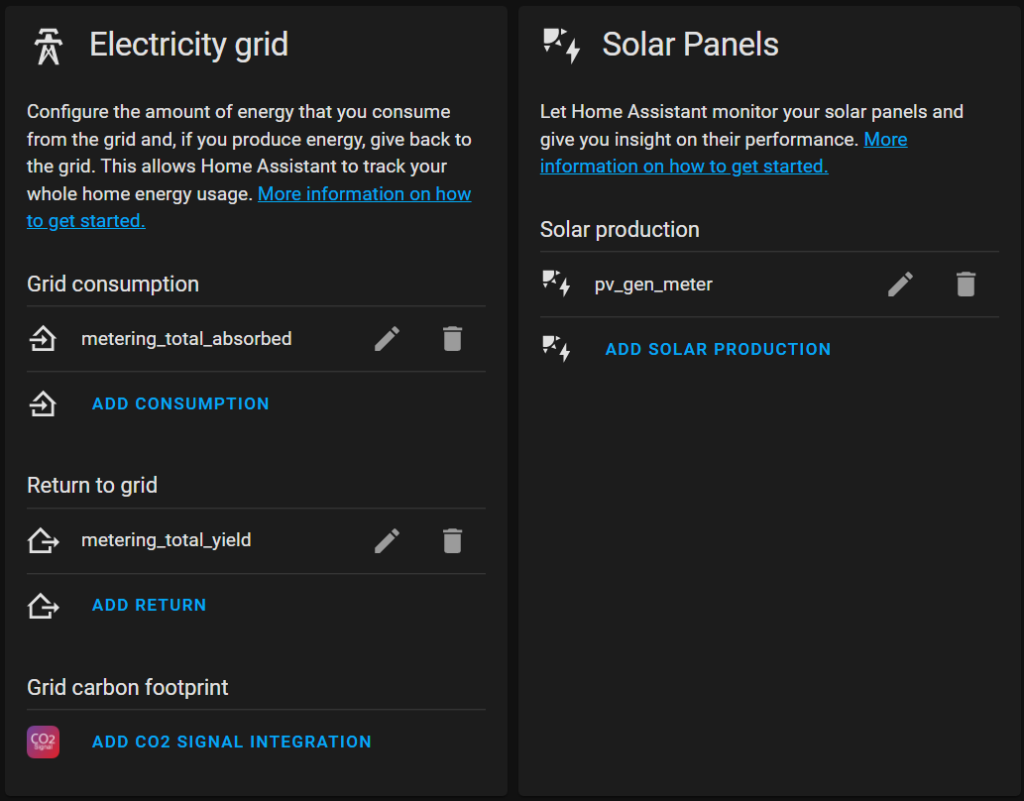
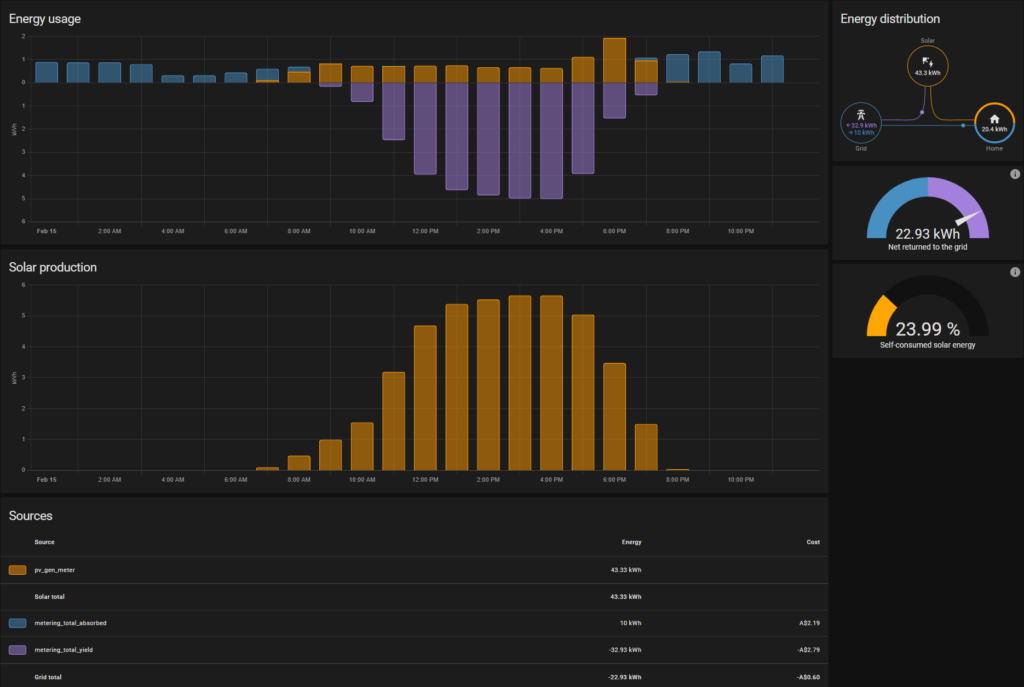
Energy Dashboard
There is LoveLace but in recent version of Home Assistant, there is an Energy dashboard that looks quite snazzy, especially on your smart phone. By configuring the Energy dashboard with the required entities you can not plot usage daily, weekly, monthly and yearly and it gives you a great visual breakdown of production, consumption, feed-in and cost.
Signaling When Power Is Free and When Power Is Not Free
In my house Home Assistant is just one control plane with an Arduino Mega and PLC performing most output operations (Roller Doors, Roller Shutters, Fans, Out Door Lighting, Heating, Cooling). Whilst Home Assistant is communicating with the SMA Inverter with an HTTP integration and performing sensor math, these 4 values I want available to both the PLC and Arduino Mega. The solution is MQTT. But how can I get Home Assistant to sensor values to a MQTT topic. There is two paths one can follow
- Automation Task : Based on a frequency (CRON expression) you can define values to publish
- MQTT State Stream : MQTT State Stream is an integration that publishes state changes in Home Assistant to individual MQTT topics. The MQTT integration is a prerequisite for MQTT State Stream to work. It is configured in your configuration.yaml and uses the MQTT broker you define in your MQTT integration
mqtt_statestream:
  base_topic: homeassistant
  include:
    entities:
      - sensor.grid_power
      - sensor.metering_active_power_feed_l1
      - sensor.metering_active_power_draw_l1
      - sensor.energy_house_consumption
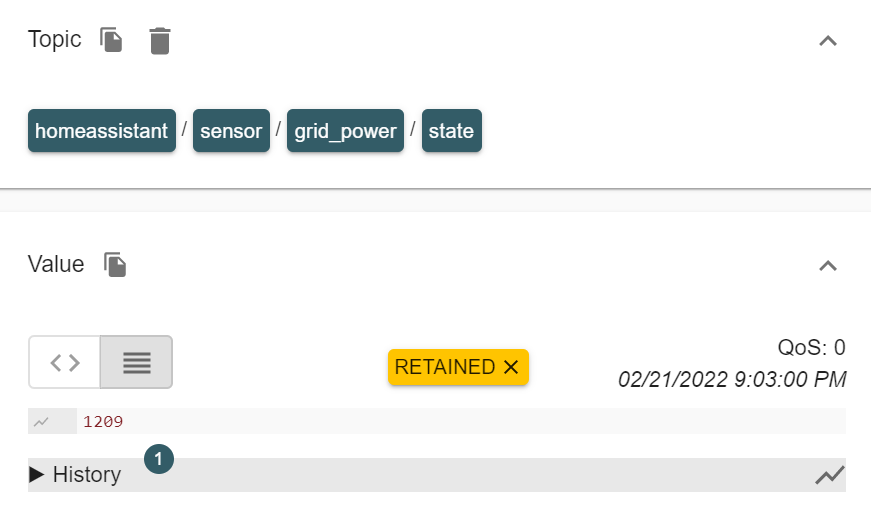
Whilst the later is very verbose, it provides the highest resolution as I am publishing a message per second sensor when there is change. At most times only 3 values will ever be changing as ‘Grid – Draw’ is usually 0 during the day and ‘PV Generation’ is 0 t night. The QoS levels in MQTT are set to 0, meaning these messages should not be persisted to disk on my Mosquitto broker but given this flows through Mosquitto it is an opportunity for my ESP32 Bridge which subscribes to all topics (#) to push these in to Microsoft Azure IoT Hub.
These messages end up in ‘homeasisant/senor/sensorname/state‘ and below we can see a value of 1209 has been published indicating 1209 watts being generated at that point of time.
Making Data Based Decisions
Given most folk who read this post will be more familiar with Home Assistant than with C++ (Arduino) or Ladder Logic (PLC) I am using below an example of a Home Assistant automation that will manipulate a GPO, that has a Washing Machine, Dryer, and Cordless Vacuum connected.
In this scenario I am turning on the GPO when the house is generating at least 2000 watts of solar PV generation for more than 5 minutes. This can be illustrated in the GUI or via yaml in automations.yaml. What’s not shown is an automation to turn off when solar PV generation is < 500 watts for 10 minutes.

- id: '1643973693097'
  alias: 'Laundry - ON - Sonoff Mini R3 '
  description: Turn On > 2000w generation
  trigger:
  - platform: state
    entity_id: sensor.grid_power
    from: '2000'
    to: '7500'
    for:
      hours: 0
      minutes: 5
      seconds: 0
  condition: []
  action:
  - service: switch.turn_on
    target:
      entity_id: switch.1001439cad_1
    data: {}
Conclusion
Do I need to to this? Absolutely not. I do this because I can, but also as I want to maximize the usages of generated solar electricity.
There are many ways to keep your saw sharp. This story is as much about integration of disparate systems which is cornerstone to IT architectures. Taking data from one system, massaging and manipulating and deriving business value. From taking the raw data from the inverter and energy meter (load and ingest) through to massaging in Home Assistant (process) and publishing via MQTT (serve) to be consumed by other upstream systems.
How are you keeping your saw sharp?
Think big and happy building
Shane
3 thoughts on “Making Data Driven Decisions With A PV Array, Home Assistant and MQTT”