
NVR (Network Video Recording) and false positives. Two words if you have been in this game long enough you will be familiar with. Tree’s that move, a spider all create noise to the point you tune out. Argh.
I never have relied on the smarts of my Geovision camera’s but have used SightHound, Synology Surveillance Station and Blue Iris.
With either application the overall end-user experience has increased and with tuning, they all can be pretty good.
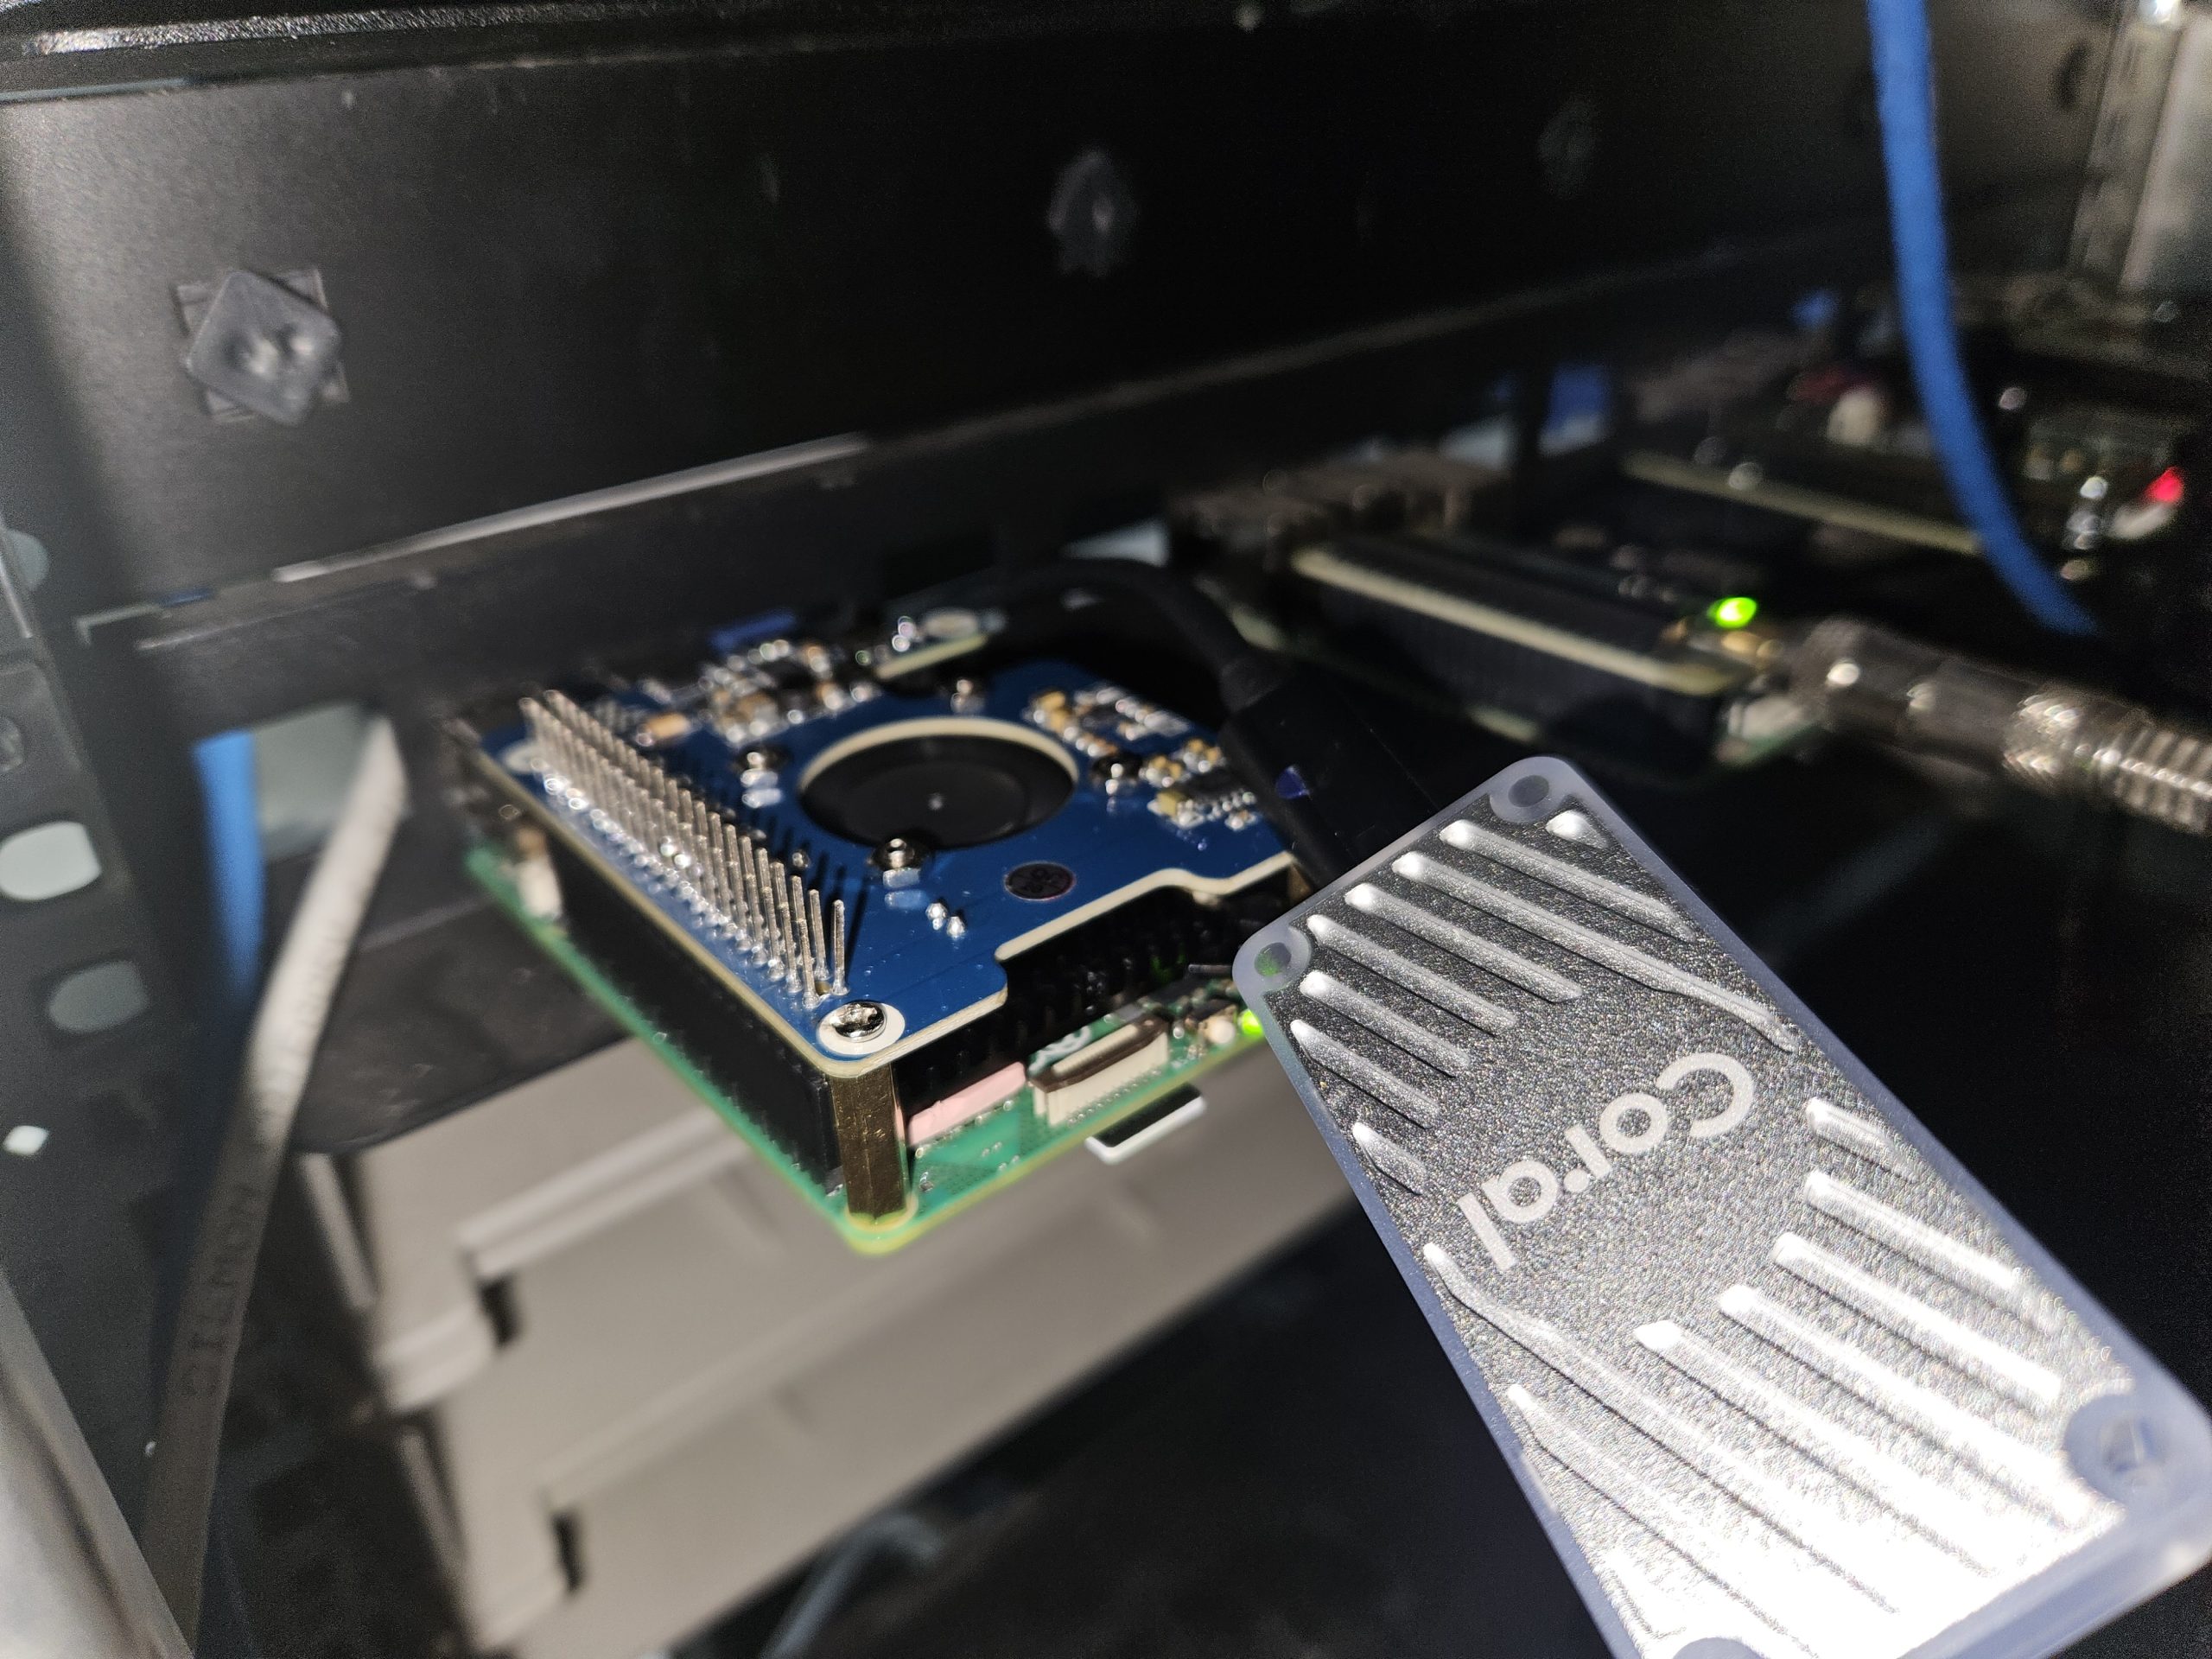
There has been a lot of chatter about Frigate in the circles I follow and for good reason. Frigate uses a local ML model and can take use of Google’s now EOL’s Coral TPU accelerators, allow for computer vision at the edge whilst only sipping a few watts.
So in this post post I am going to show you how you can
- Install Google Coral Drivers
- Install Docker on Ubuntu 24.04/Raspbian running on a Raspberry Pi 5
- Mild overclock
- Install Portainer (optional)
- Setup Frigate with Docker Compose on Portainer using mapped NFS NAS Storage
- Basic configuration of a RTSP camera for detect and record in Frigate
- Basic masking in Frigate
- Configuration of Go2RTC streaming back to Home Assistant
- Configuration of Frigate and a MQTT broker (Mosquitto)
- Configuration of Home Assistant Integration
- Configuration of Home Assistant Notifications
There is a lot to do but dont be stressed out.
Install Google Coral Drivers
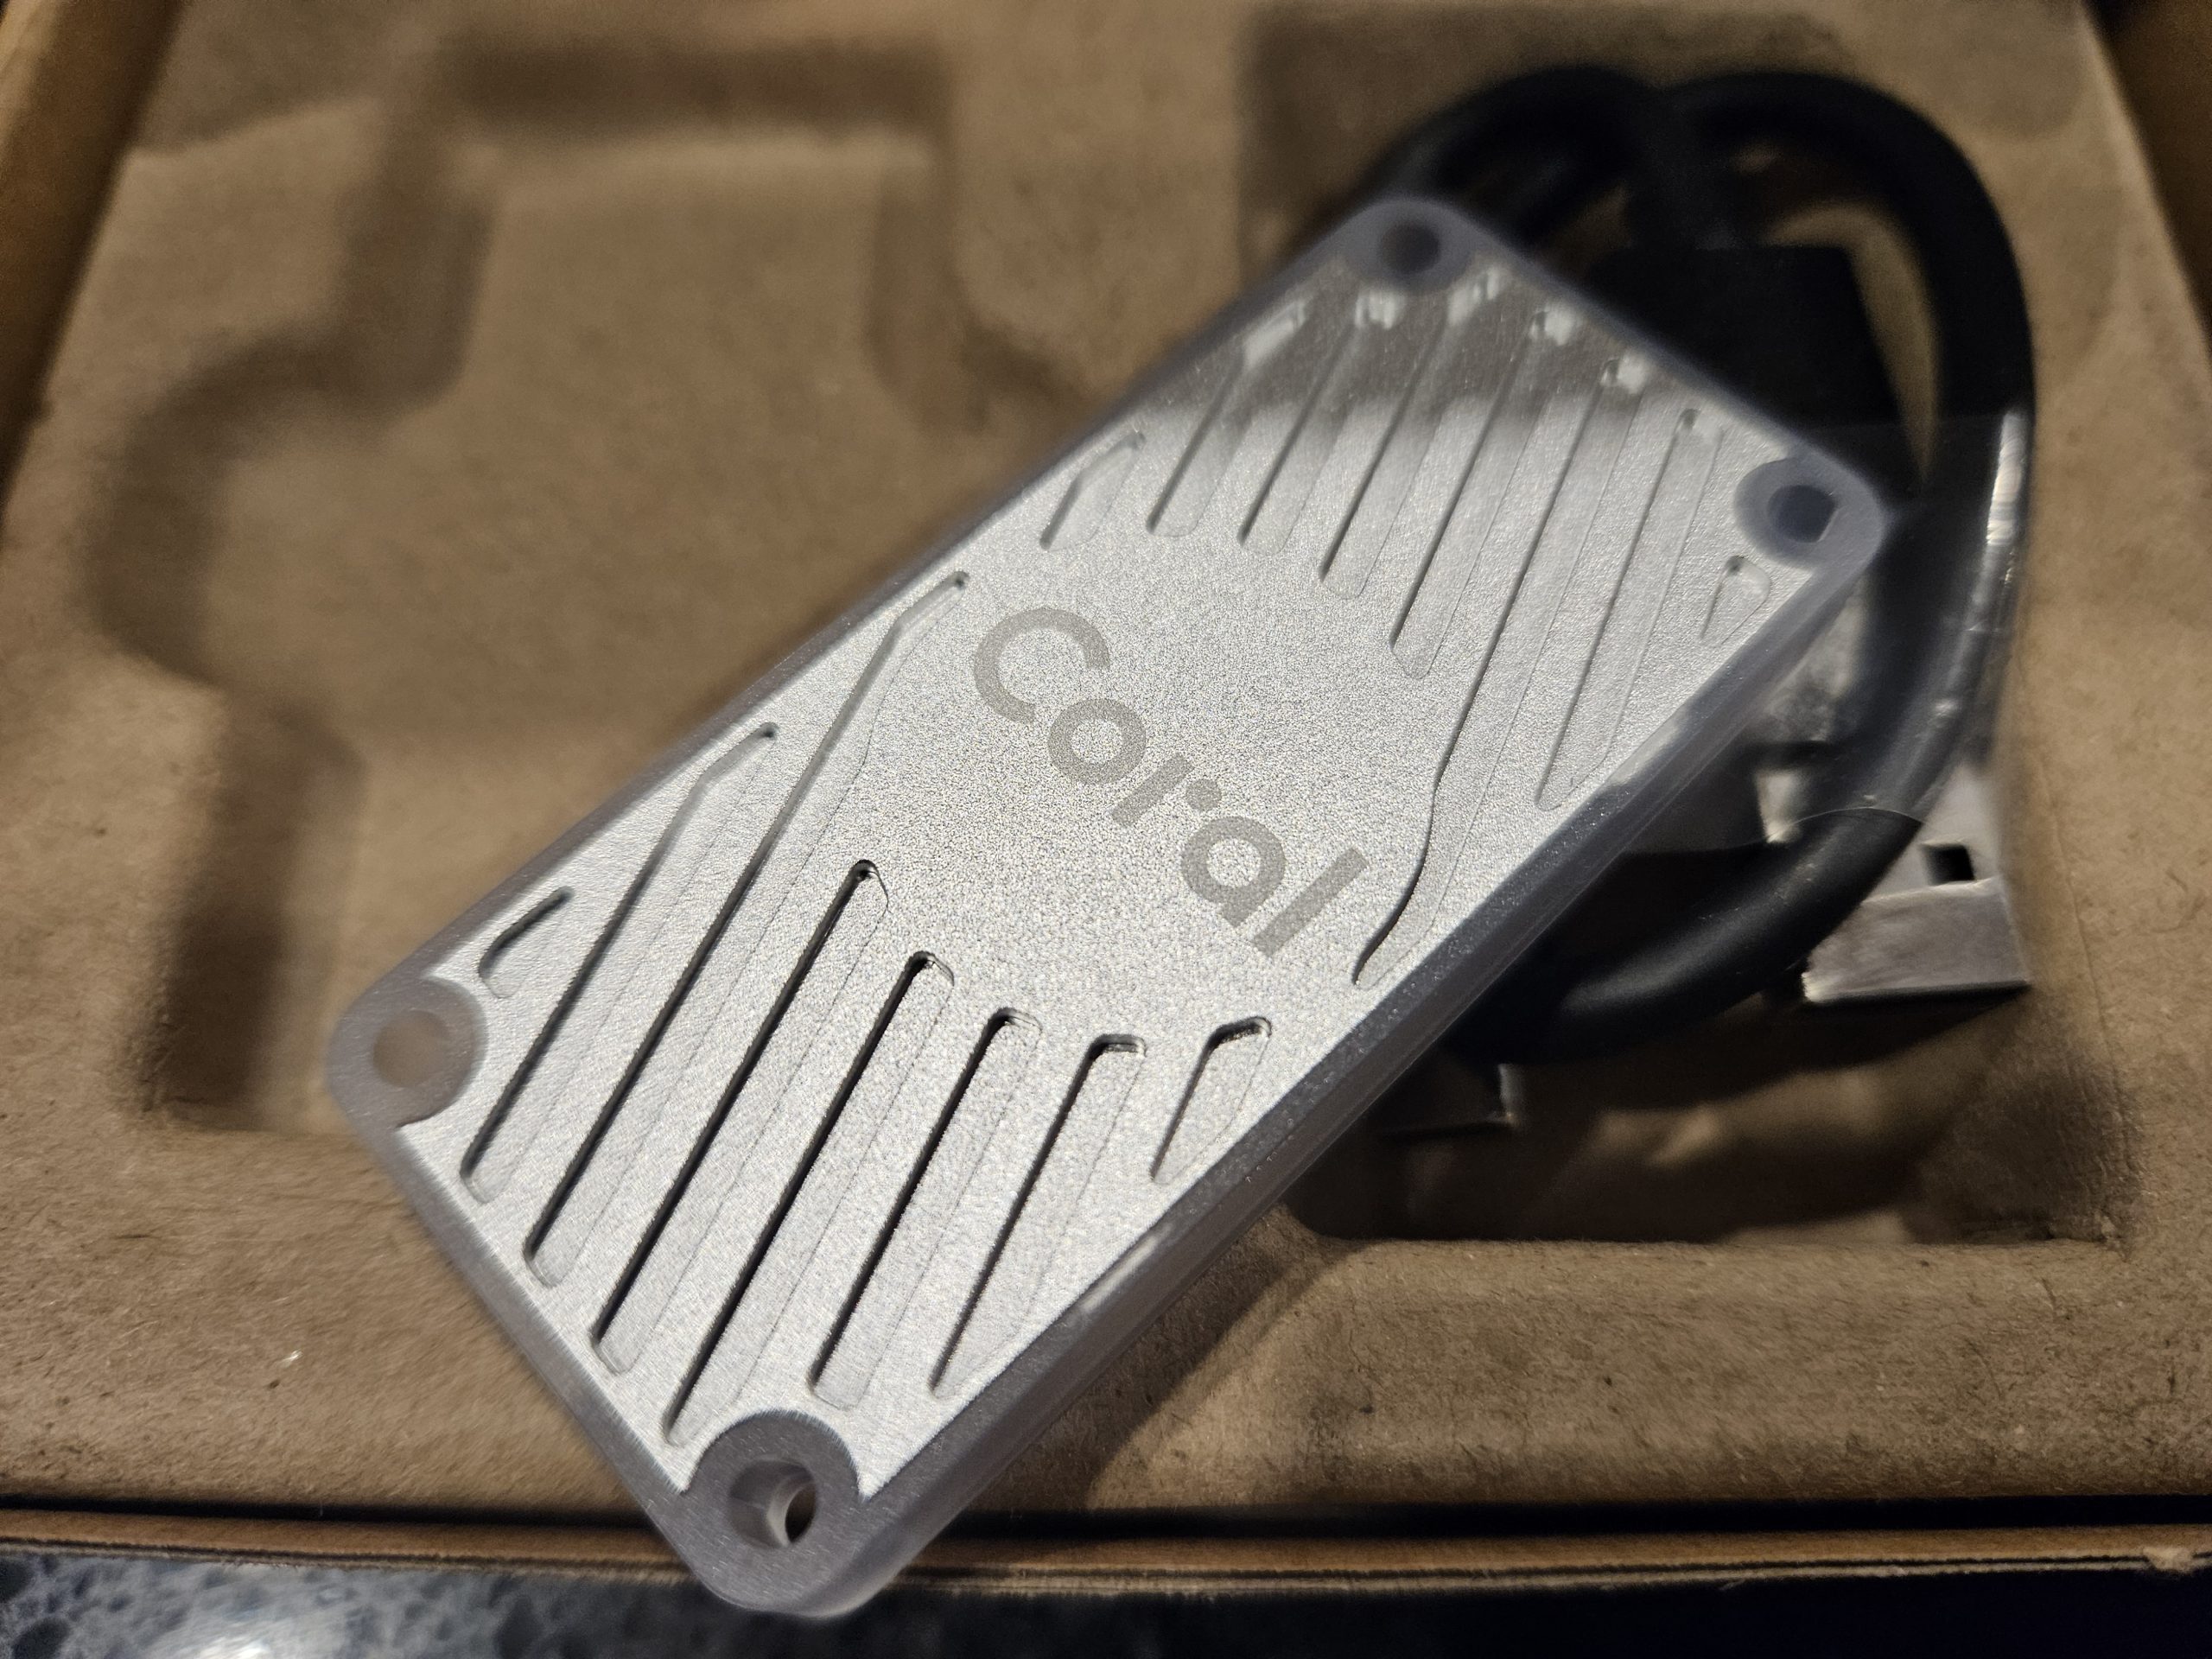
I am using the USB version of the Google Coral TPU. The process will be slightly different if you use a PCIe based version. The following is based on Google’s instructions at https://coral.ai/docs/accelerator/get-started/#requirements
You need to start by adding Googles repository to your system
echo "deb https://packages.cloud.google.com/apt coral-edgetpu-stable main" | sudo tee /etc/apt/sources.list.d/coral-edgetpu.list
curl https://packages.cloud.google.com/apt/doc/apt-key.gpg | sudo apt-key add -
sudo apt-get update
Then install the TPU runtime.
sudo apt-get install libedgetpu1-std
That’s all you need to do, how ever you can overclock the TPU. Google will warn you that the device will get hot to touch. The above command installed the standard Edge TPU runtime for Linux, which operates the device at a reduced clock frequency. You can instead install a runtime version that operates at the maximum clock frequency. This increases the inferencing speed but also increases power consumption and causes the USB Accelerator to become very hot.
If you wish to run this enter this optional command. It is winter as I type this post in Melbourne, Australia. The device with a digital thermometer has not registered more than 40C. Frigate is going to leverage the TPU sporadically based on motion. It is not a constant load and I would suggest the following command for increased inference performance.
sudo apt-get install libedgetpu1-max
Install Docker On Ubuntu 24.04 / Raspbian On A Raspberry Pi 5
In a past post I walk through the process of setting up Ubuntu 23.10 on a Raspberry Pi 5, 24.04 LTS is very similar. You can find this article here. I am going to assume you have Ubuntu or Raspbian on you Raspberry Pi 5
To install Docker I followed the instruction at https://docs.docker.com/engine/install/ubuntu/. There are many approaches to install but how I install this is as follows.
Before you install Docker Engine for the first time on a new host machine, you need to set up the Docker repository. Afterward, you can install and update Docker from the repository.
Set up Docker’s apt repository.
# Add Docker's official GPG key:
sudo apt-get update
sudo apt-get install ca-certificates curl
sudo install -m 0755 -d /etc/apt/keyrings
sudo curl -fsSL https://download.docker.com/linux/ubuntu/gpg -o /etc/apt/keyrings/docker.asc
sudo chmod a+r /etc/apt/keyrings/docker.asc

# Add the repository to Apt sources:
echo \
  "deb [arch=$(dpkg --print-architecture) signed-by=/etc/apt/keyrings/docker.asc] https://download.docker.com/linux/ubuntu \
  $(. /etc/os-release && echo "$VERSION_CODENAME") stable" | \
  sudo tee /etc/apt/sources.list.d/docker.list > /dev/null
sudo apt-get update
Then install Docker via apt-get
sudo apt-get install docker-ce docker-ce-cli containerd.io docker-buildx-plugin docker-compose-plugin
I do like to then validate everything is working with a Hello World
sudo docker run hello-world
Which then results in a Hello World output
sudo docker run hello-world
[sudo] password for baldacchino_admin:

Hello from Docker!
This message shows that your installation appears to be working correctly.

To generate this message, Docker took the following steps:
 1. The Docker client contacted the Docker daemon.
 2. The Docker daemon pulled the "hello-world" image from the Docker Hub.
    (arm64v8)
 3. The Docker daemon created a new container from that image which runs the
    executable that produces the output you are currently reading.
 4. The Docker daemon streamed that output to the Docker client, which sent it
    to your terminal.

To try something more ambitious, you can run an Ubuntu container with:
 $ docker run -it ubuntu bash

Share images, automate workflows, and more with a free Docker ID:
 https://hub.docker.com/

For more examples and ideas, visit:
 https://docs.docker.com/get-started/
Mild OverClock
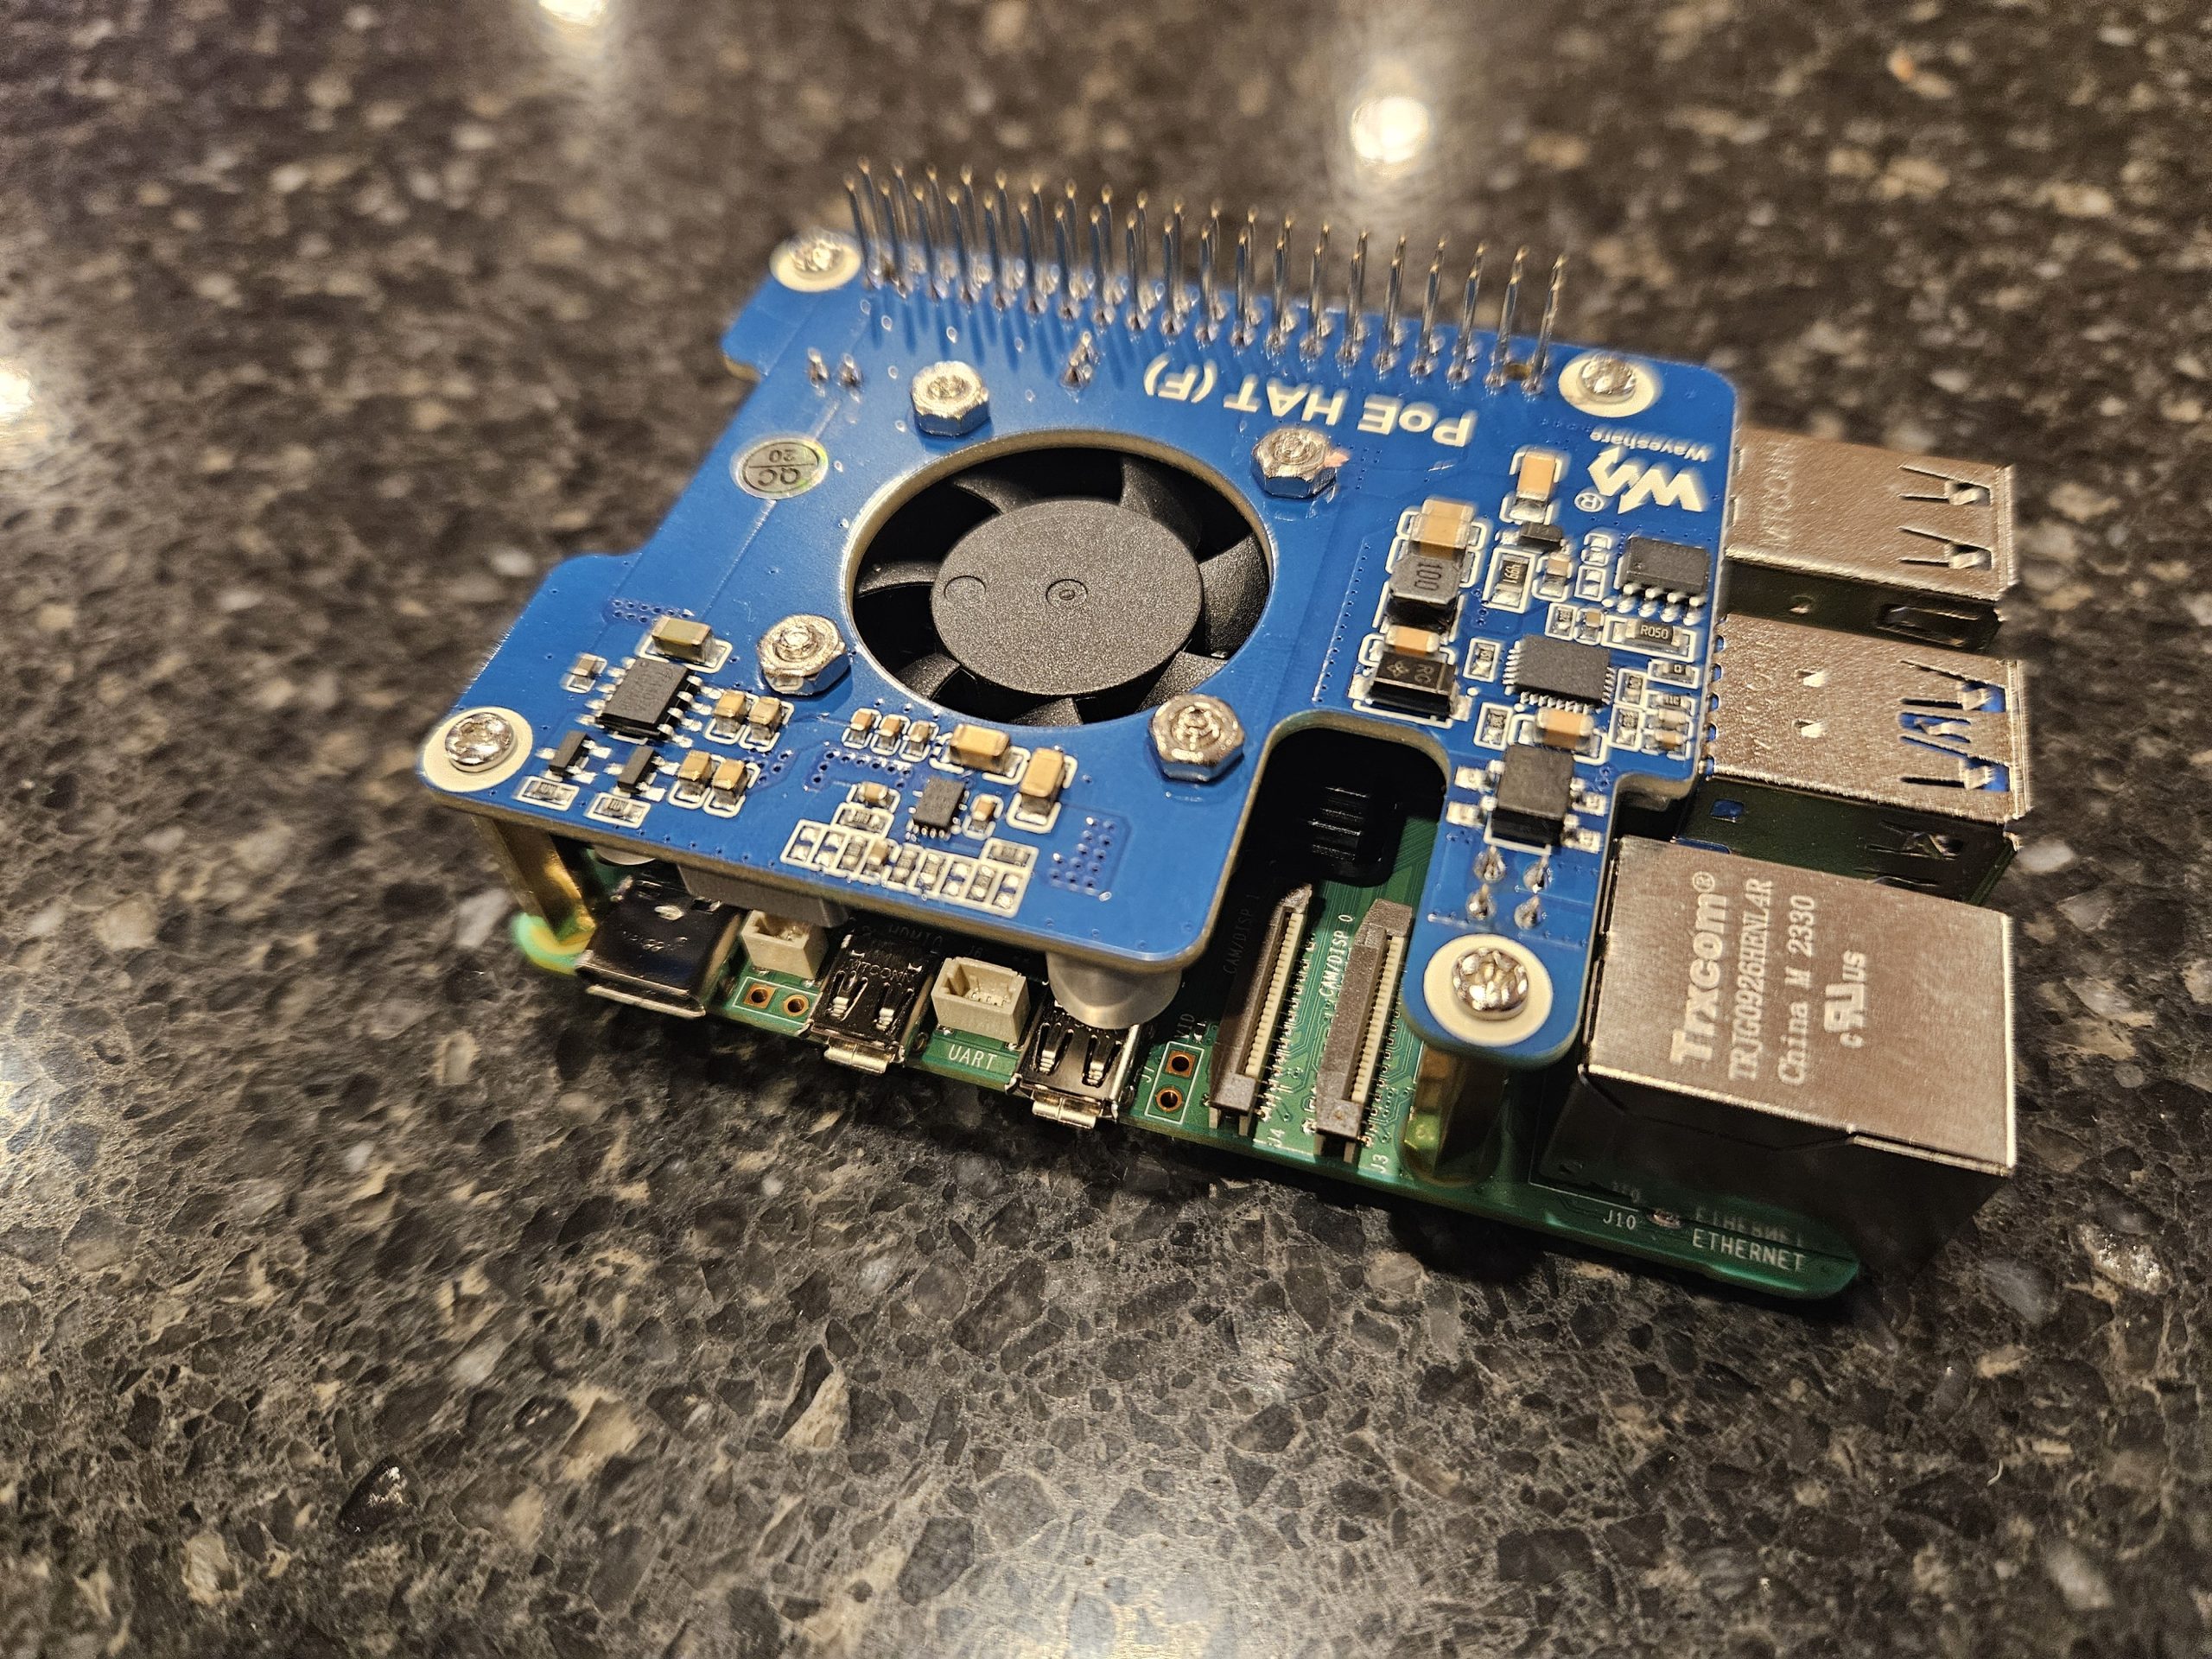
The Google Coral TPU will take a lot of the load from your system, that said FFMmpeg will still consume CPU cycles. From Jeff Gerling’s post to others, there are limits on whats these PI’s can do. I am running 6 x 5MP H.264 Cameras with 40% CPU and all data going over NFS and RTSP.
A milld overclock will give your Raspberry Pi 5 some headroom. The Raspberry Pi 5 uses a 64-bit 2.4 GHz quad-core ARM Cortex-A76 processor. The SoC features a quad-core ARM Cortex-A76 processor clocked at 2.4 GHz, alongside a VideoCore VII GPU clocked at 800 MHz.
We will be shifting to 2.9GHz CPU and 850MHz GPU
To do this edit with the config.txt file
sudo nano /boot/firmware/config.txt
Then add the following lines to the bottom of the file.
over_voltage_delta=50000
arm_freq=2900
gpu_freq=850
Just note if you go to high and get to greedy (over 3GHz and 900Mhz) the Raspberry Pi 5 will fail to boot or be unstable. If it does fail to boot, you will need to eject your block storage (Micro SD / USB / PCIe), mount of another device and edit this file, it’s a hassle. This is safe overclock for the Raspberry Pi 5
Install Portainainer (optional)
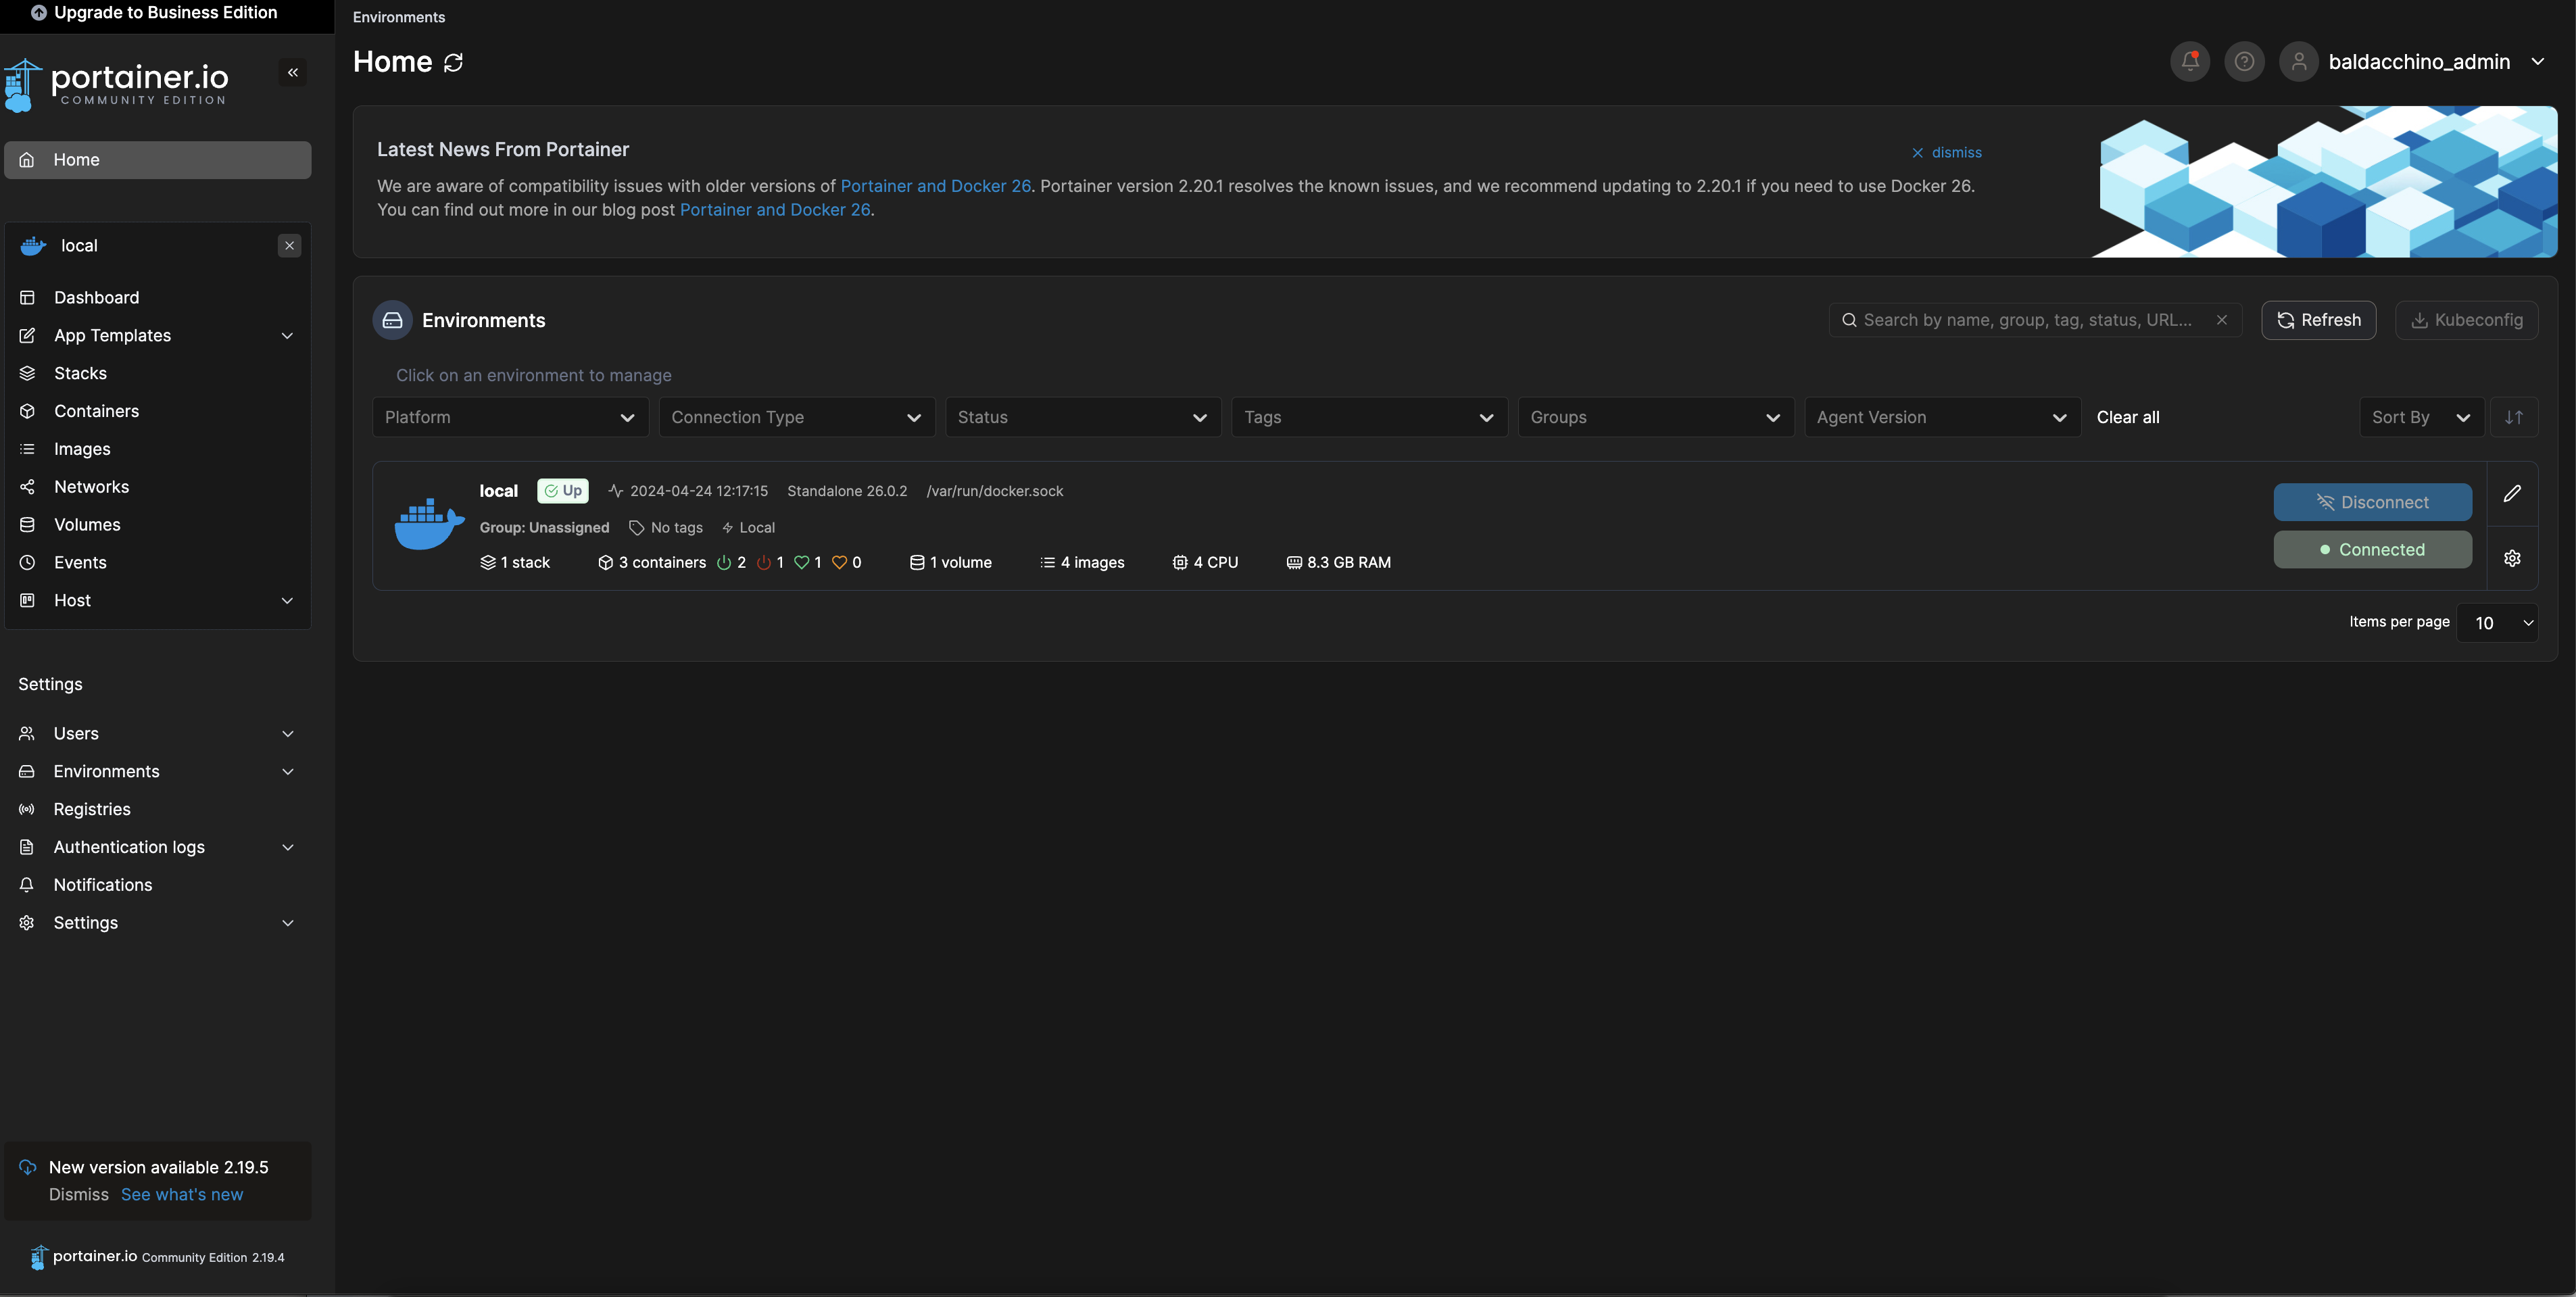
Portainer, simply said is a GUI for Docker Management. Do we need this? Nope, but it provides visibility and allows the use of Docker Compose files. It will give you the ability to easily deploy containers, manage the platform and more. All of this of course could be done with vanilla Docker, but if you are managing multiple Docker hosts and dont want to run Kuberenetes then Portainer is a viable option. If you have less than 3 Docker nodes to manage then its free with their Community Edition which is designed for Home Labs and individual use. It does has a restricted feature set, specifically around RBAC and federation, but this is something I dont need and I doubt you will need also.
Installation is simple. First, create the volume that Portainer Server will use to store its database:
docker volume create portainer_data
Then start the container automatically run the following command
docker run -d -p 8000:8000 -p 9443:9443 --name portainer --restart=always -v /var/run/docker.sock:/var/run/docker.sock -v portainer_data:/data portainer/portainer-ce:latest
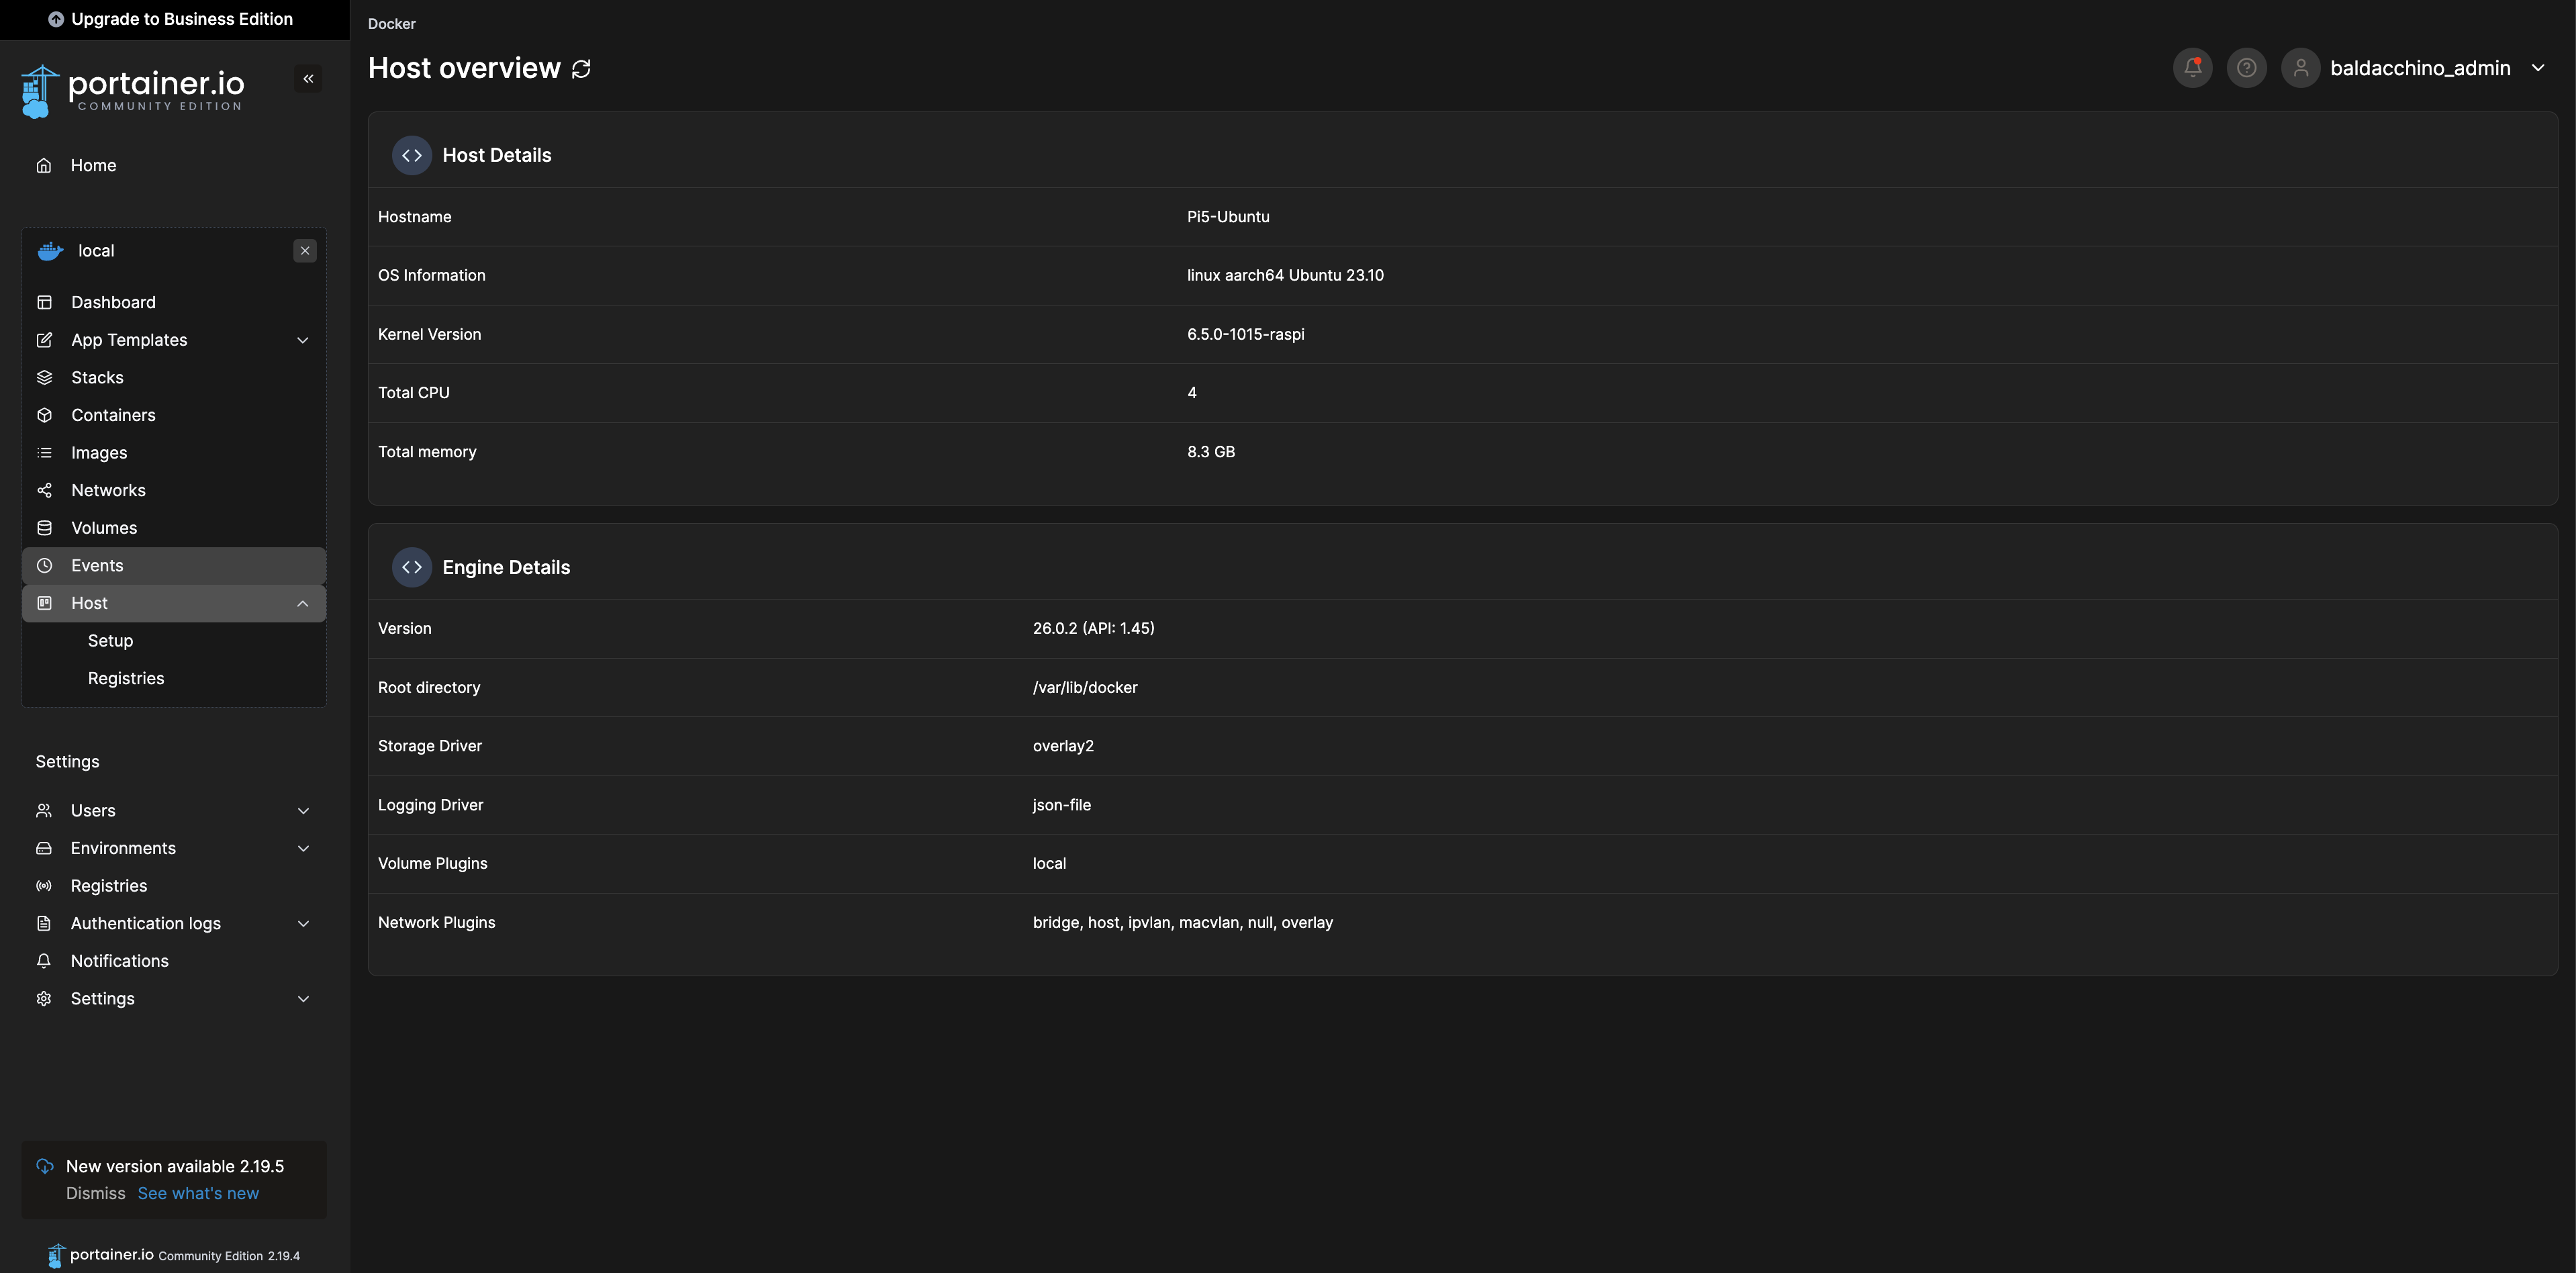
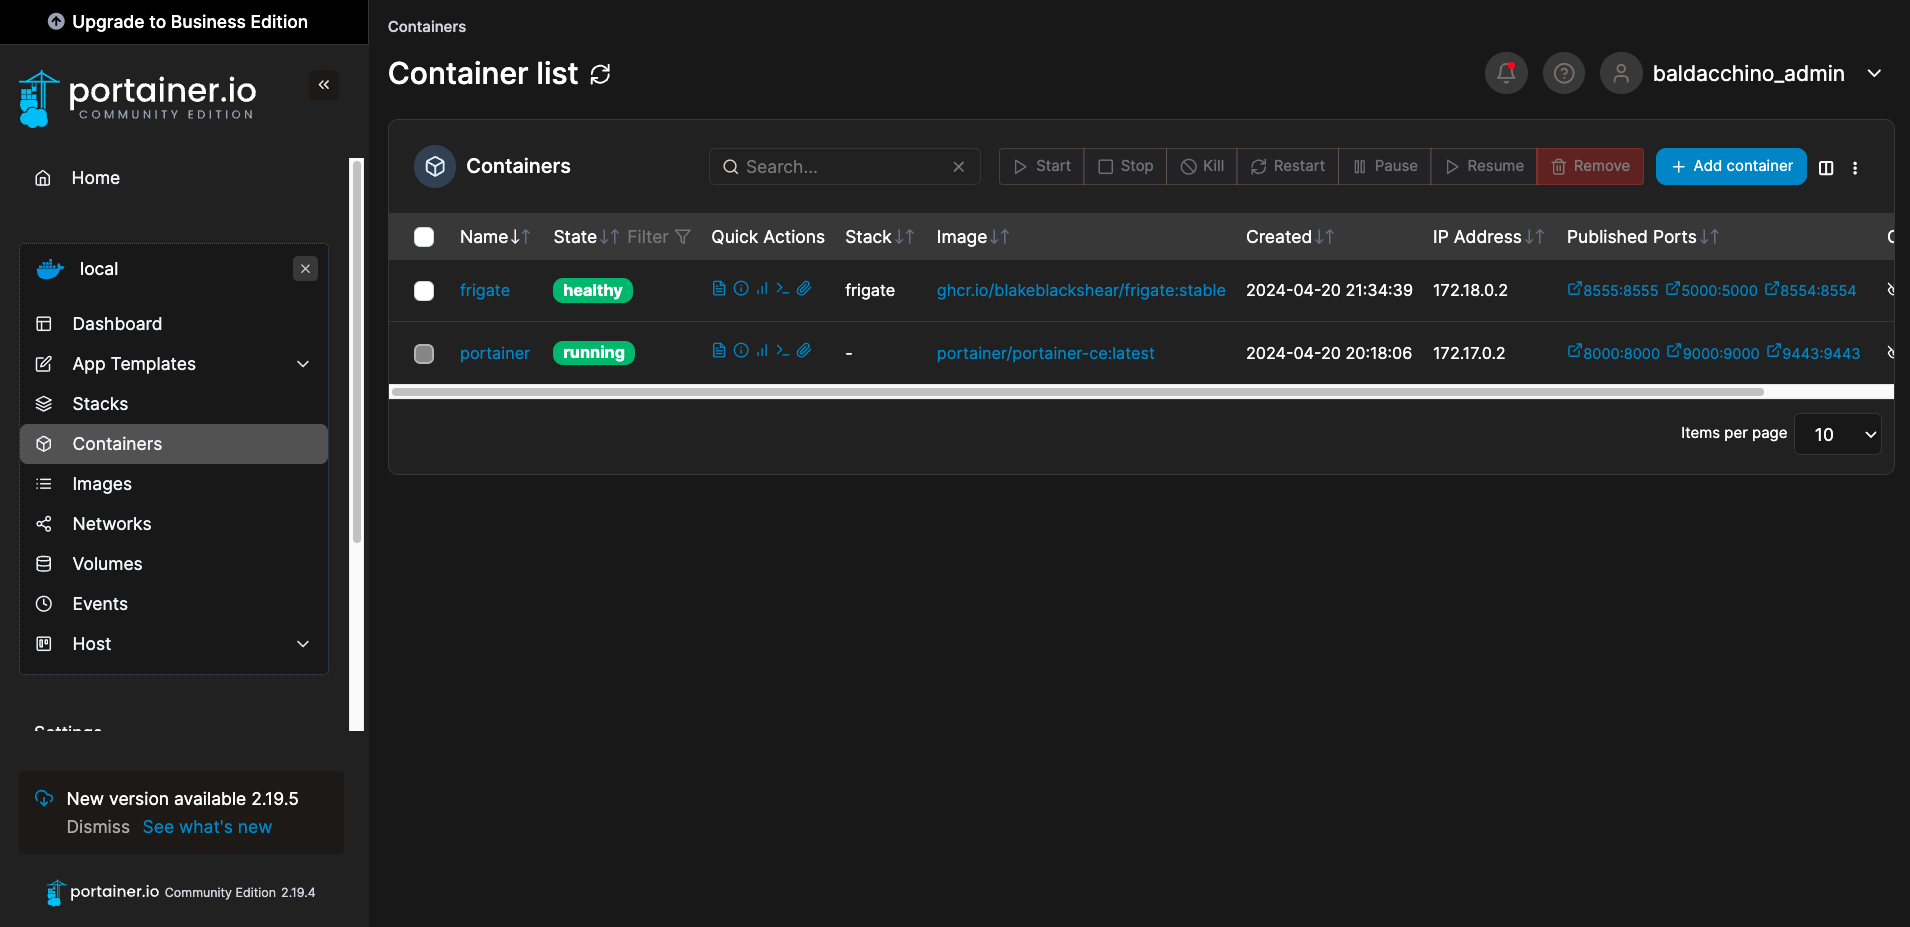
You can validate the container is running via docker ps
sudo docker ps

[sudo] password for baldacchino_admin:

CONTAINER ID   IMAGE                                    COMMAND        CREATED      STATUS                  PORTS                                                                                                                                                           NAMES
6dd5f2c6a7cf   portainer/portainer-ce:latest            "/portainer"   3 days ago   Up 2 days               0.0.0.0:8000->8000/tcp, :::8000->8000/tcp, 0.0.0.0:9000->9000/tcp, :::9000->9000/tcp, 0.0.0.0:9443->9443/tcp, :::9443->9443/tcp                                 portainer
Accessing port 9443 on the device IP will load Potainer with a self signed TLS certificate. You can click around, if you are familiar with basic Docker constructs you will find Portainer very self explanatory.
Setup Frigate with Docker Compose on Portainer using mapped NFS NAS Storage
I am going to pause with Docker and Portainer and pivot to storage. Frigate by all accounts is storage and I/O heavy. My cameras have a stream bandwidth of 3GiB/hr and I am storing 4TiB every 3 days. Using a microSD card will not end well. The endurance ratings of these cards are relativley short compared to SSD / NVMe / mechanical disks. In this step I will be mapping and externalising Frigate’s storage (media and configuration) to be on a remote NFS share on the same local LAN over the PI’s 1GBe interface.
This post will not go in the process of creating shared NFS storage and I will assume you have this in place, instead I will illustrate how to create a persistent mount point
Create a folder for the mount point. I am using a folder of /mnt/nfs_synology ,you can use any value you wish, just ensure you replace in all examples throughout this article.
mkdir /mnt/nfs_synology/
Setup the mount, in my example 10.0.0.200 is my bonded 2 x 1GBe link, replace with your NFS host IP
sudo mount 10.0.0.200:/Synology/Frigate /mnt/nfs_synology
Then edit fstab to ensure its persists on boot
sudo nano /etc/fstab
Add the line on the very bottom of this snippet to fstab
LABEL=writable  /       ext4    discard 0       1
LABEL=system-boot       /boot/firmware  vfat    defaults        0       1
10.0.0.200:/Synology/Frigate /mnt/nfs_synology nfs rw,soft,intr,noatime,x-gvfs-show 0 0
Setup Frigate with Docker Compose on Portainer using mapped NFS NAS Storage
With our storage ready, we are now almost ready to run Frigate. This caught me out, its not as simple as running the container. This section is broadly based on Frigate’s getting started guide at https://docs.frigate.video/guides/getting_started
Frigate requires a valid config file to start (I spent time looking over Docker logs initially) The following directory structure is the bare minimum to get started. Once Frigate is running, you can use the built-in config editor which supports config validation.
├── config/
│   └── config.yml
└── storage/
On your NFS file system ensure you create this folder structure. You can do this by using mkdir and touch
cd /mnt/nfs_synology
mkdir storage config && touch config/config.yml
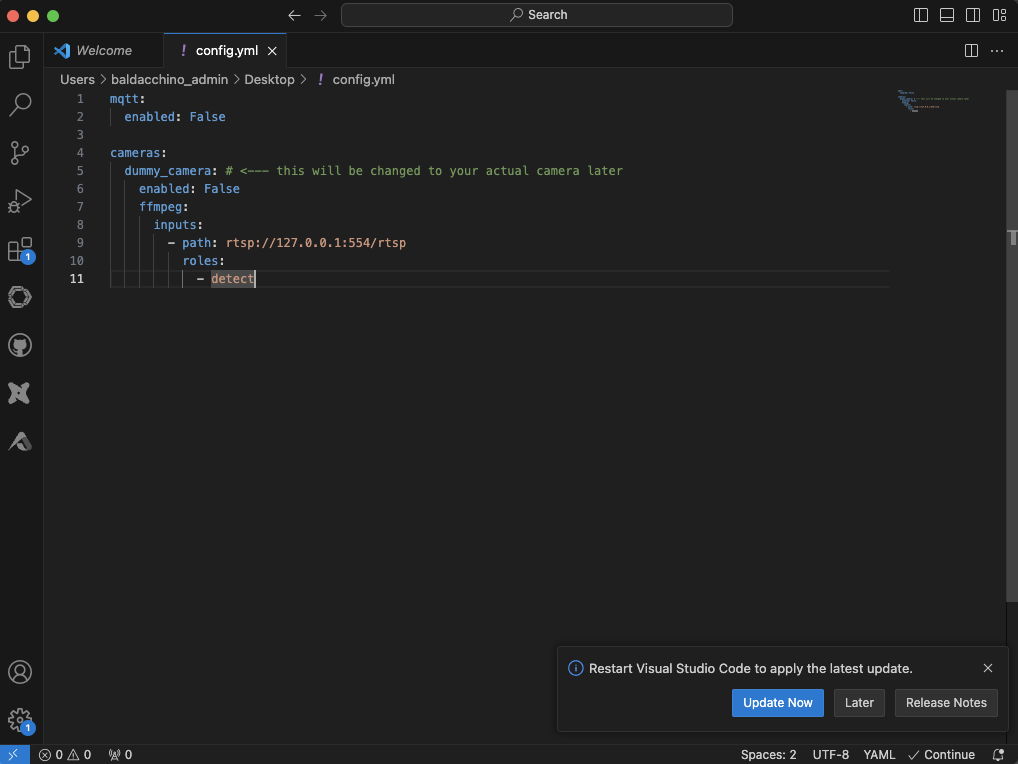
Then edit the config.yml and place the following base configuration in to the yaml file, you will change this later, but this will facilitate Frigate starting.
mqtt:
  enabled: False

cameras:
  dummy_camera: # <--- this will be changed to your actual camera later
    enabled: False
    ffmpeg:
      inputs:
        - path: rtsp://127.0.0.1:554/rtsp
          roles:
            - detect
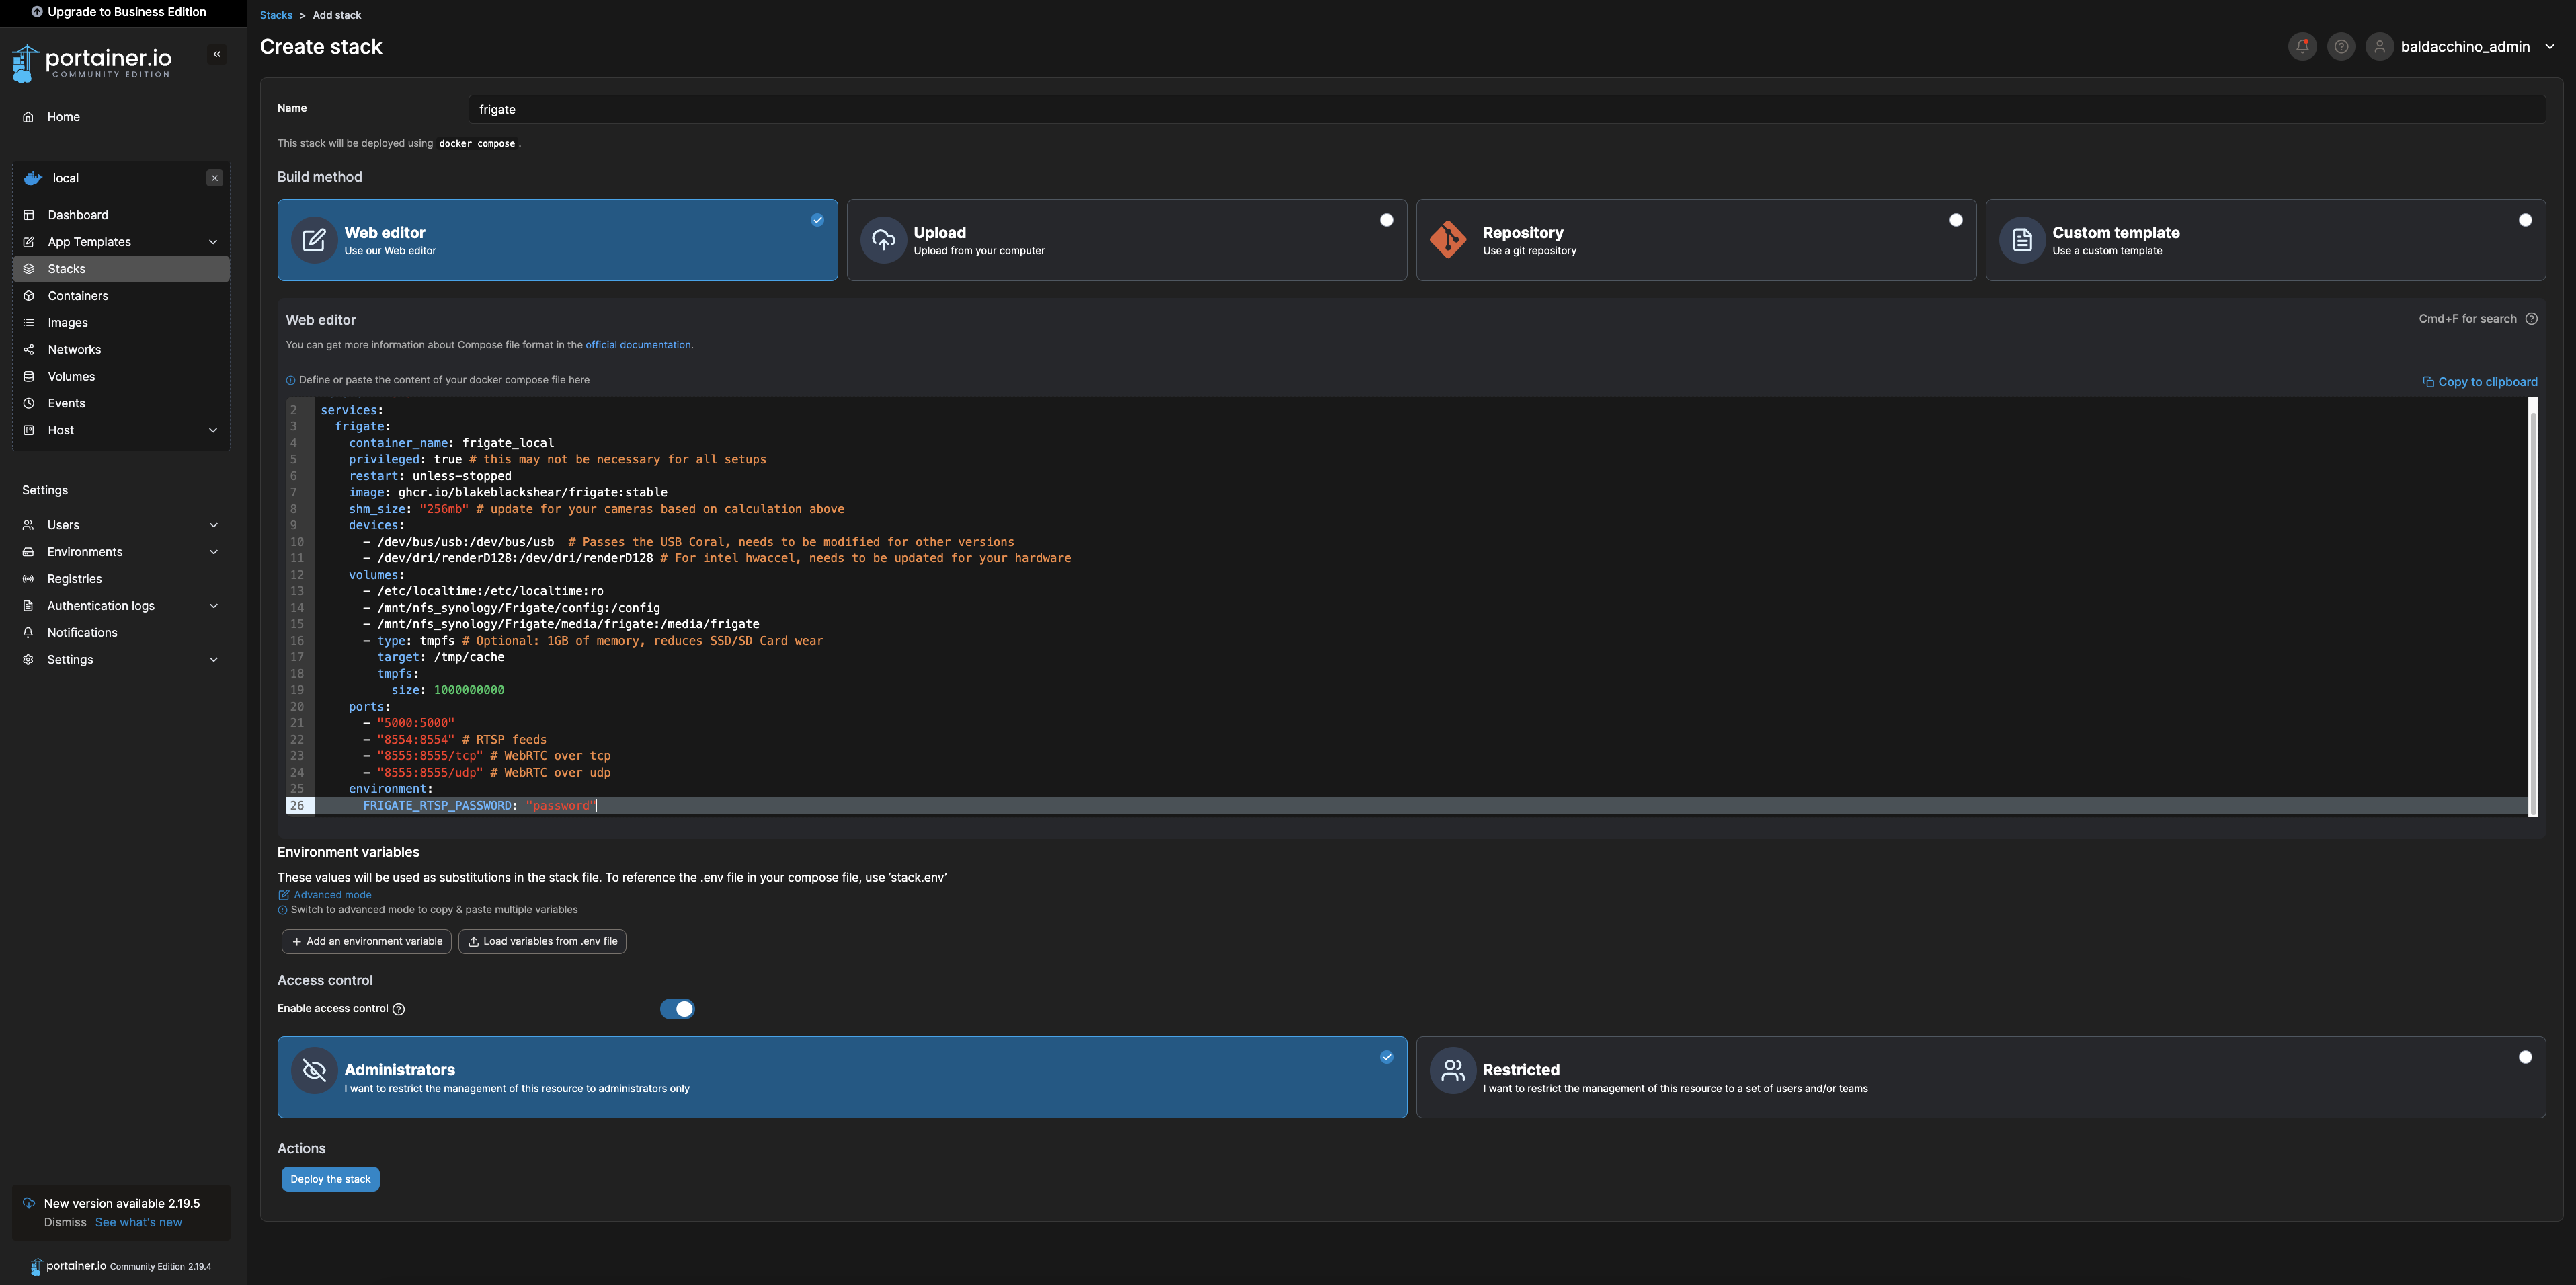
We will be using Frigate’s Docker Compose YAML, but we need to externalise the storage from our Raspberry Pi to our NFS mount. Edit this file accordingly to the paths of your NFS storage. This file only differs to Frigate’s example as the volumes section is mapped to external storage.
version: "3.9"
services:
  frigate:
    container_name: frigate
    privileged: true # this may not be necessary for all setups
    restart: unless-stopped
    image: ghcr.io/blakeblackshear/frigate:stable
    shm_size: "256mb" # update for your cameras based on calculation above
    devices:
      - /dev/bus/usb:/dev/bus/usb  # Passes the USB Coral, needs to be modified for other versions
      - /dev/dri/renderD128:/dev/dri/renderD128 # For intel hwaccel, needs to be updated for your hardware
    volumes:
      - /etc/localtime:/etc/localtime:ro
      - /mnt/nfs_synology/Frigate/config:/config
      - /mnt/nfs_synology/Frigate/media/frigate:/media/frigate
      - type: tmpfs # Optional: 1GB of memory, reduces SSD/SD Card wear
        target: /tmp/cache
        tmpfs:
          size: 1000000000
    ports:
      - "5000:5000"
      - "8554:8554" # RTSP feeds
      - "8555:8555/tcp" # WebRTC over tcp
      - "8555:8555/udp" # WebRTC over udp
    environment:
      FRIGATE_RTSP_PASSWORD: "password"
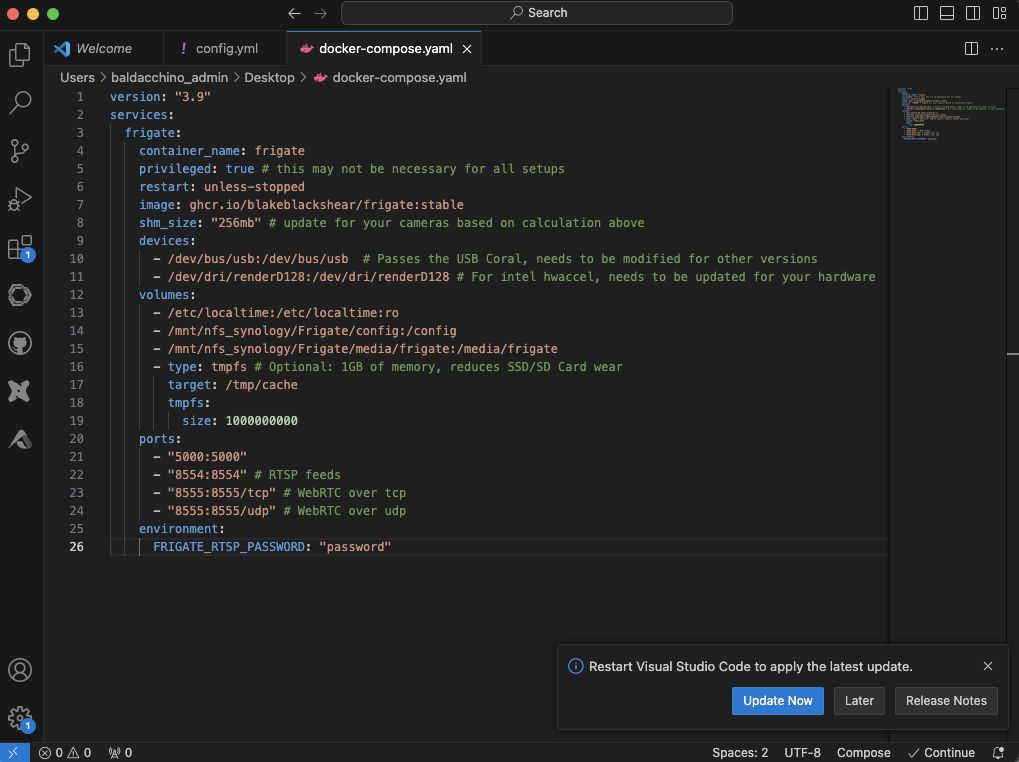
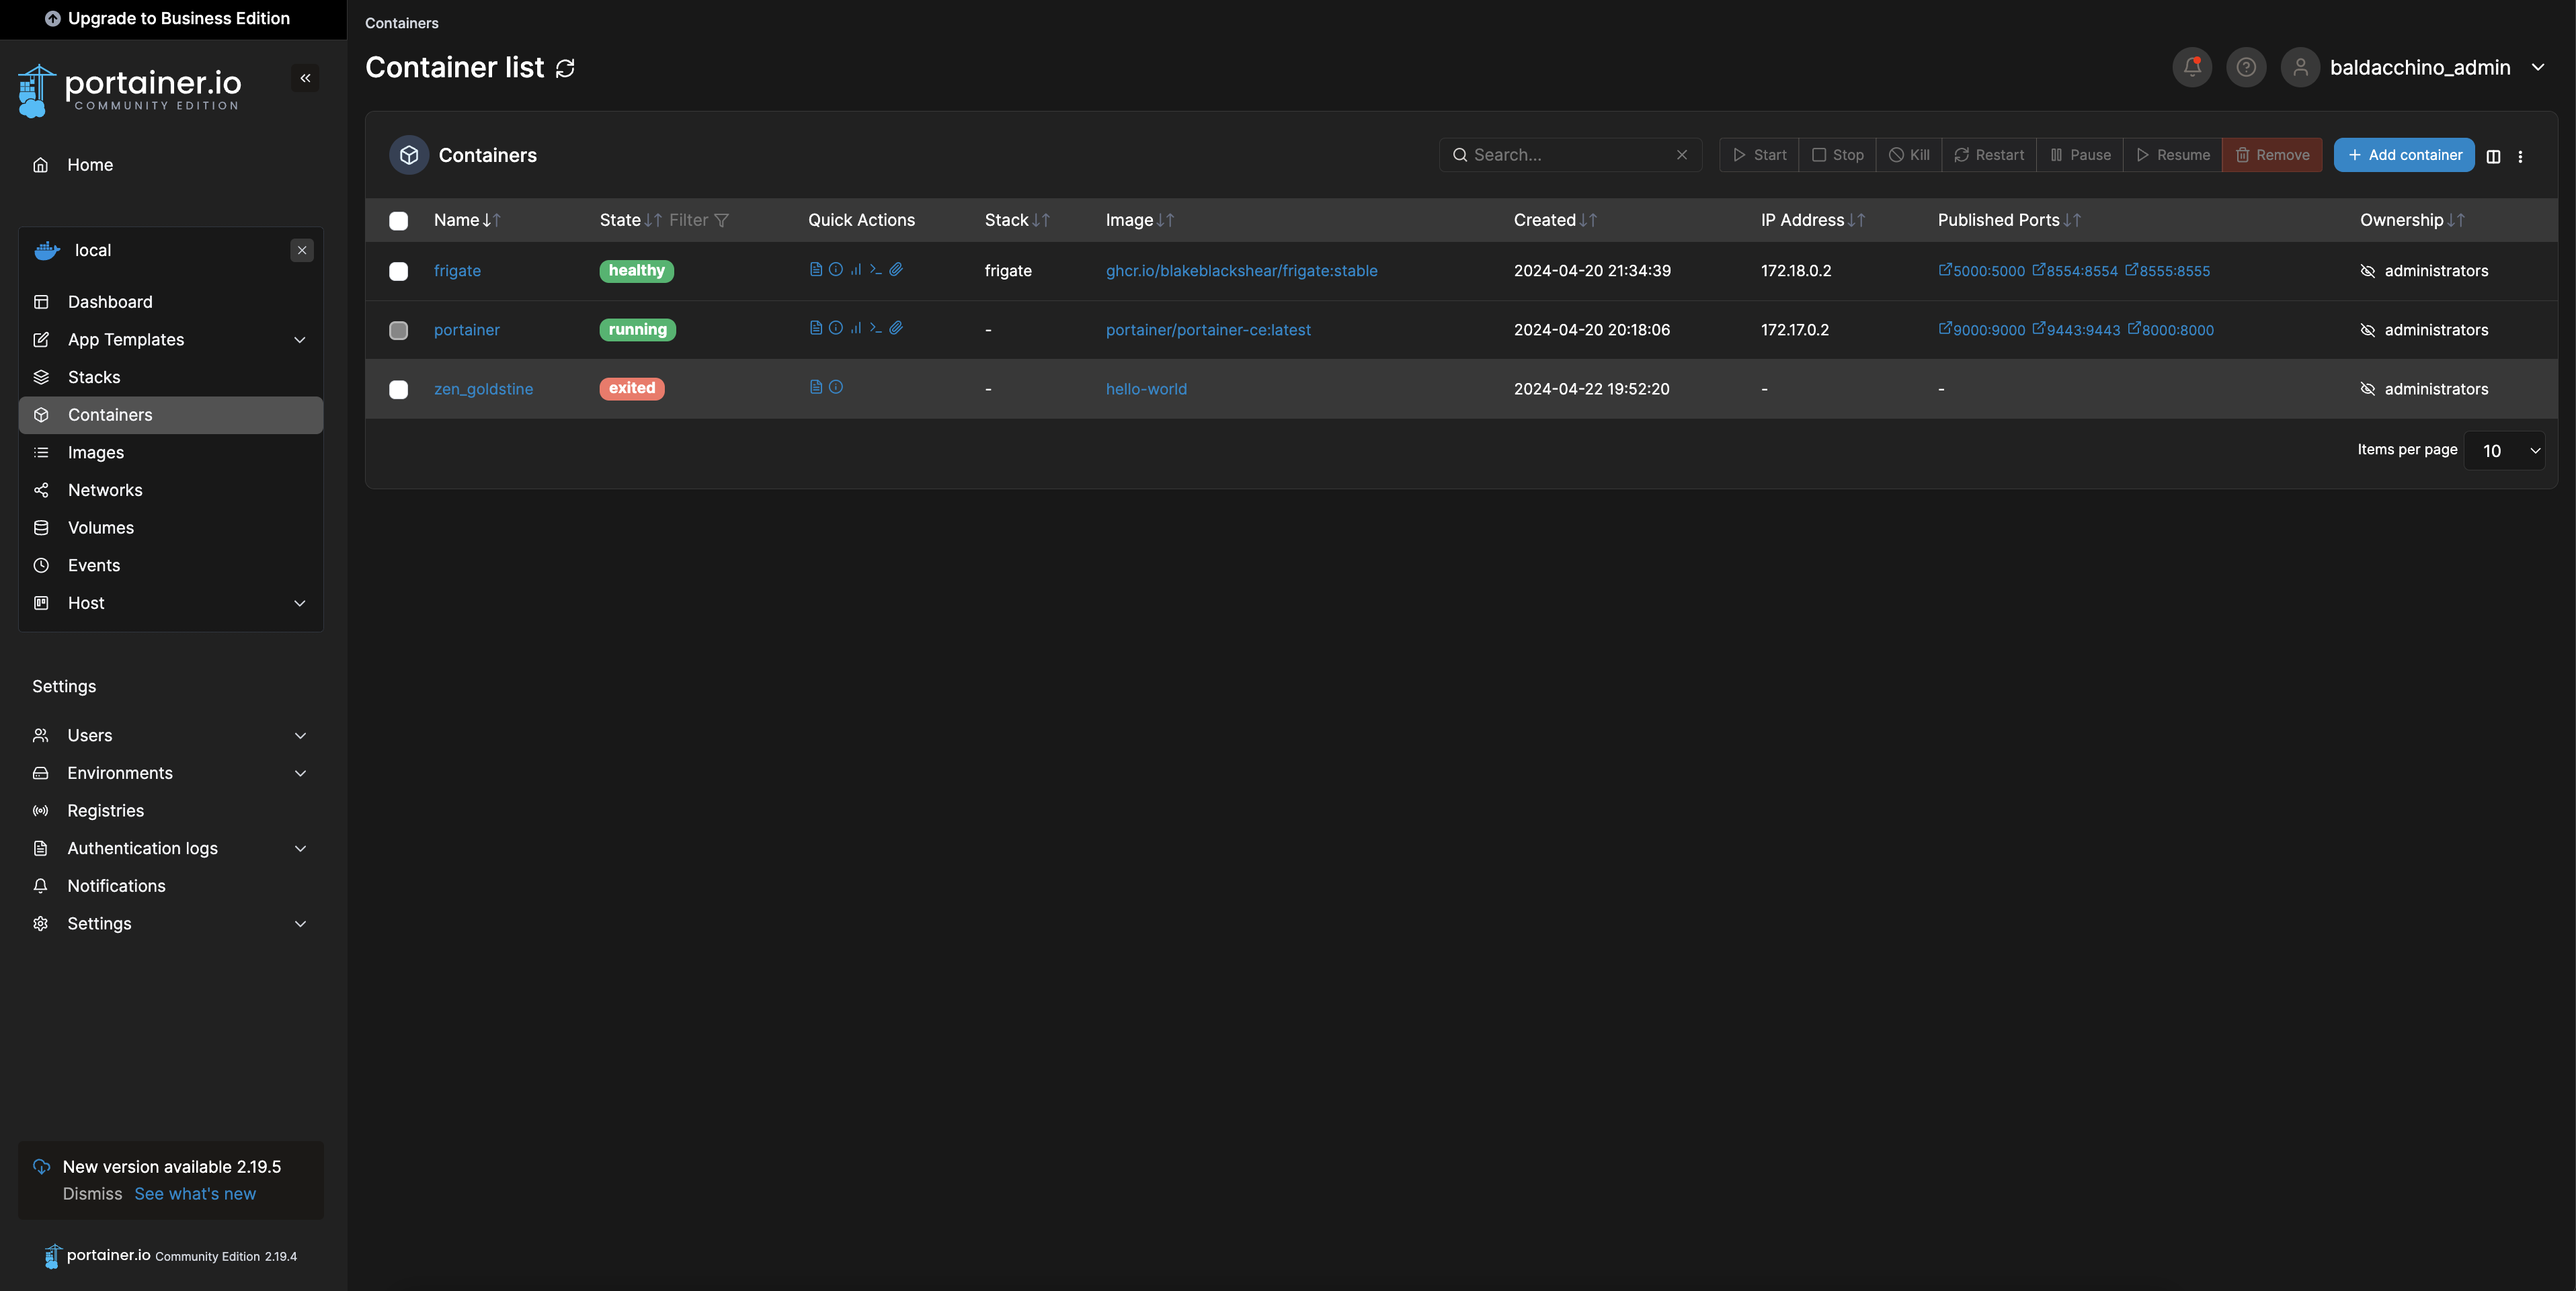
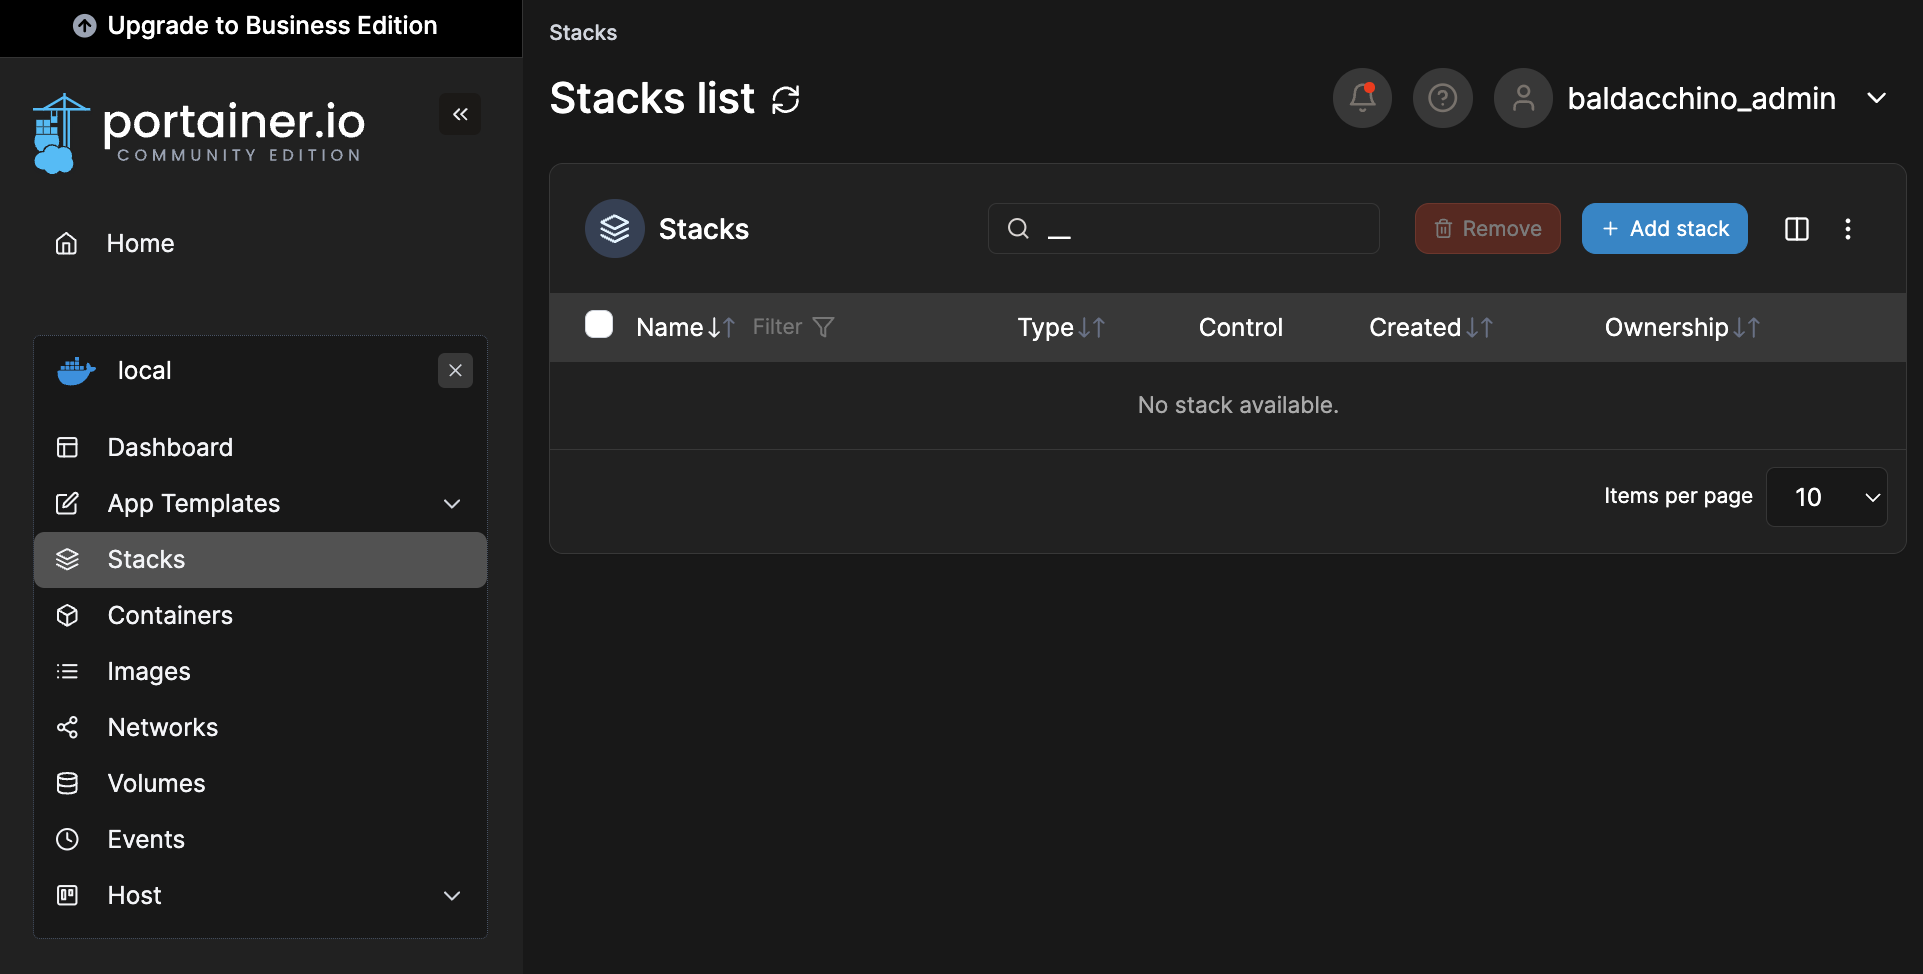
From here will head back in to Portainer (http://device_ip:9443). Select your the local Docker instance and then click on ‘Stacks’ on the left hand menu and ‘Add stack’ in the top right hand corner. Paste the contents of your docker-compose.yaml in to the web-editor and create your stack. If all goes to plan, in around 5 minutes Frigate will be running, healthy and there will be a list of published ports. I like to look at the logs (under Quick Actions) to ensure the container started correctly.
Basic configuration of a RTSP camera for detect and record in Frigate
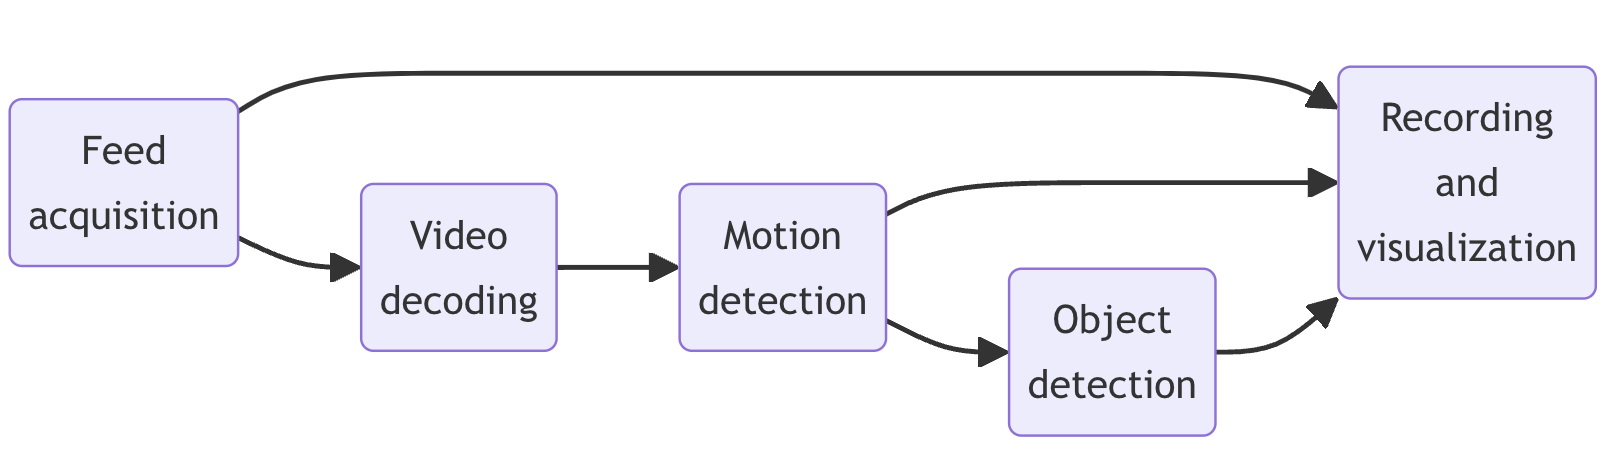
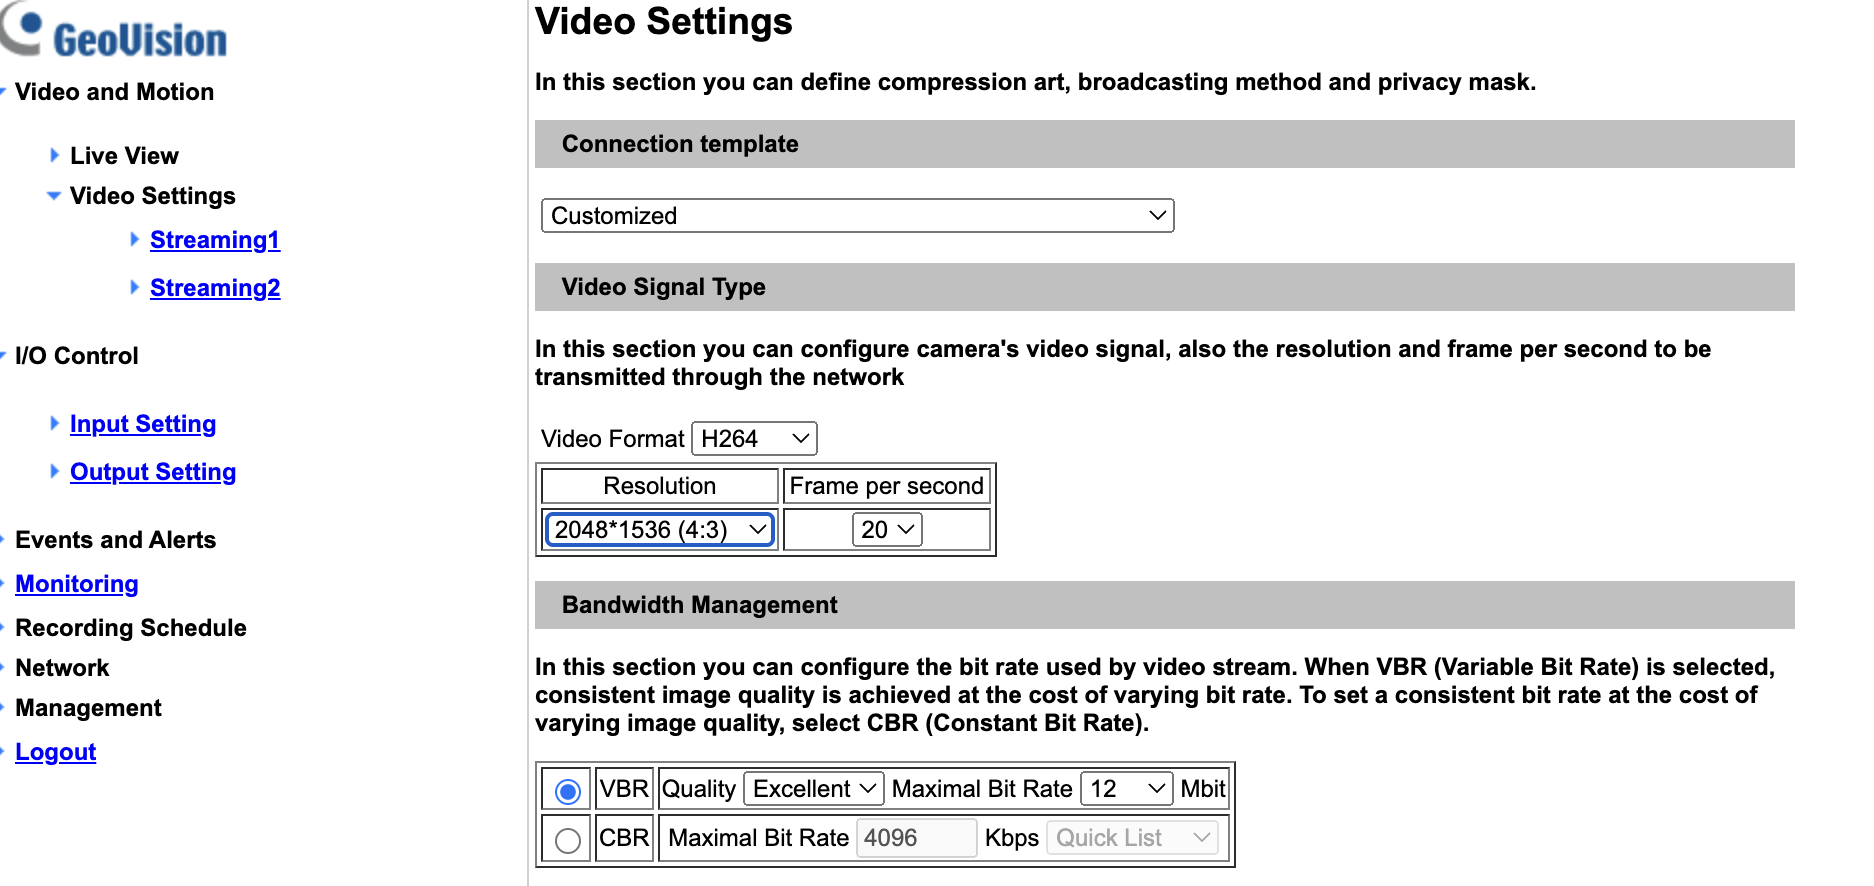
Your camera(s) will need to be setup and configured for RTSP (Real Time Streaming Protocol). Frigate is driven by the a yaml configuration file (config.yaml) which we have externalised on our NFS storage, this file will need to edited, either via Frigate or via any form of text editor. Frigate will work best using two streams. A low resolution stream for detection (against local model) and a high resolution stream for recording. Most IP cameras will have this ability. Note the video pipeline image that depicts this process.
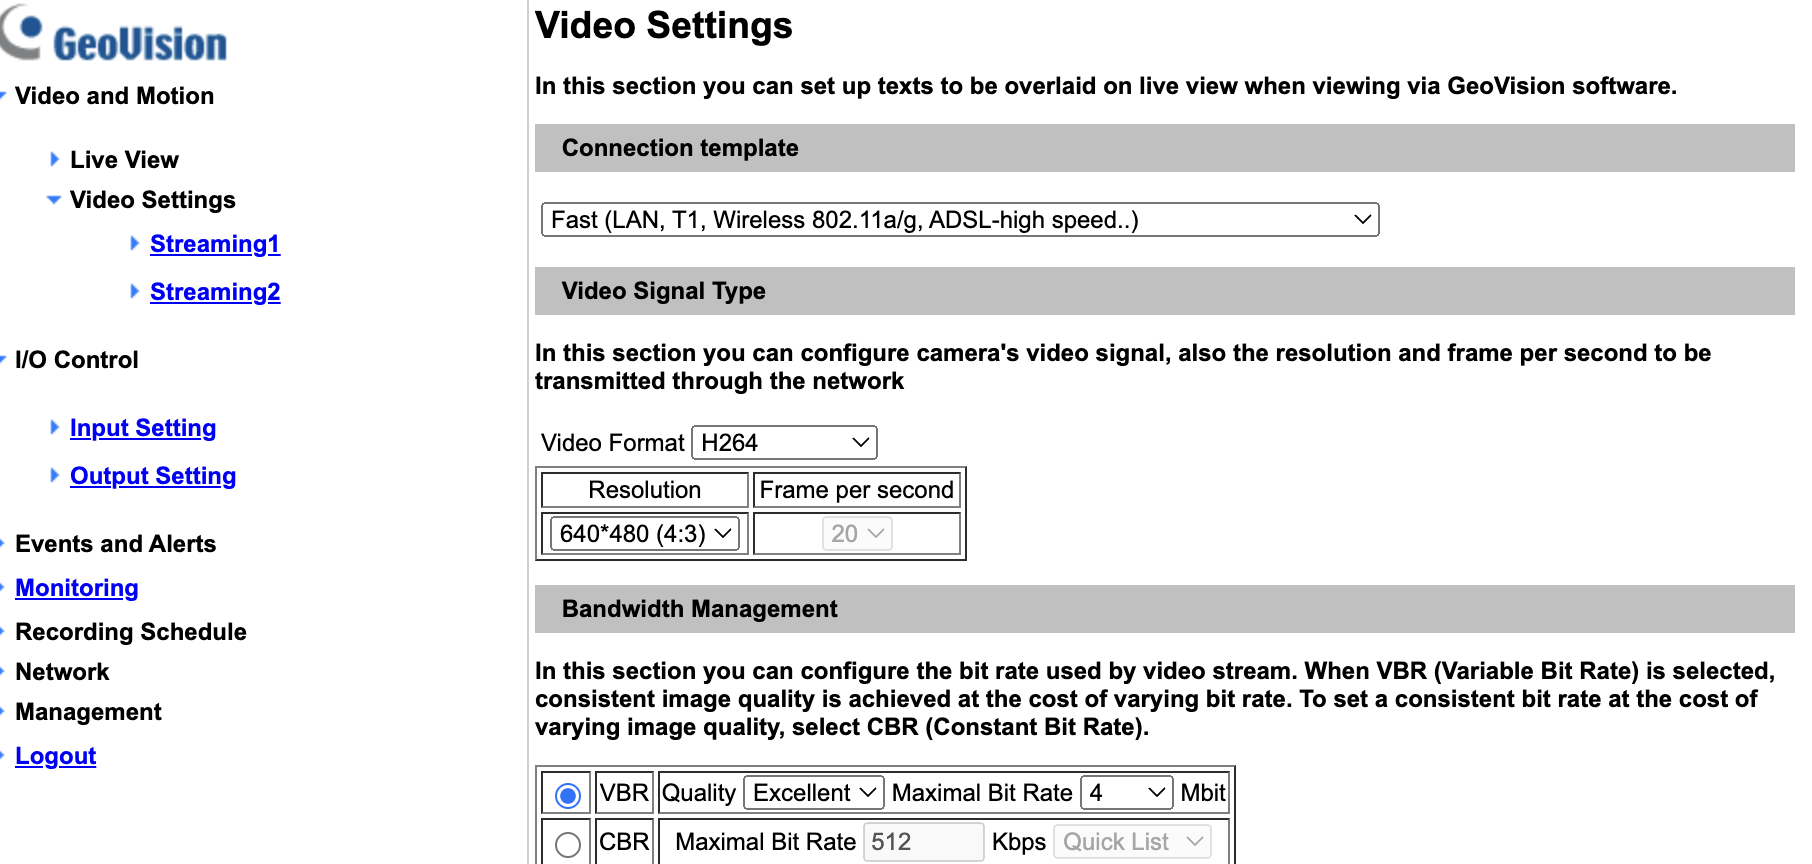
You will need to obtain the RTSP URL, this may not be so straight forward, end up Googling these. For my Geovision based cameras the format is
rtsp://user:password@ip_address:8554/CH001.sdp
rtsp://user:password@ip_address:8554/CH002.sdp
Find your RTSP URL’s and test these using VLC (Open Network Stream) or even FFmpeg. Validate that they are working and keep these strings handy.
Navigate to Frigate – http://frigate_ip_address:5000, there is no authentication. On the left hand menu click on ‘Config’ which will open up the config.yaml file in an editor. Things you will need to include are
- The use of your Google Coral TPU
- Your cameras, each Camera is a seperate line item
- MQTT / Go2RTC (to get messages to Home Assistant)
- How you wish to record data.
Google Coral TPU support : Add the following, just ensure you have the Google Coral TPU drivers installed and that you have passed this device through to the container (see above in our Docker-compose.yaml)
detectors:
  coral:
    type: edgetpu
    device: usb
Cameras : Add the following lines. Use the streams from your camera. Use the high quality stream for recording and the lower quality stream for detection. In the example, I have named my camera ‘front_door’. In my example below, CH002.sdp is my low resolution feed and CH001.sdp is my high resolution feed. Adjust accordingly to your cameras RTSP URIs. Frigate recommends H264 and no more than 1280×720 on the detection feed. See https://docs.frigate.video/frigate/camera_setup/#example-camera-configuration for more details.
  front_door: #
    enabled: True
    ffmpeg:
      inputs:
        - path: rtsp://user:pass@ip_address:8554/CH002.sdp
          roles:
            - detect
        - path: rtsp://user:pass@ip_address:8554/CH001.sdp
          roles:
            - record
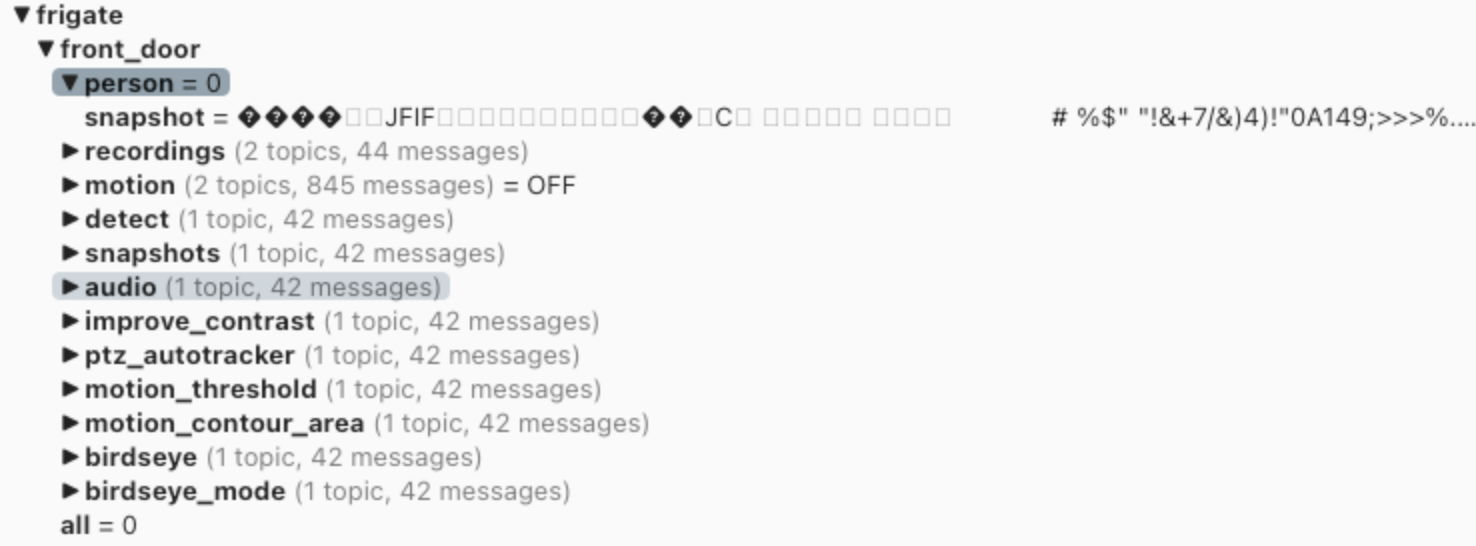
MQTT : Enter your broker IP address and authentication details if required. If you are running stock Mosquitto then there will be no authentication, if you need to use authentication see https://docs.frigate.video/configuration/ and if you wish to change the default MQTT topic path (/frigate) to something else see, or get an overview of the topic data see https://docs.frigate.video/integrations/mqtt. Once enabled you should see a lot of information flowing to your MQTT broker. You can use MQTT Explorer or even mosquitto_sub to validate. This data is incredibly helpful for downstream automation.
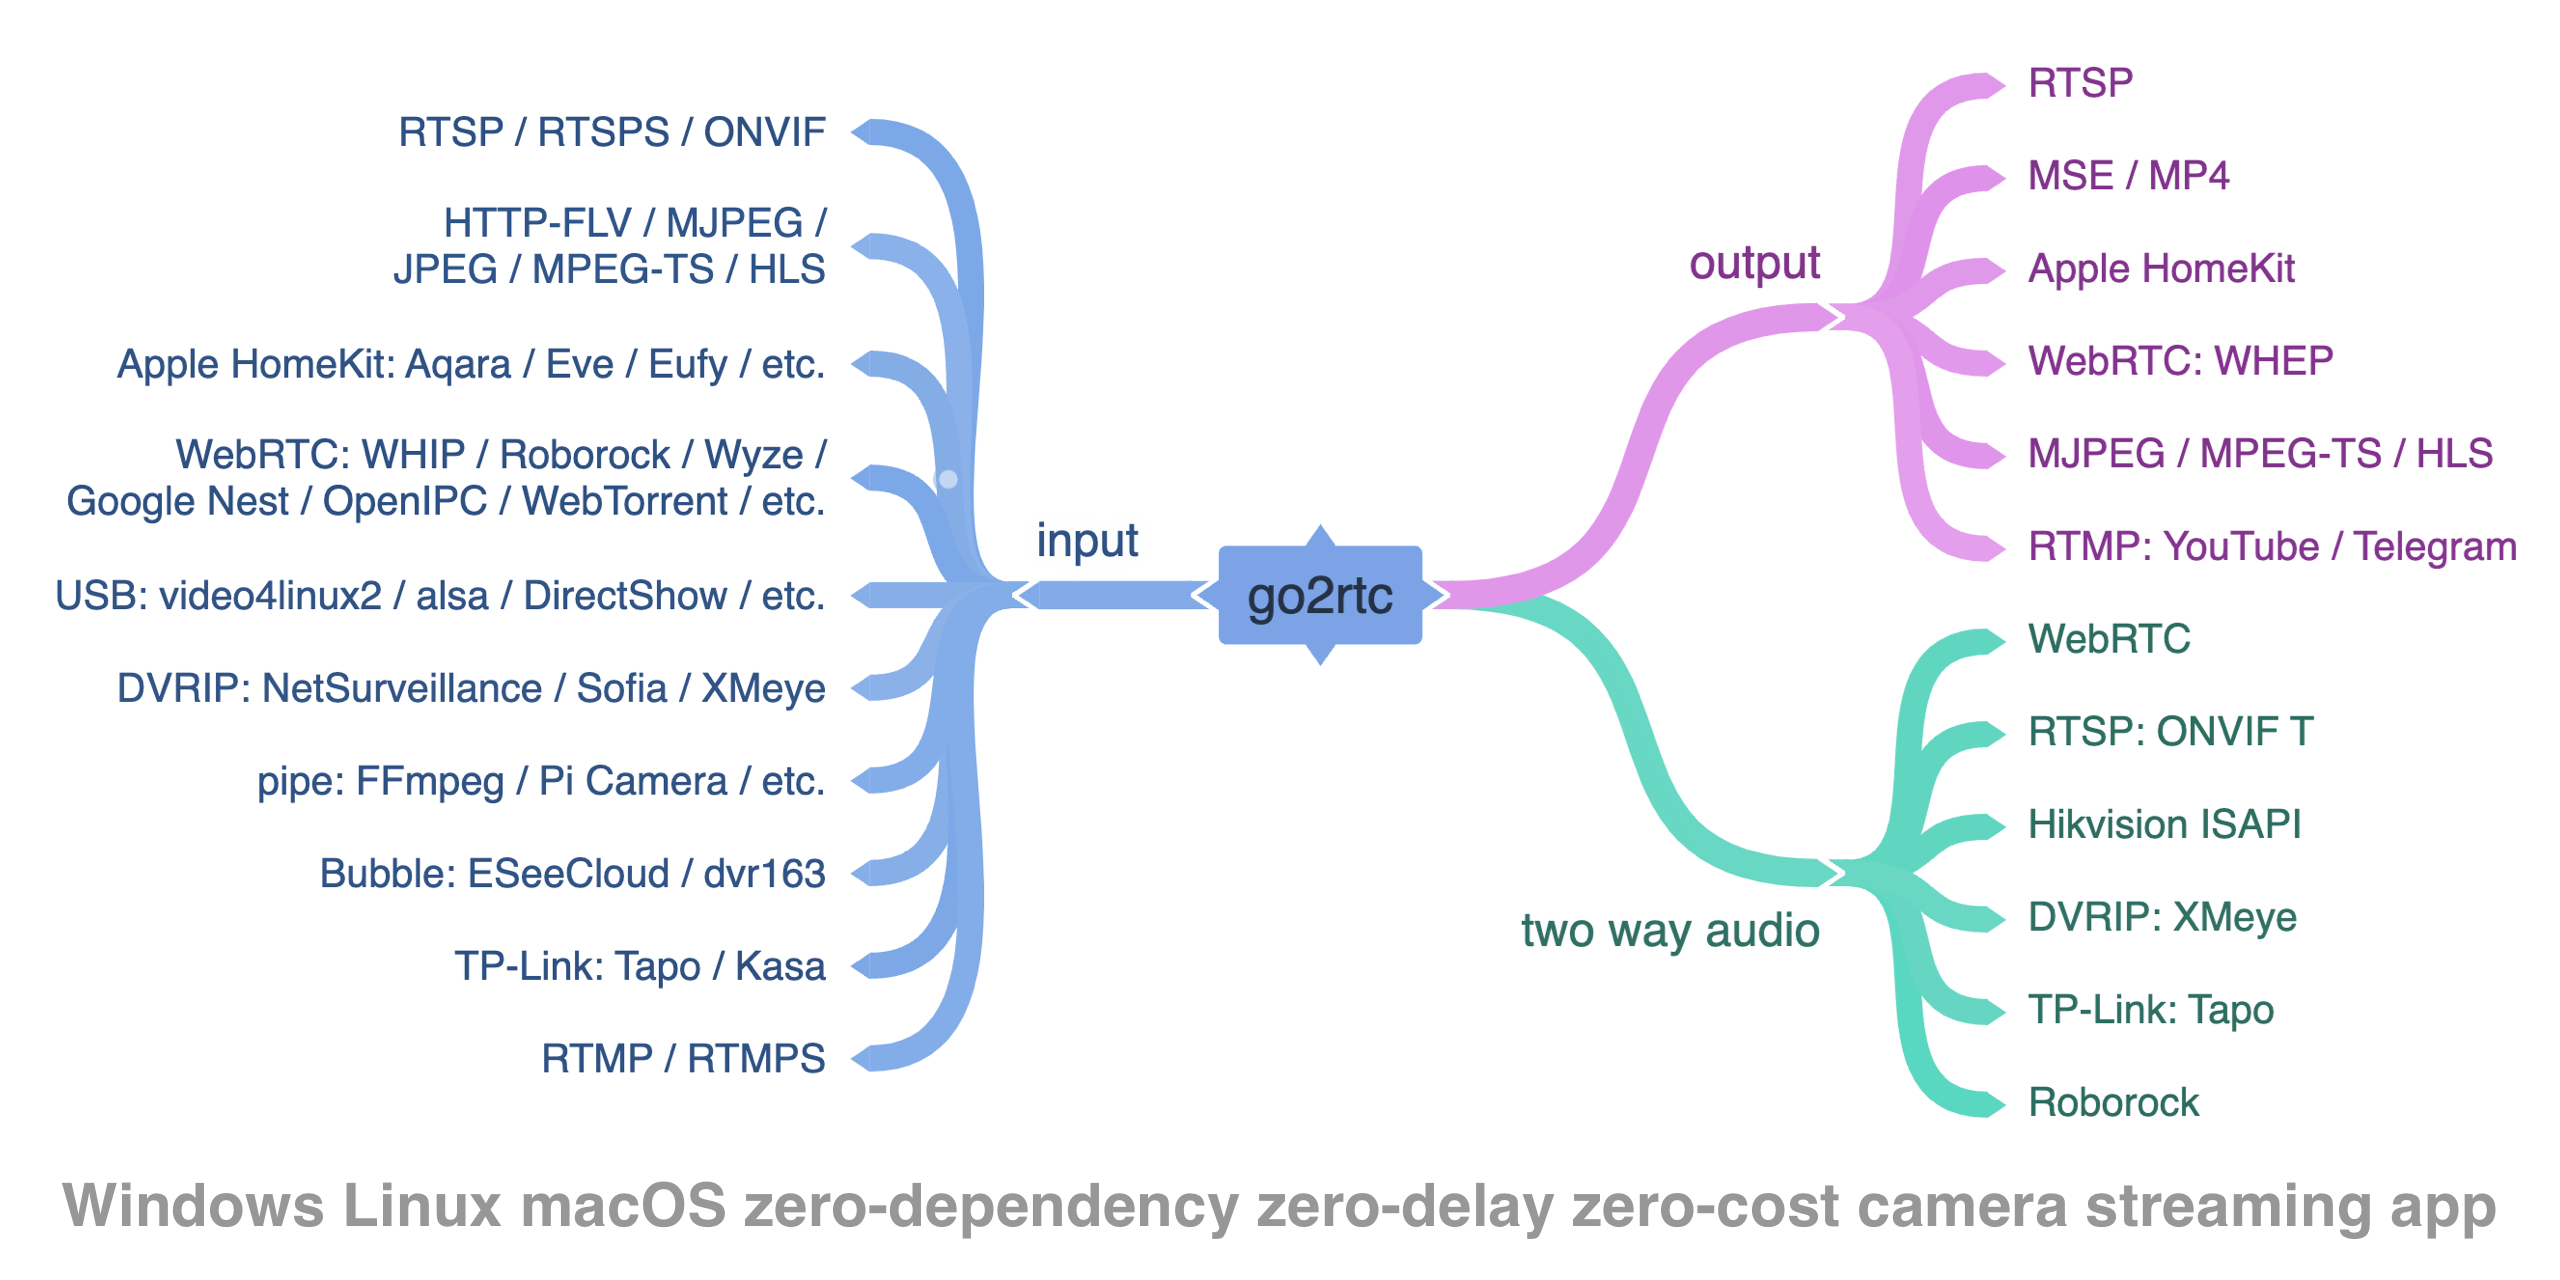
Go2RTC : Go2RTC is optional, but if you wish to display live video in to a Home Assistant Lovelace template you will need to configure Go2RTC. Home Assistant can not read from RTSP natively. Go2RTC can stream from almost anything to the browser via HTTP.
Recording : Record everything or record on motion. Think about the load on your I/O subsystem. The durability of the media you are writing to. I am storing video footage for 30 days when motion is detected.
There are sample configurations from very minimal storages, through to store everything. I am picking the middle ground. See https://docs.frigate.video/configuration/record/ for all configuration permutations.
record:
  enabled: True
  retain:
    days: 3
    mode: motion
  events:
    retain:
      default: 30
      mode: motion
Putting this all together, minus all of my cameras, a sample end2end configuration may look as follows
mqtt:
  enabled: True
  host: 10.0.0.200

go2rtc:
  streams:
    front_door:
      - rtsp://user:password@ip_address_of_camera:8554/path_to_stream.sdp

cameras:
  front_door:
    enabled: True
    ffmpeg:
      inputs:
        - path: rtsp://user:password@ip_address_of_camera:8554/low_res_stream.sdp
          roles:
            - detect
        - path: rtsp://user:password@ip_address_of_camera:8554/high_res_stream.sdp
          roles:
            - record

detectors:
  coral:
    type: edgetpu
    device: usb


record:
  enabled: True
  retain:
    days: 3
    mode: motion
  events:
    retain:
      default: 30
      mode: motion
Basic masking in Frigate
Masks are used to tell Frigate where not to detect objects. They filter out false positives for a given object type based on location. These should be used to filter any areas where it is not possible for an object of that type to be. In my example I am masking out my foot path because I only want to be notified of people entering my house.
To create a mask, go to your given camera and click ‘Debug’ and then ‘Show Options’


Finally copy the mask to your config file, in the YAML below notice the mask section has been added. You will need to restart Frigate for this to take affect.
cameras:
  front_door: # <--- this will be changed to your actual camera later
    enabled: True
    ffmpeg:
      inputs:
        - path: rtsp://user:pass@ip_address:8554/CH002.sdp
          roles:
            - detect
        - path: rtsp://user:pass@Ip_address:8554/CH001.sdp
          roles:
            - record
    motion:
      mask:
        - 127,55,136,160,552,217,570,71
Configuration of Home Assistant Integration
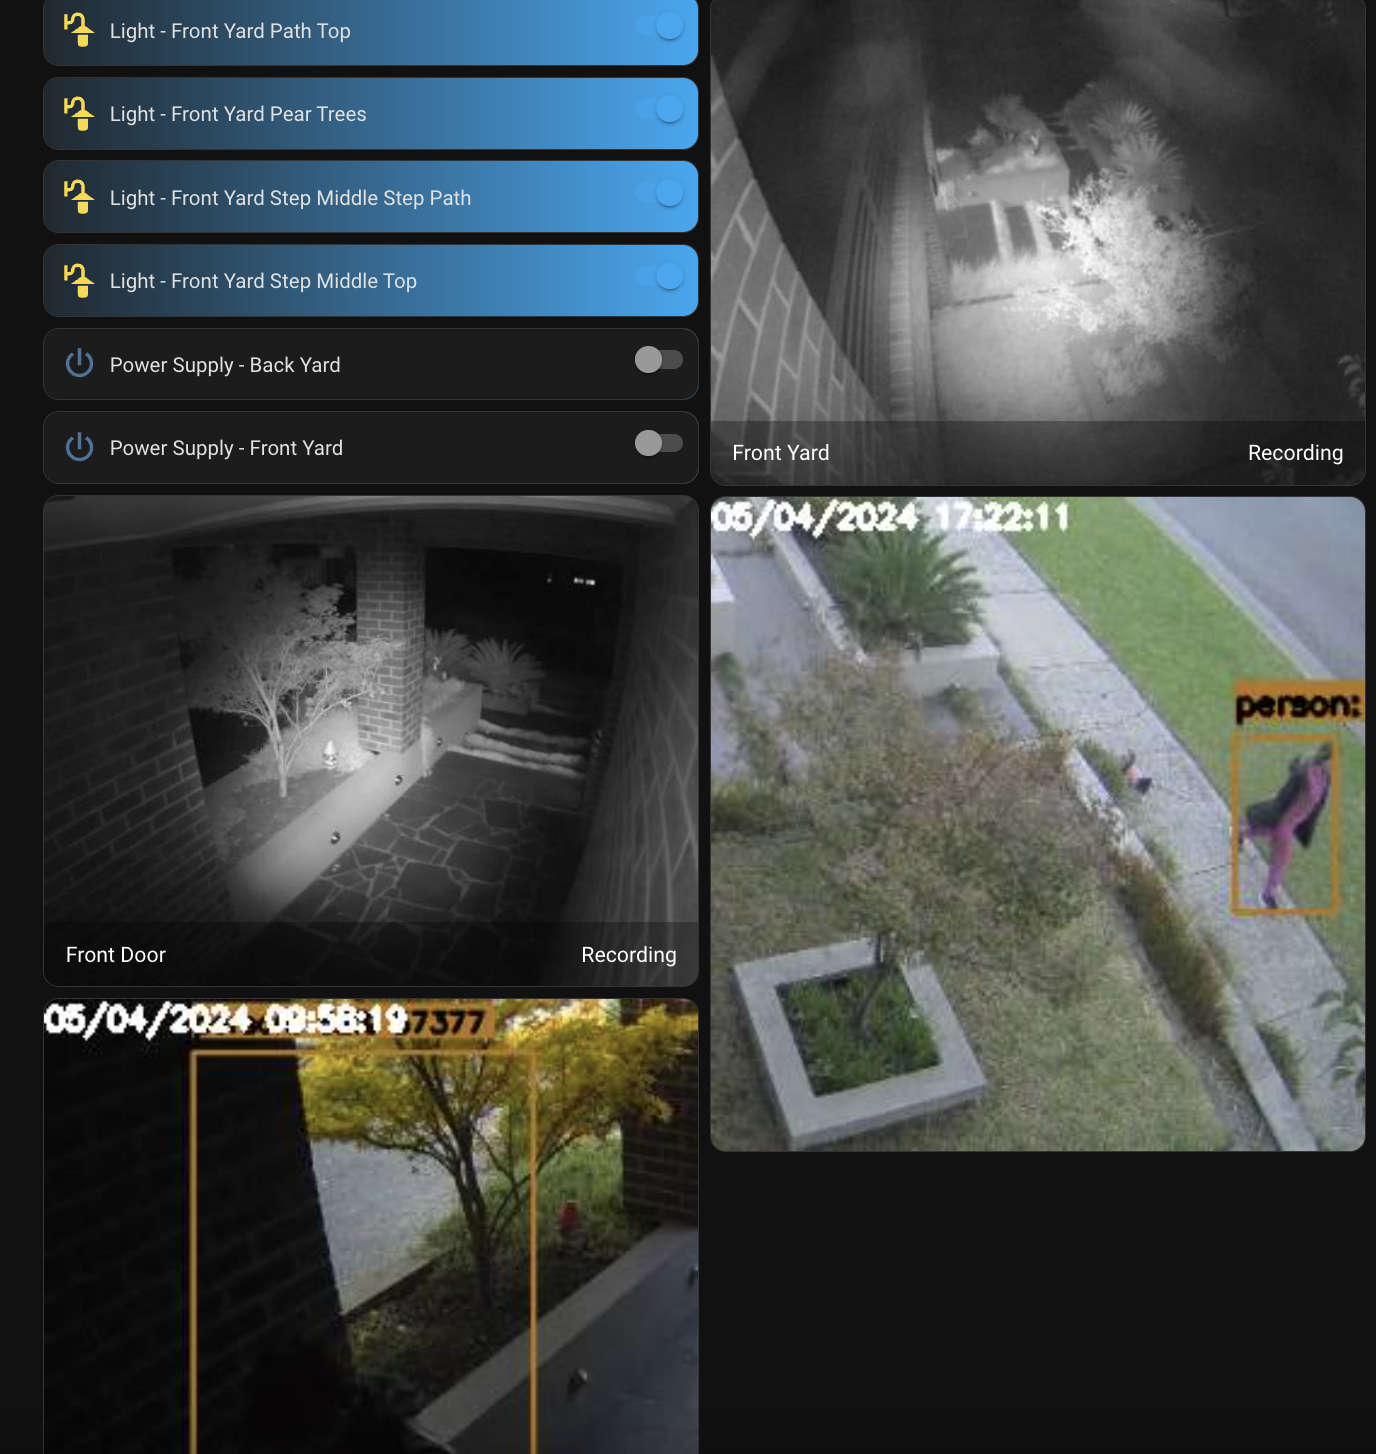
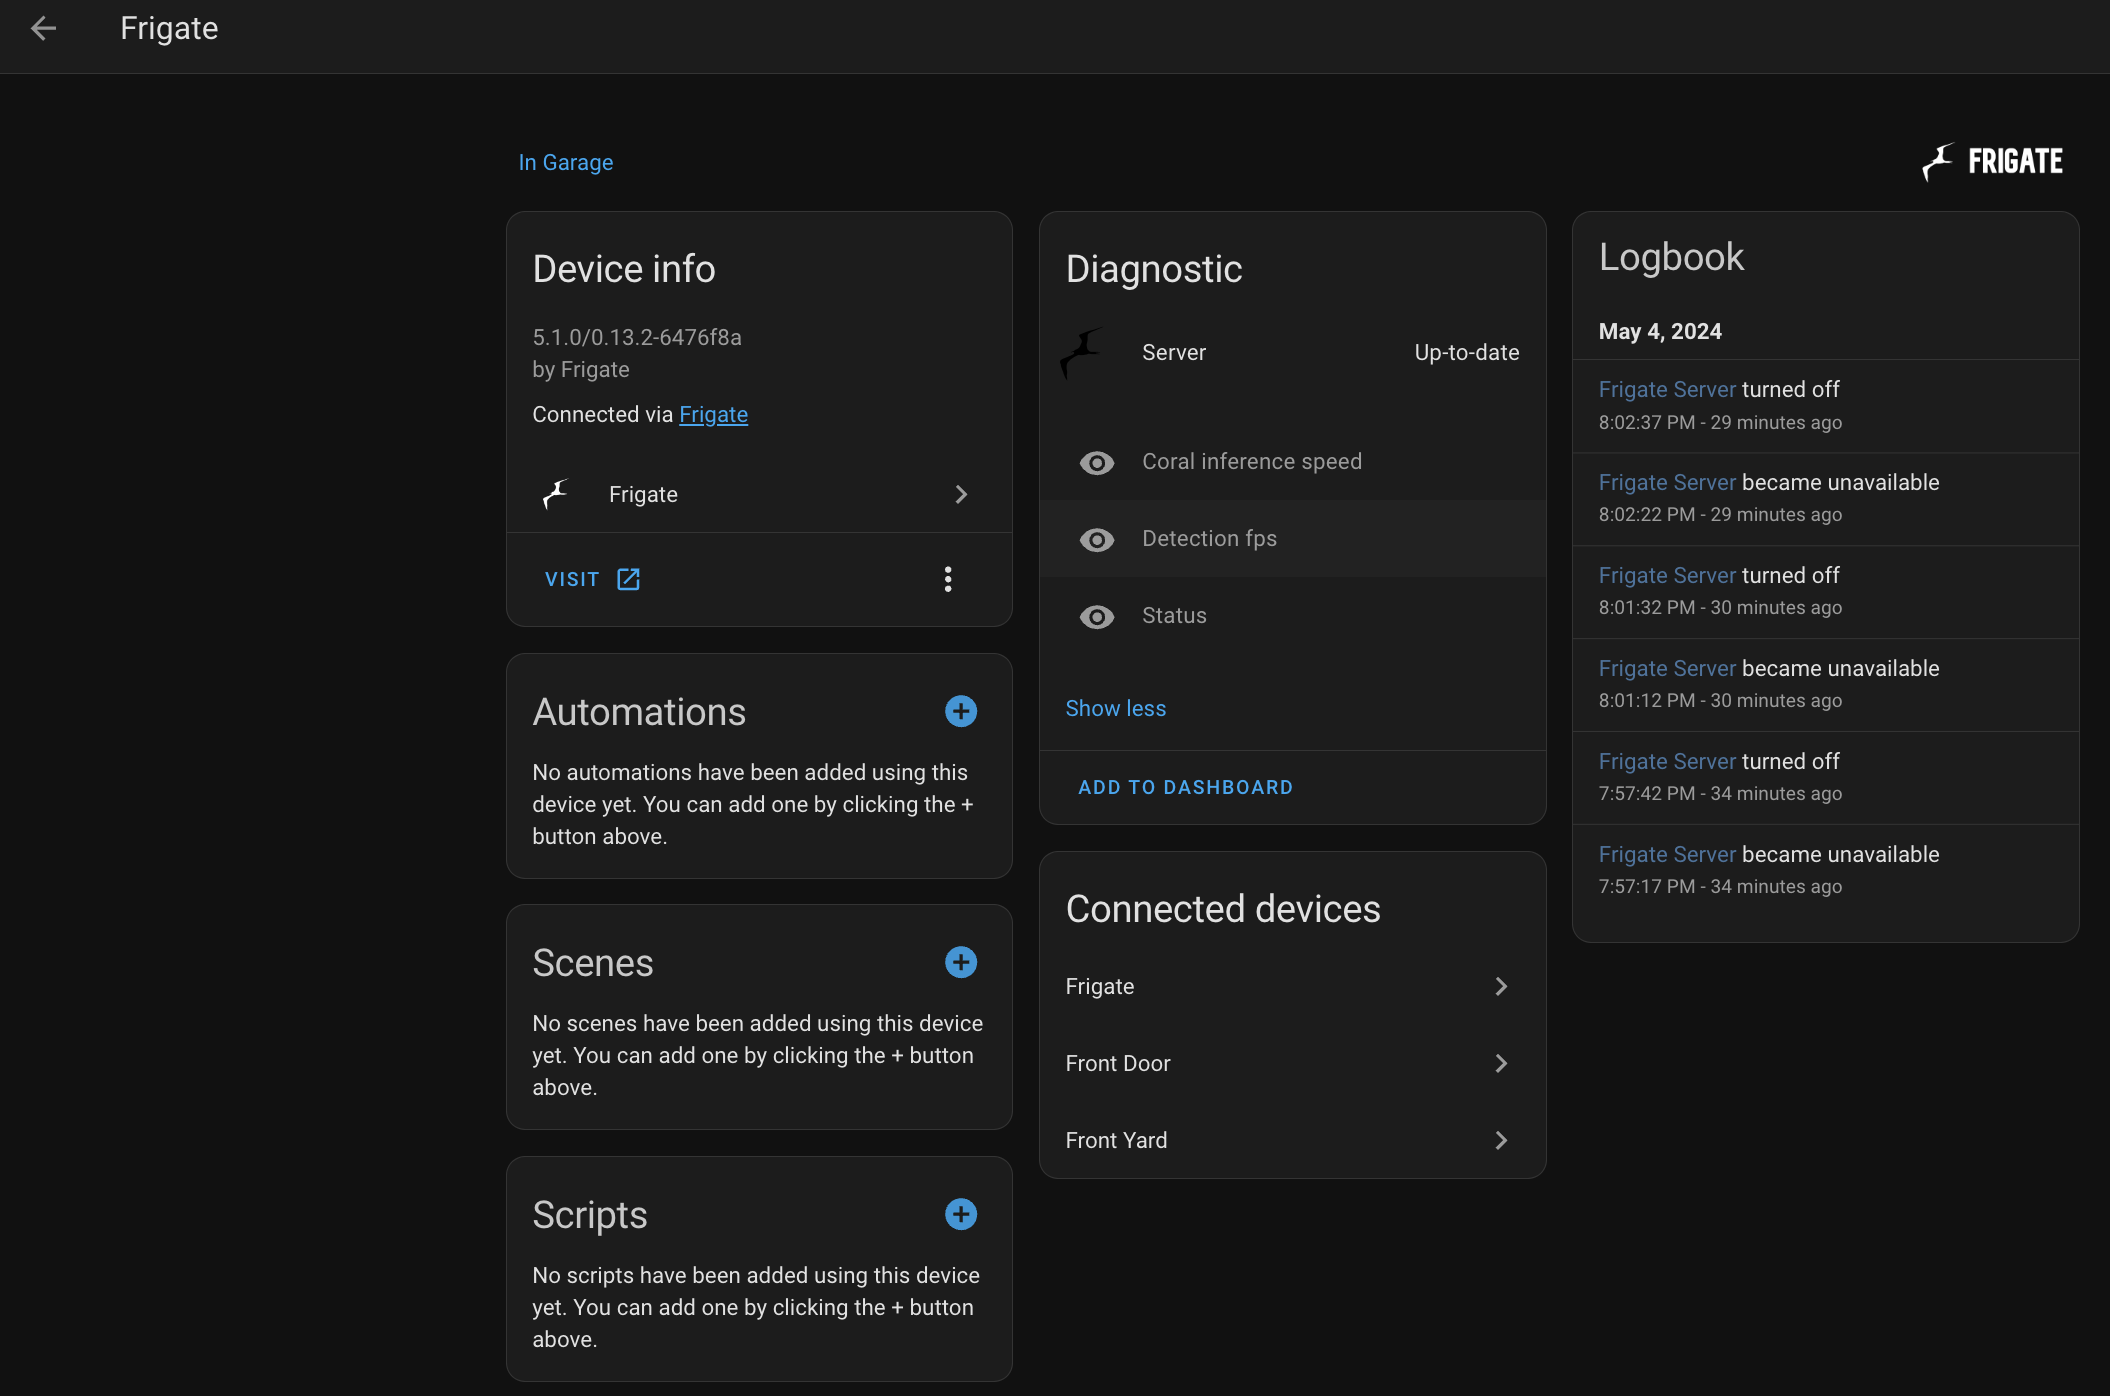
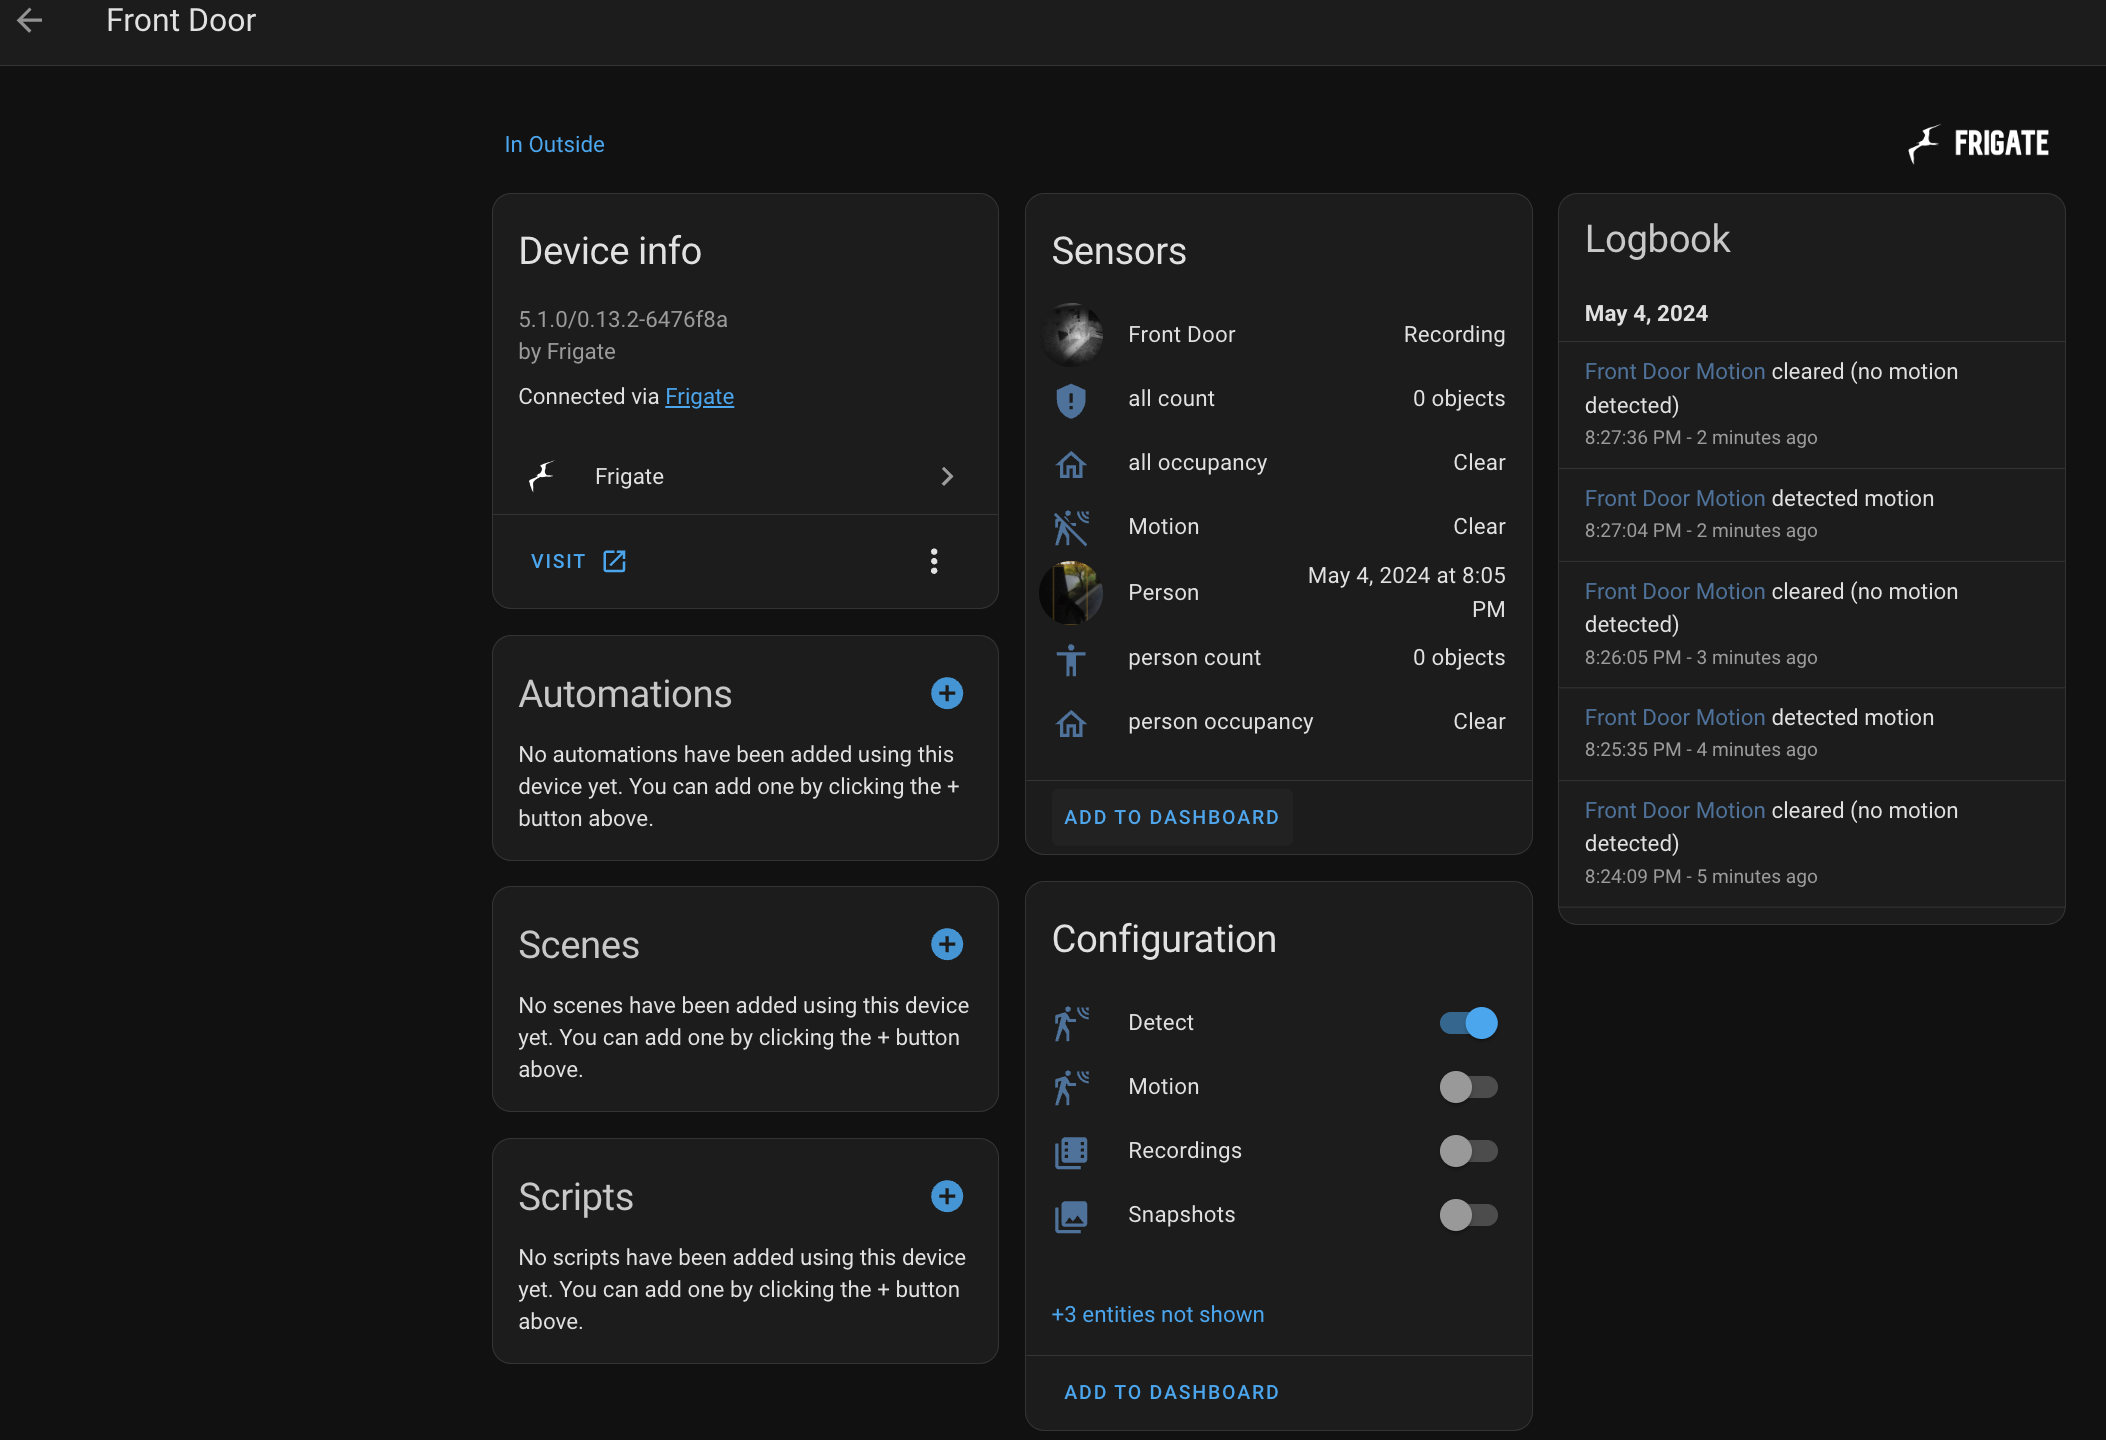
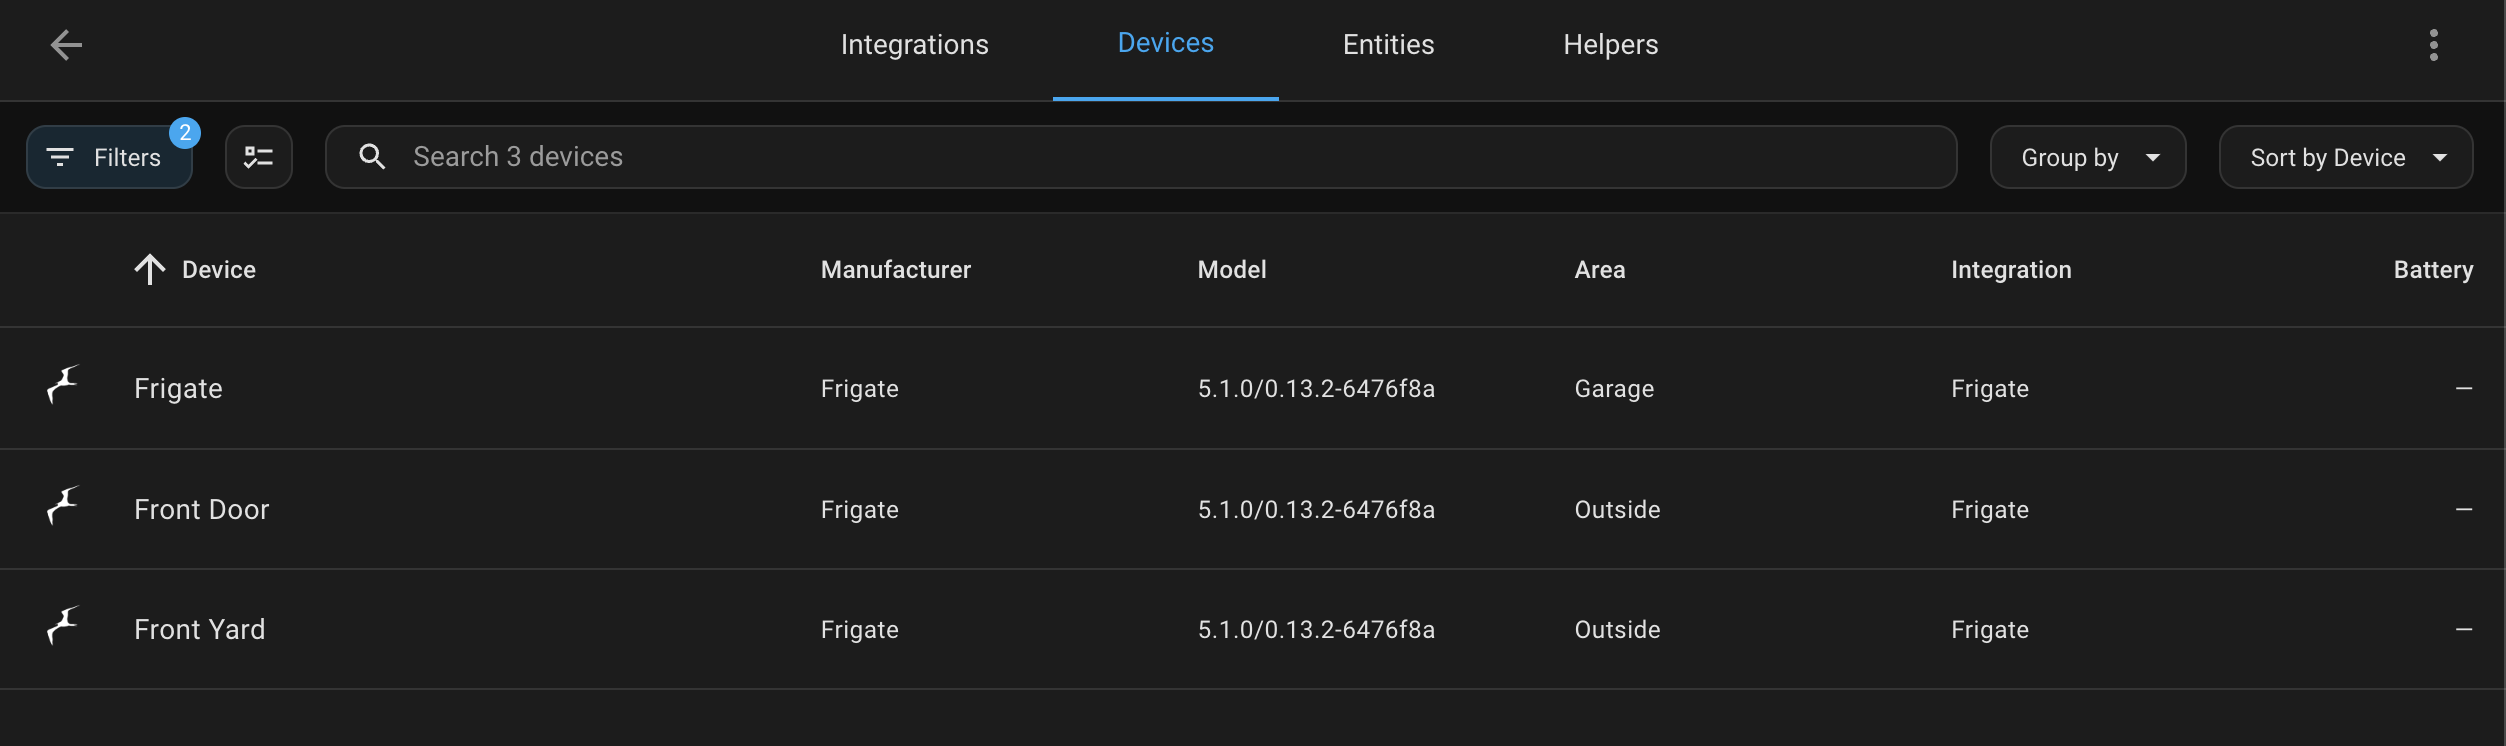
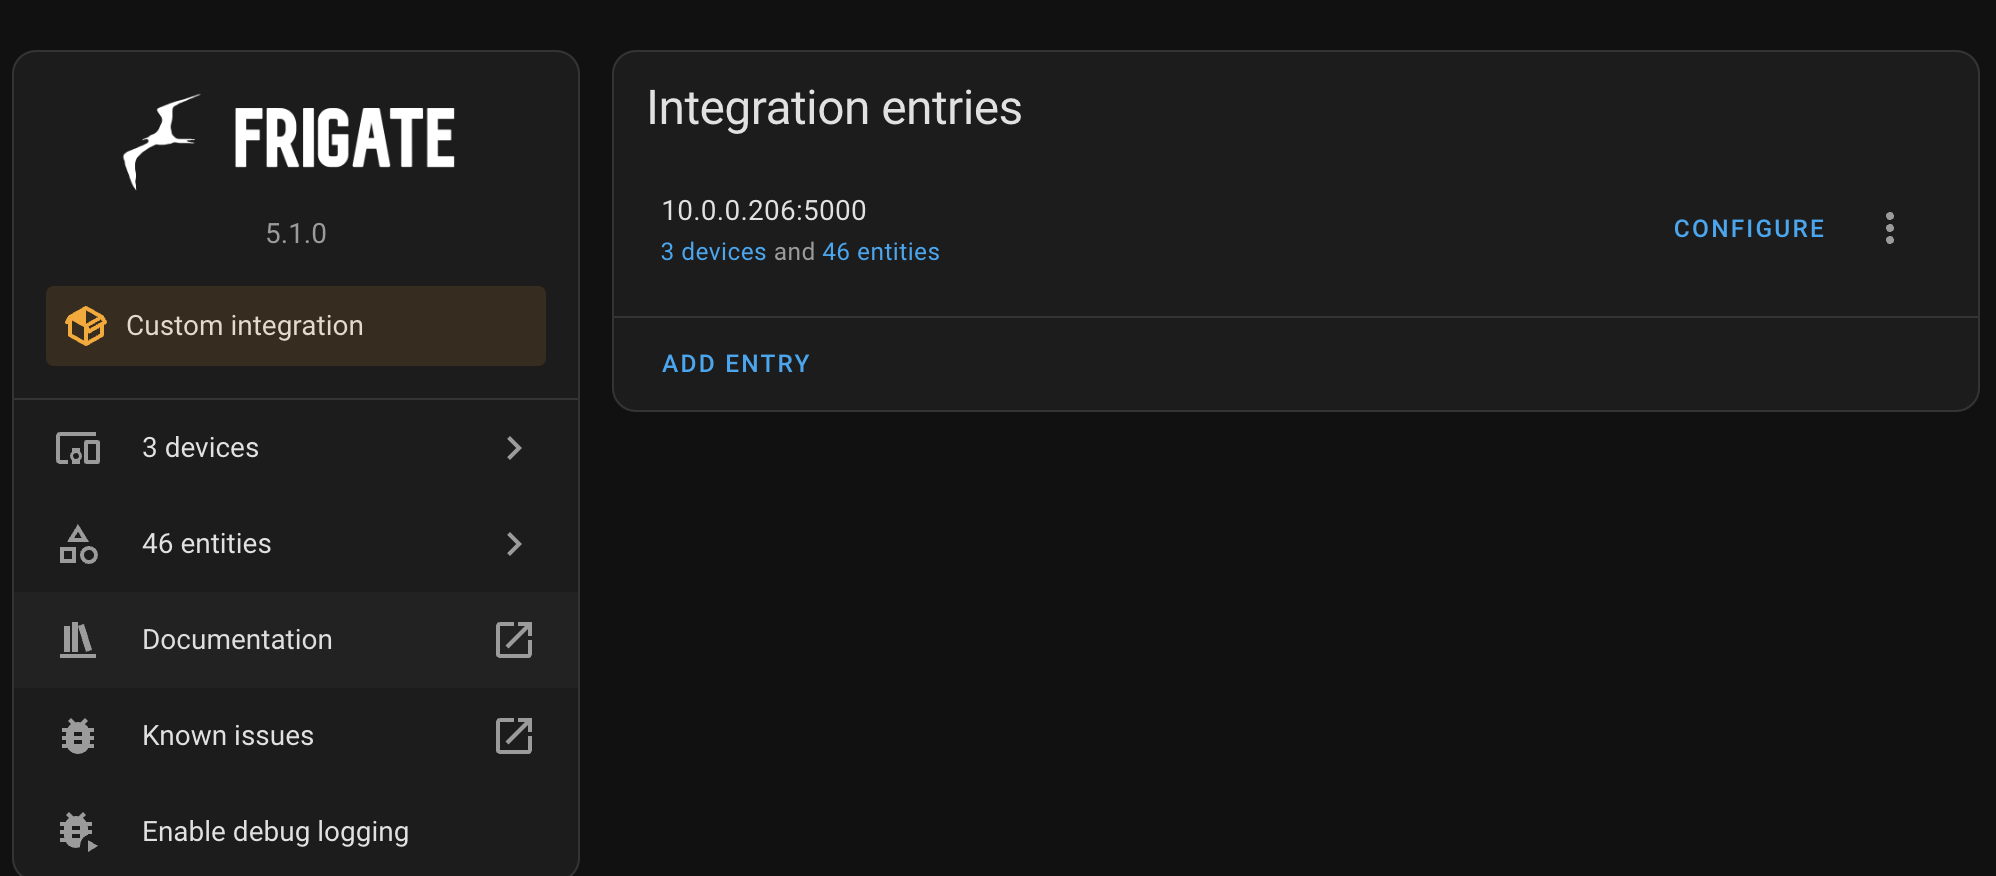
Configure Frigate Integration by using the adding the Frigate integration, select your IP address and port (default is 5000). It is as simple as that. This will allow you to bring entities in to Home Assistant from Frigate. Your dashboards will be able to view video footage via these.
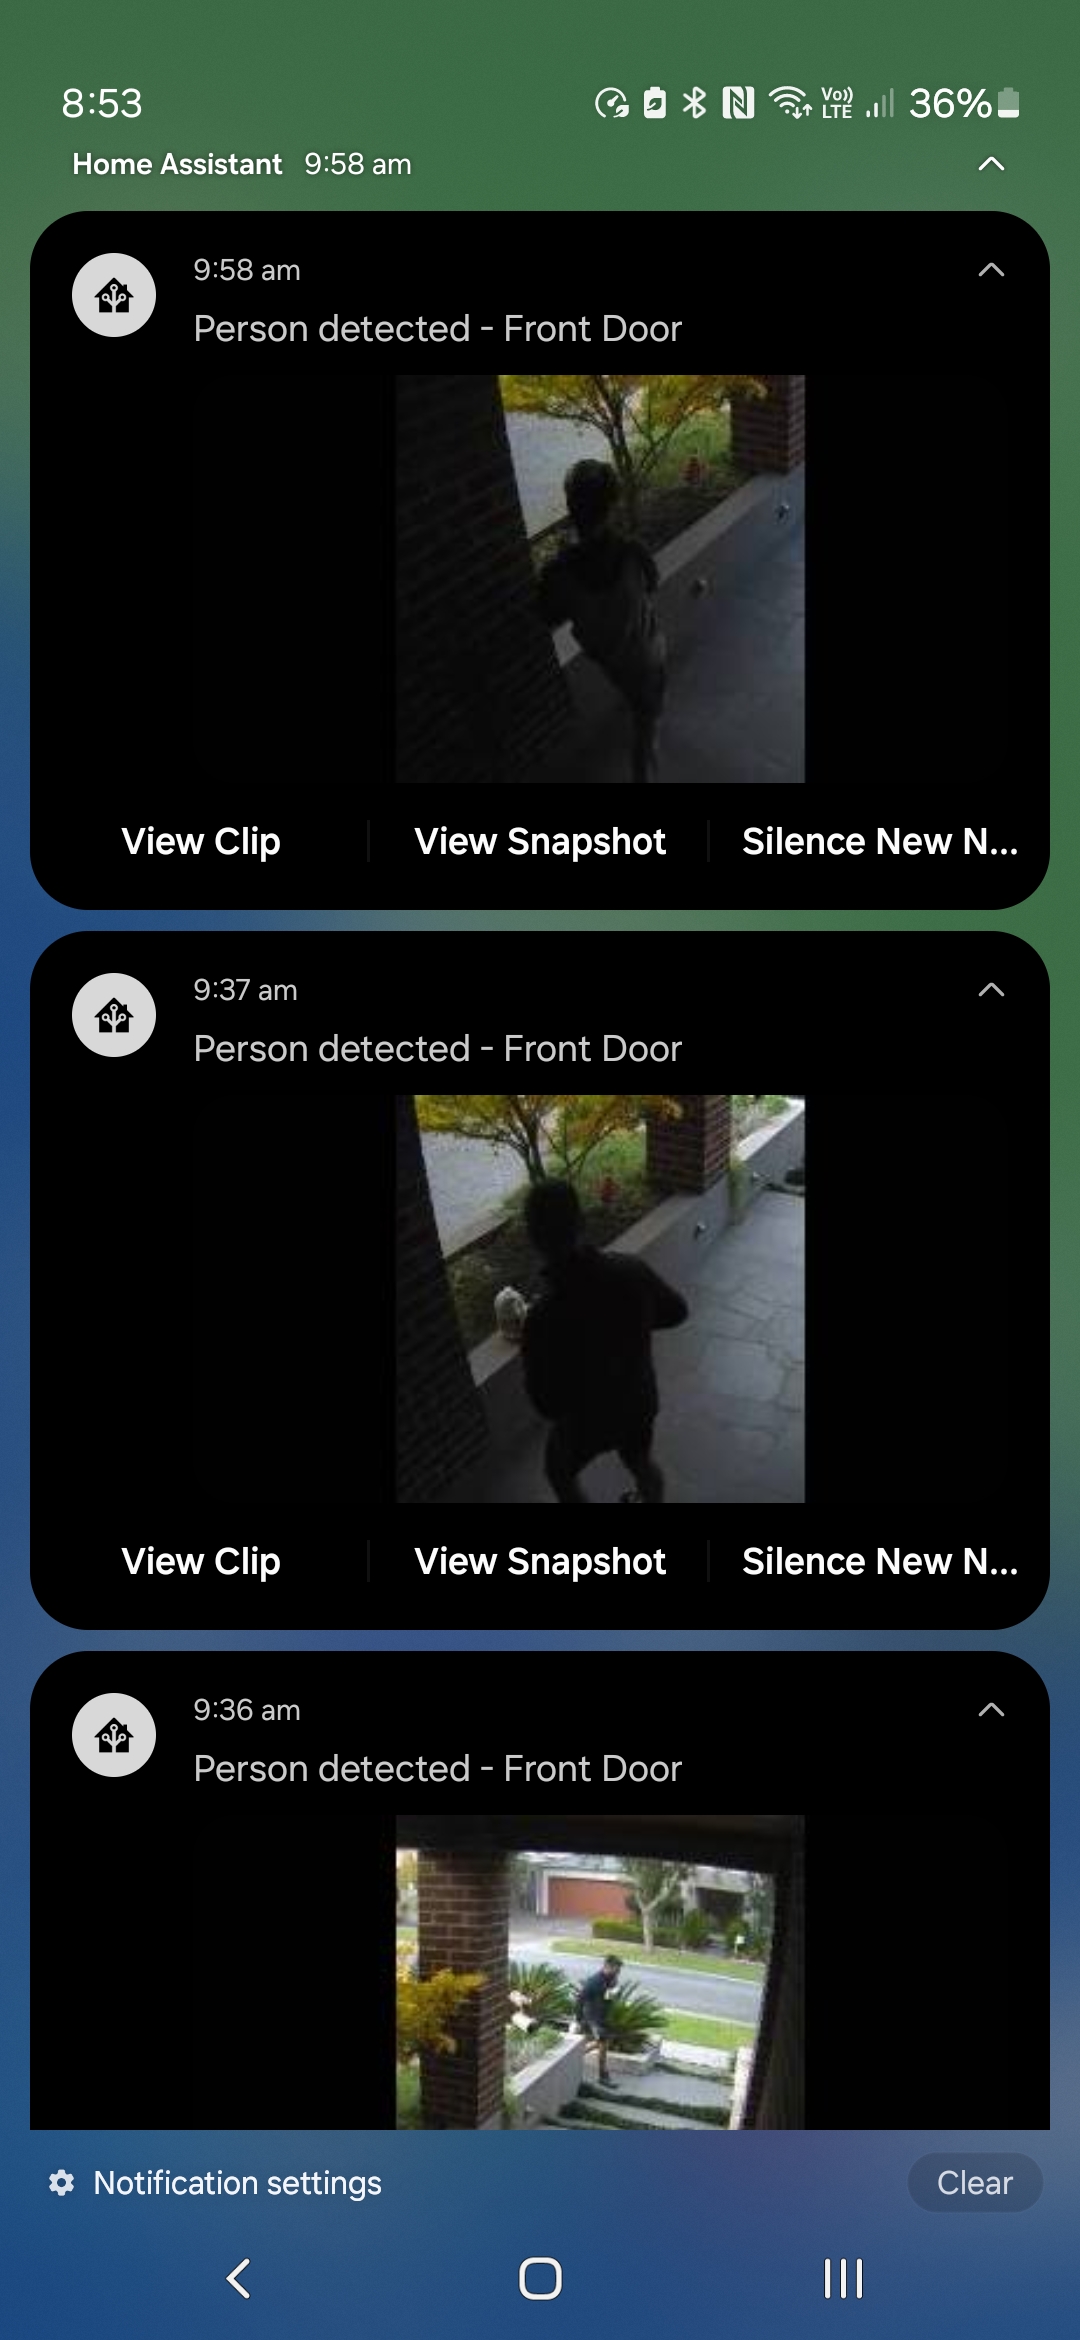
Configuration of Home Assistant Notifications
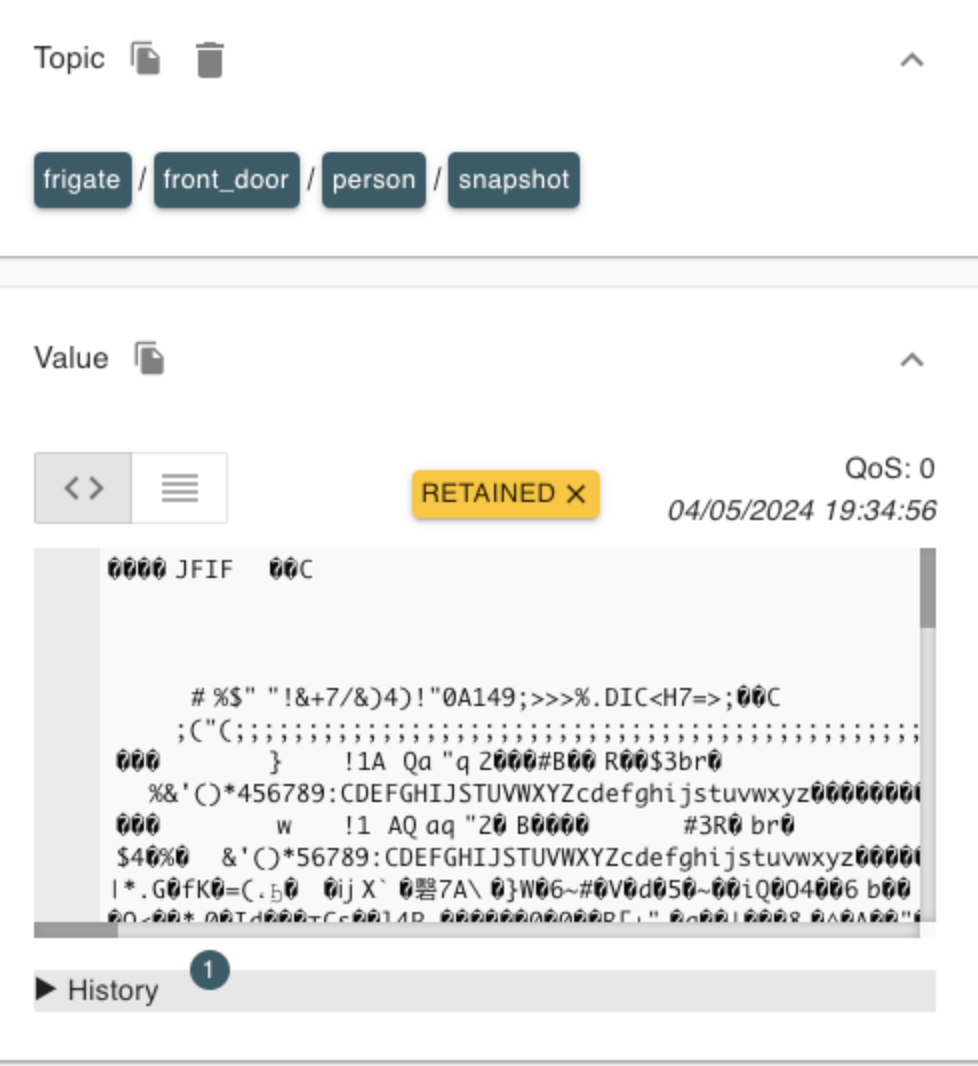
Frigate’s integration will not provide notifications of movement, this is accomplished via MQTT and a Home Assistant Automation. If we look at MQTT payloads we can see images are being streamed as payloads via MQTT. The automation will pick up this payload when triggered via a MQTT payload. The easiest way to implement this is via the Frigate Mobile Notifications Blueprint at https://community.home-assistant.io/t/frigate-mobile-app-notifications-2-0/559732


In order to get notifications we need to leverage MQTT. I am using MQTT Explorer (because I want to understand how it all works) and Frigate is pushing out a lot of data that you can use for various other automations, which is out of scope for this blog. These notifications will provide you that full circle notification from detection through to your phone / device. Remember this is MQTT and these messages can not only be consumed by Home Assistant but other systems that subscribe to these topics.
Summary
Move to to the next dimension of NVR’s by using local computer vision and edge computing vision using Frigate. Frigate’s is a step forward in removing false positives and this is a simple post you can follow to leverage a Google Coral TPU (Or Intel OpenVino) to provide that next generation of NVR to your location. I have found it just works, is it that much better than prior NVR’s I have used (debatable) but the integration and how it plays nicely with other systems makes it a worthy upgrade.

The Home Assistant integration over MQTT is the cherry on the cake. It’s running on a Raspberry Pi 5 and uses NFS storage, making it something that should bolt in to most environments.
Learn and be curious, follow along and let me know how you go.
Thanks
Shane Baldacchino
Hello,
I’m trying to setup Frigate in a RPi5 as well.
My camera is a Reolink Doorbell POE which I use a H.264 rtsp link to feed into Frigate.
My problem is that when I try to livestream from the Frigate web interface, it keeps loading and no image pops up.
I wonder if you had the same challenge.
Cheers.
Hey Dan,
That should work just fine. Have you tried the RTSP link in VLC or a similar application. It seems like to me the RTSP URL you are using is incorrect. I have had this problem before and it was either my RTSP credentials or the structure of the URI.
Hope this helps.
Hi Shane,
I thought the Pycoral Library had to be installed for the TPU to work, but based on this article, I guess not. I’ve installed Frigate on a Dell micro PC and had to back the Ubuntu install back to 20.4 to get the correct Python version. I guess it’s not necessary, though.
Indeed, its not. I just followed instructions from various websites. I just went through again, and no you dont. That said I am using a much newer Ubuntu version, so your milage my vary. Frigate runs in a container to ensure you have those old Python versions. I would recommend running a newer OS version if you can Joe.
Thanks
Shane
Shane,
Thanks for the info. I’ll redo mine and see how it goes.
Joe
Great Joe, reach out if you need a hand.
Redone and works great. Thanks for the help, Shane!
Great stuff Joe. Glad to have helped.
I followed a similar approach, good to see everything nicely put together! Respect!
For me this is also working great now but with one issue. It is related to the integration in HA. I use frigate card here and it is showing the camera just fine. Also, I can see all the events, timelines, can scroll through these but when I click on one, I just get to see a small video player that stays at 0:00 and stays black.
Any ideas?
Best guide on setting Frigate up on a Raspberry Pi. Thank you for the great information!
Hey Trev,
Apologies for the late reply. That comment is appreciated. Thanks for taking the time to pen it.
Shane