4 years ago I installed a SMA 6.0kW inverter (7.5kw of panels) and it’s been a reliable system to date, but with the installation of a whole house Fujitsu HVAC system (you can read about it here) and spurred on by the Australian Government’s Cheaper Home Batteries Program I decided to upgrade my solar PV array with more capacity and some storage.
After evaluating many options it came down two brands, Sungrow and Sigenergy but taking in to account my desire to have clean and aesthetic solution with no exposed conduits and the fact the inverter and battery stack are one the only choice was SigEnergy.
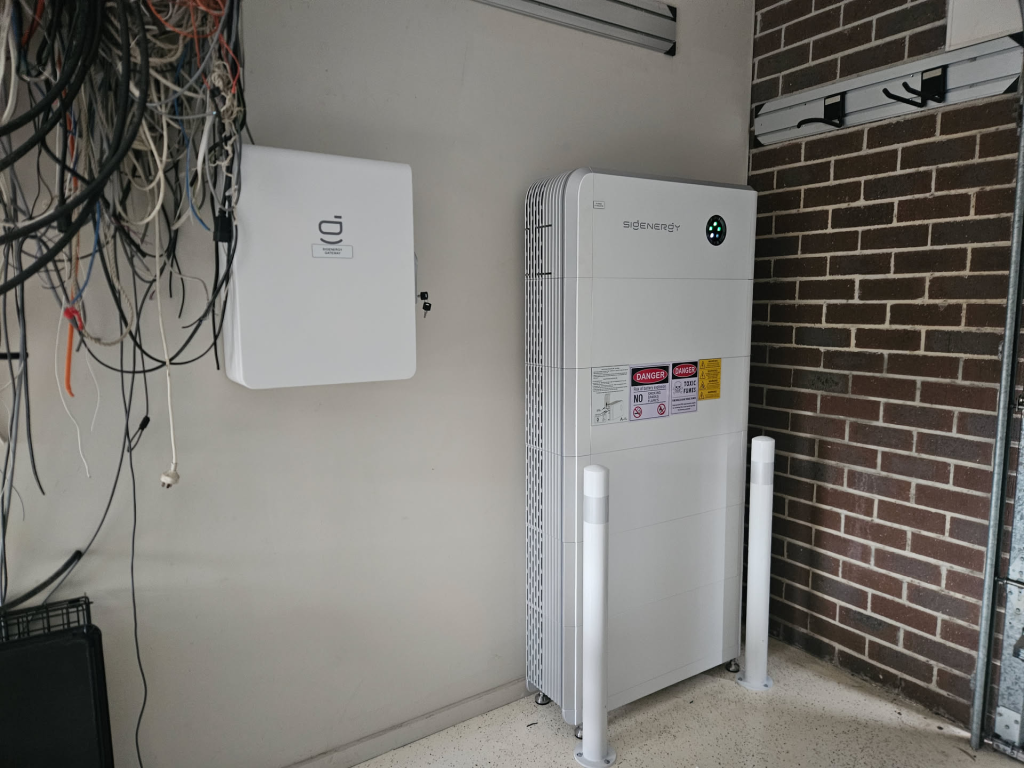
I ended up installing a SigEnergy SigenStor EC 10.0 SP system with 40KW of battery storage and increasing the generation on my roof to 14kw, along with every circuit being backed up.
The appeal was clear: integrated inverter, battery, and PV management in a single unit, with native support for ModBus and granular telemetry.
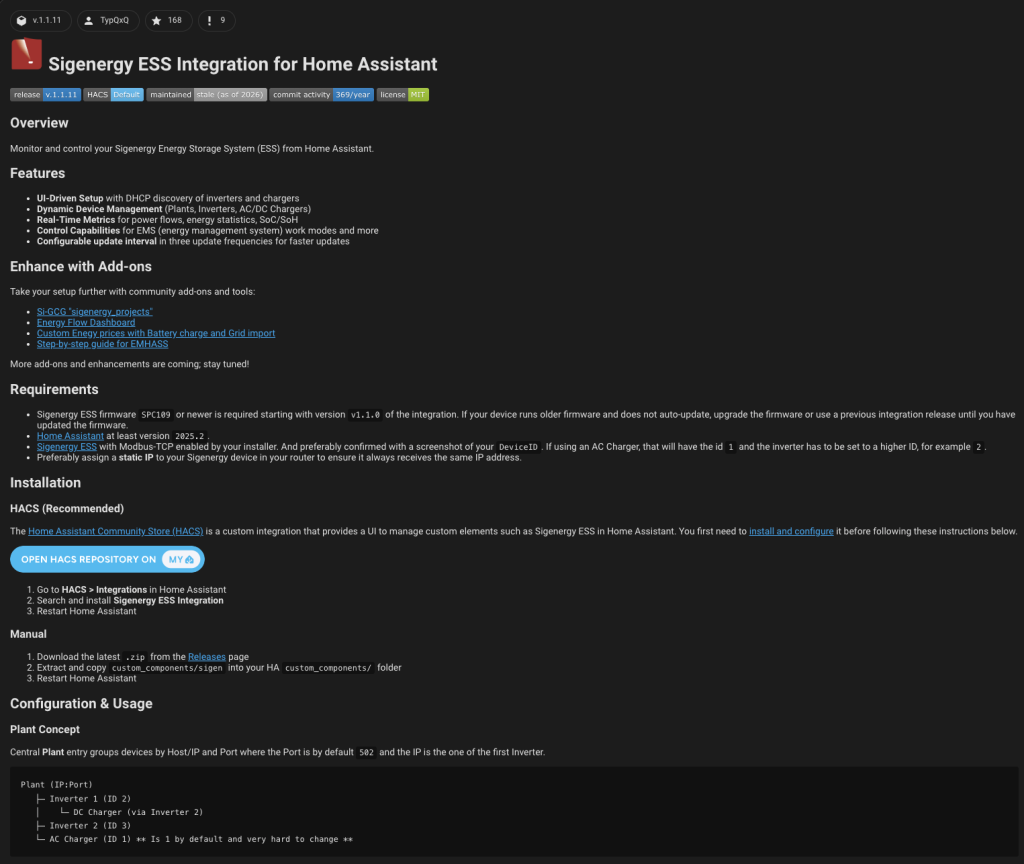
This post is not about my solar system but serves as a guide to illustrate how you can integrate SigEnergy SigenStor into Home Assistant using the Sigenergy ESS HACS plugin.
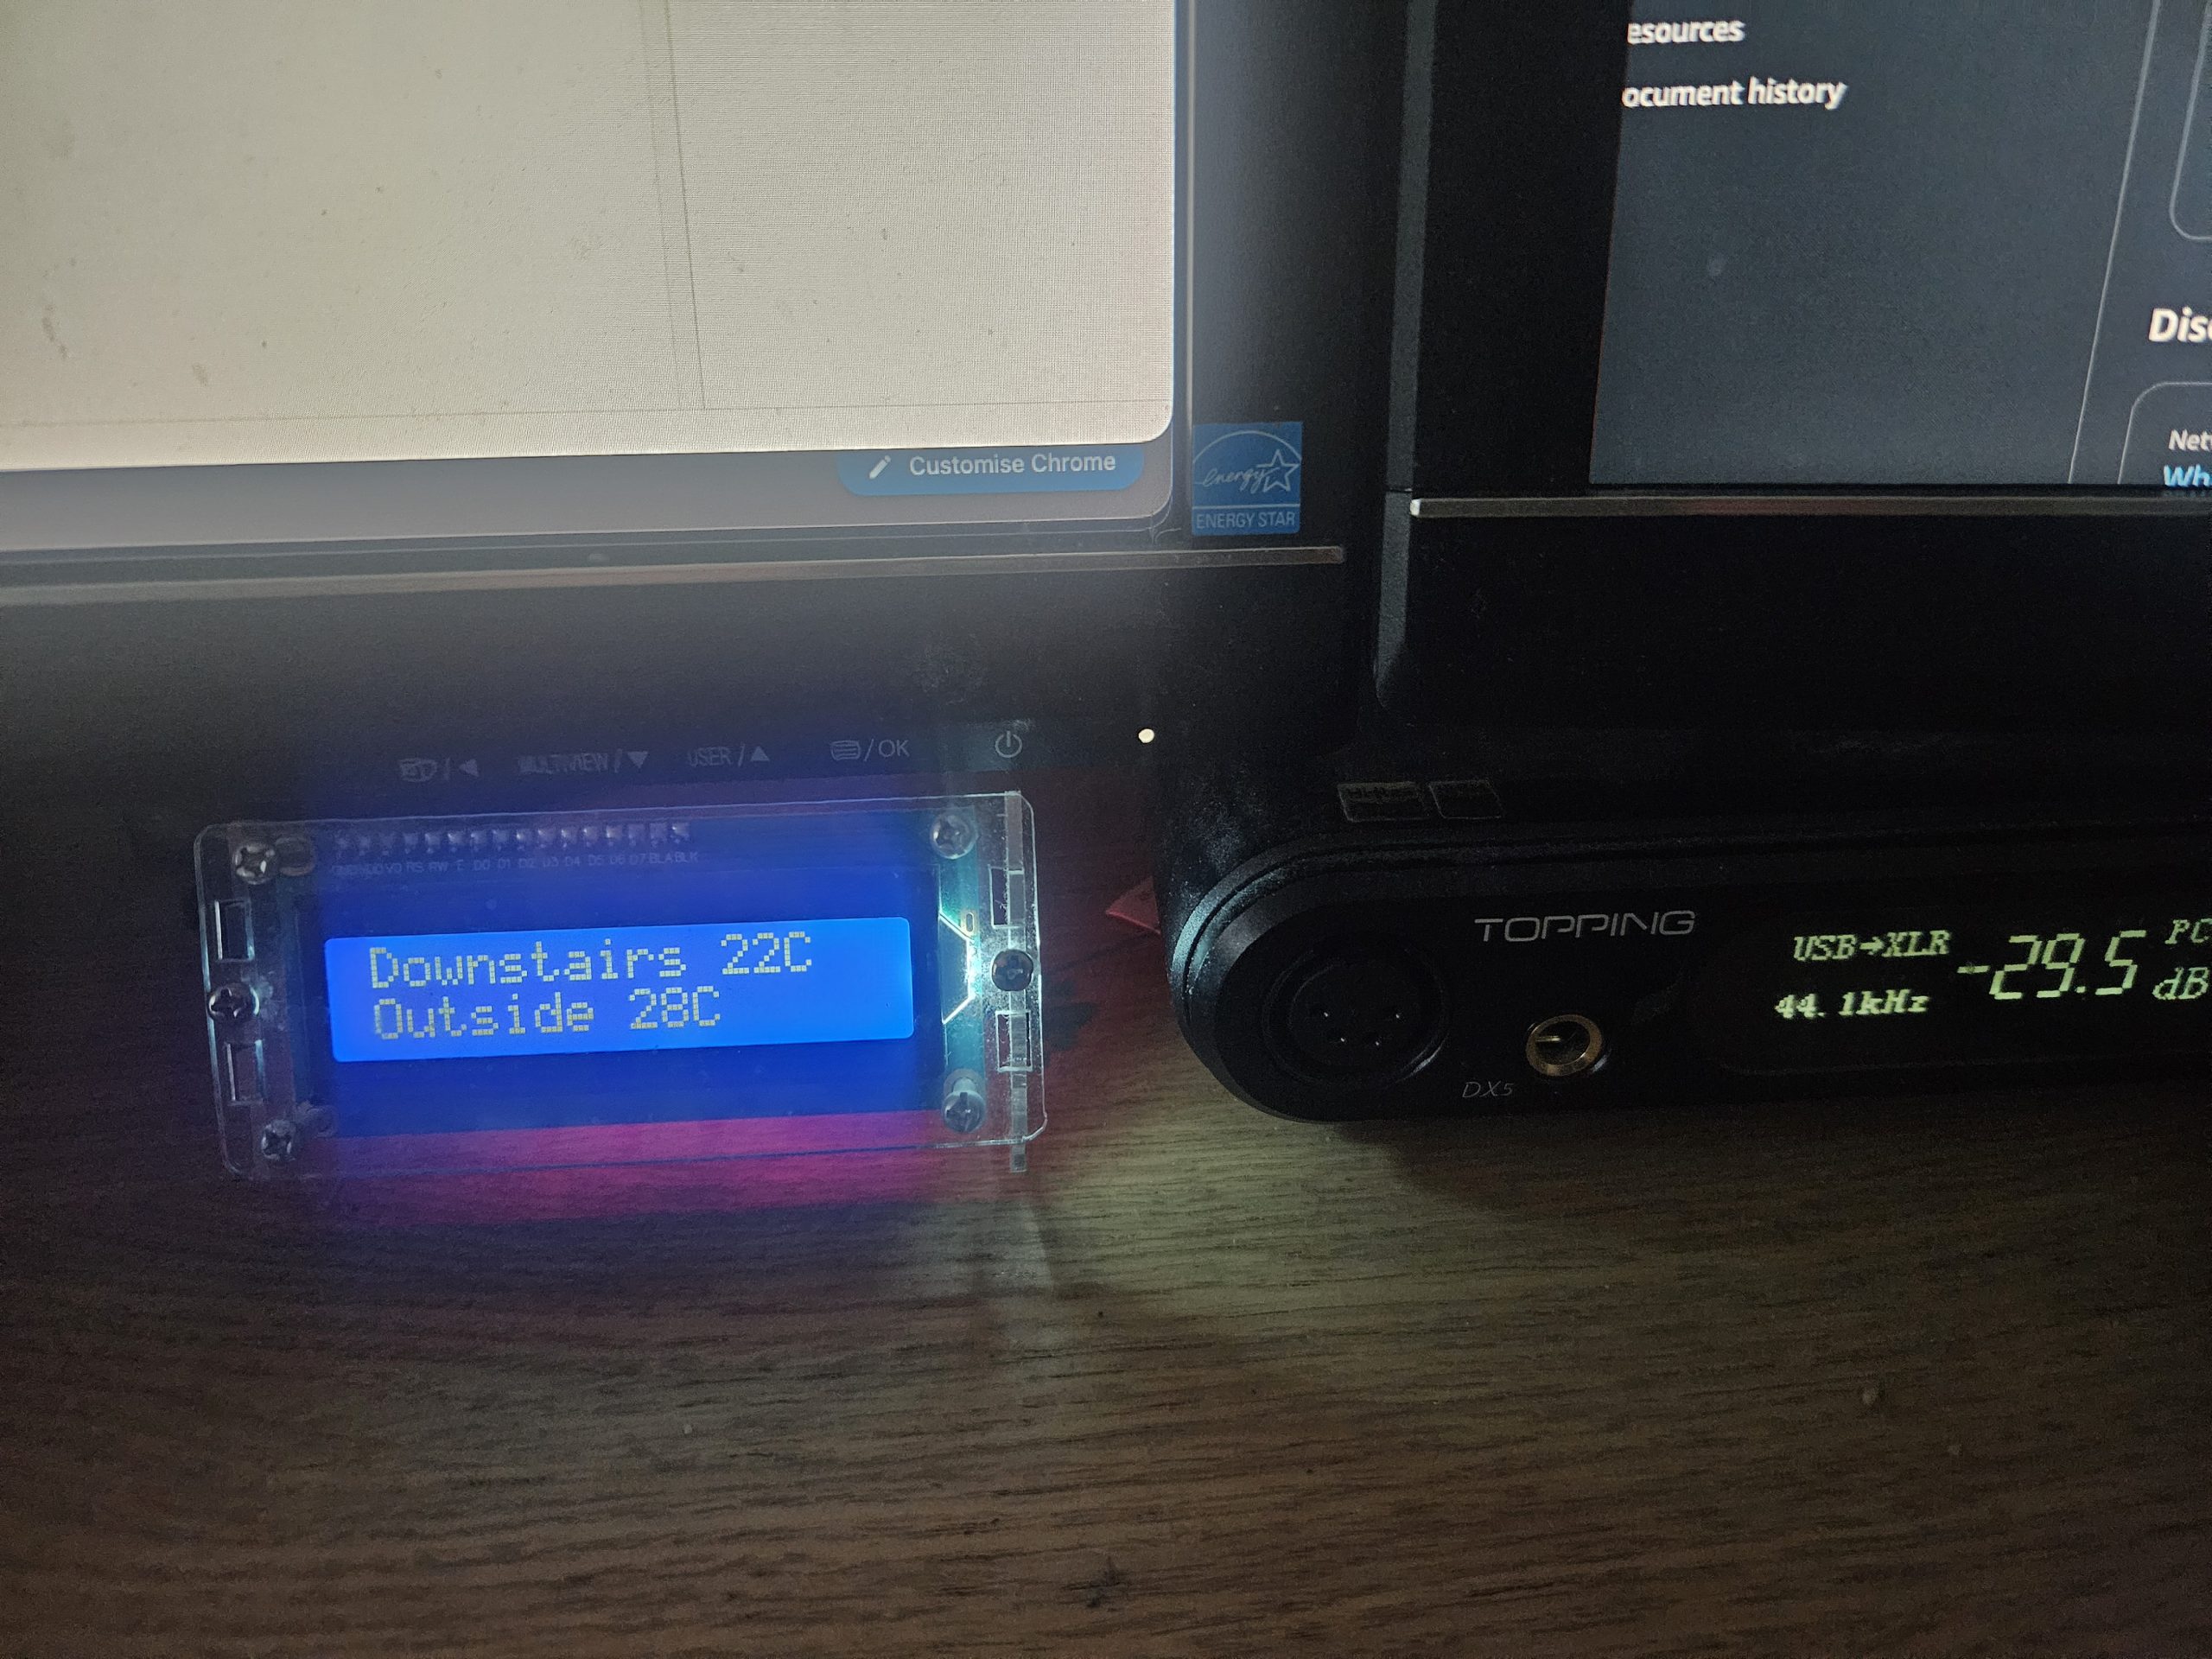
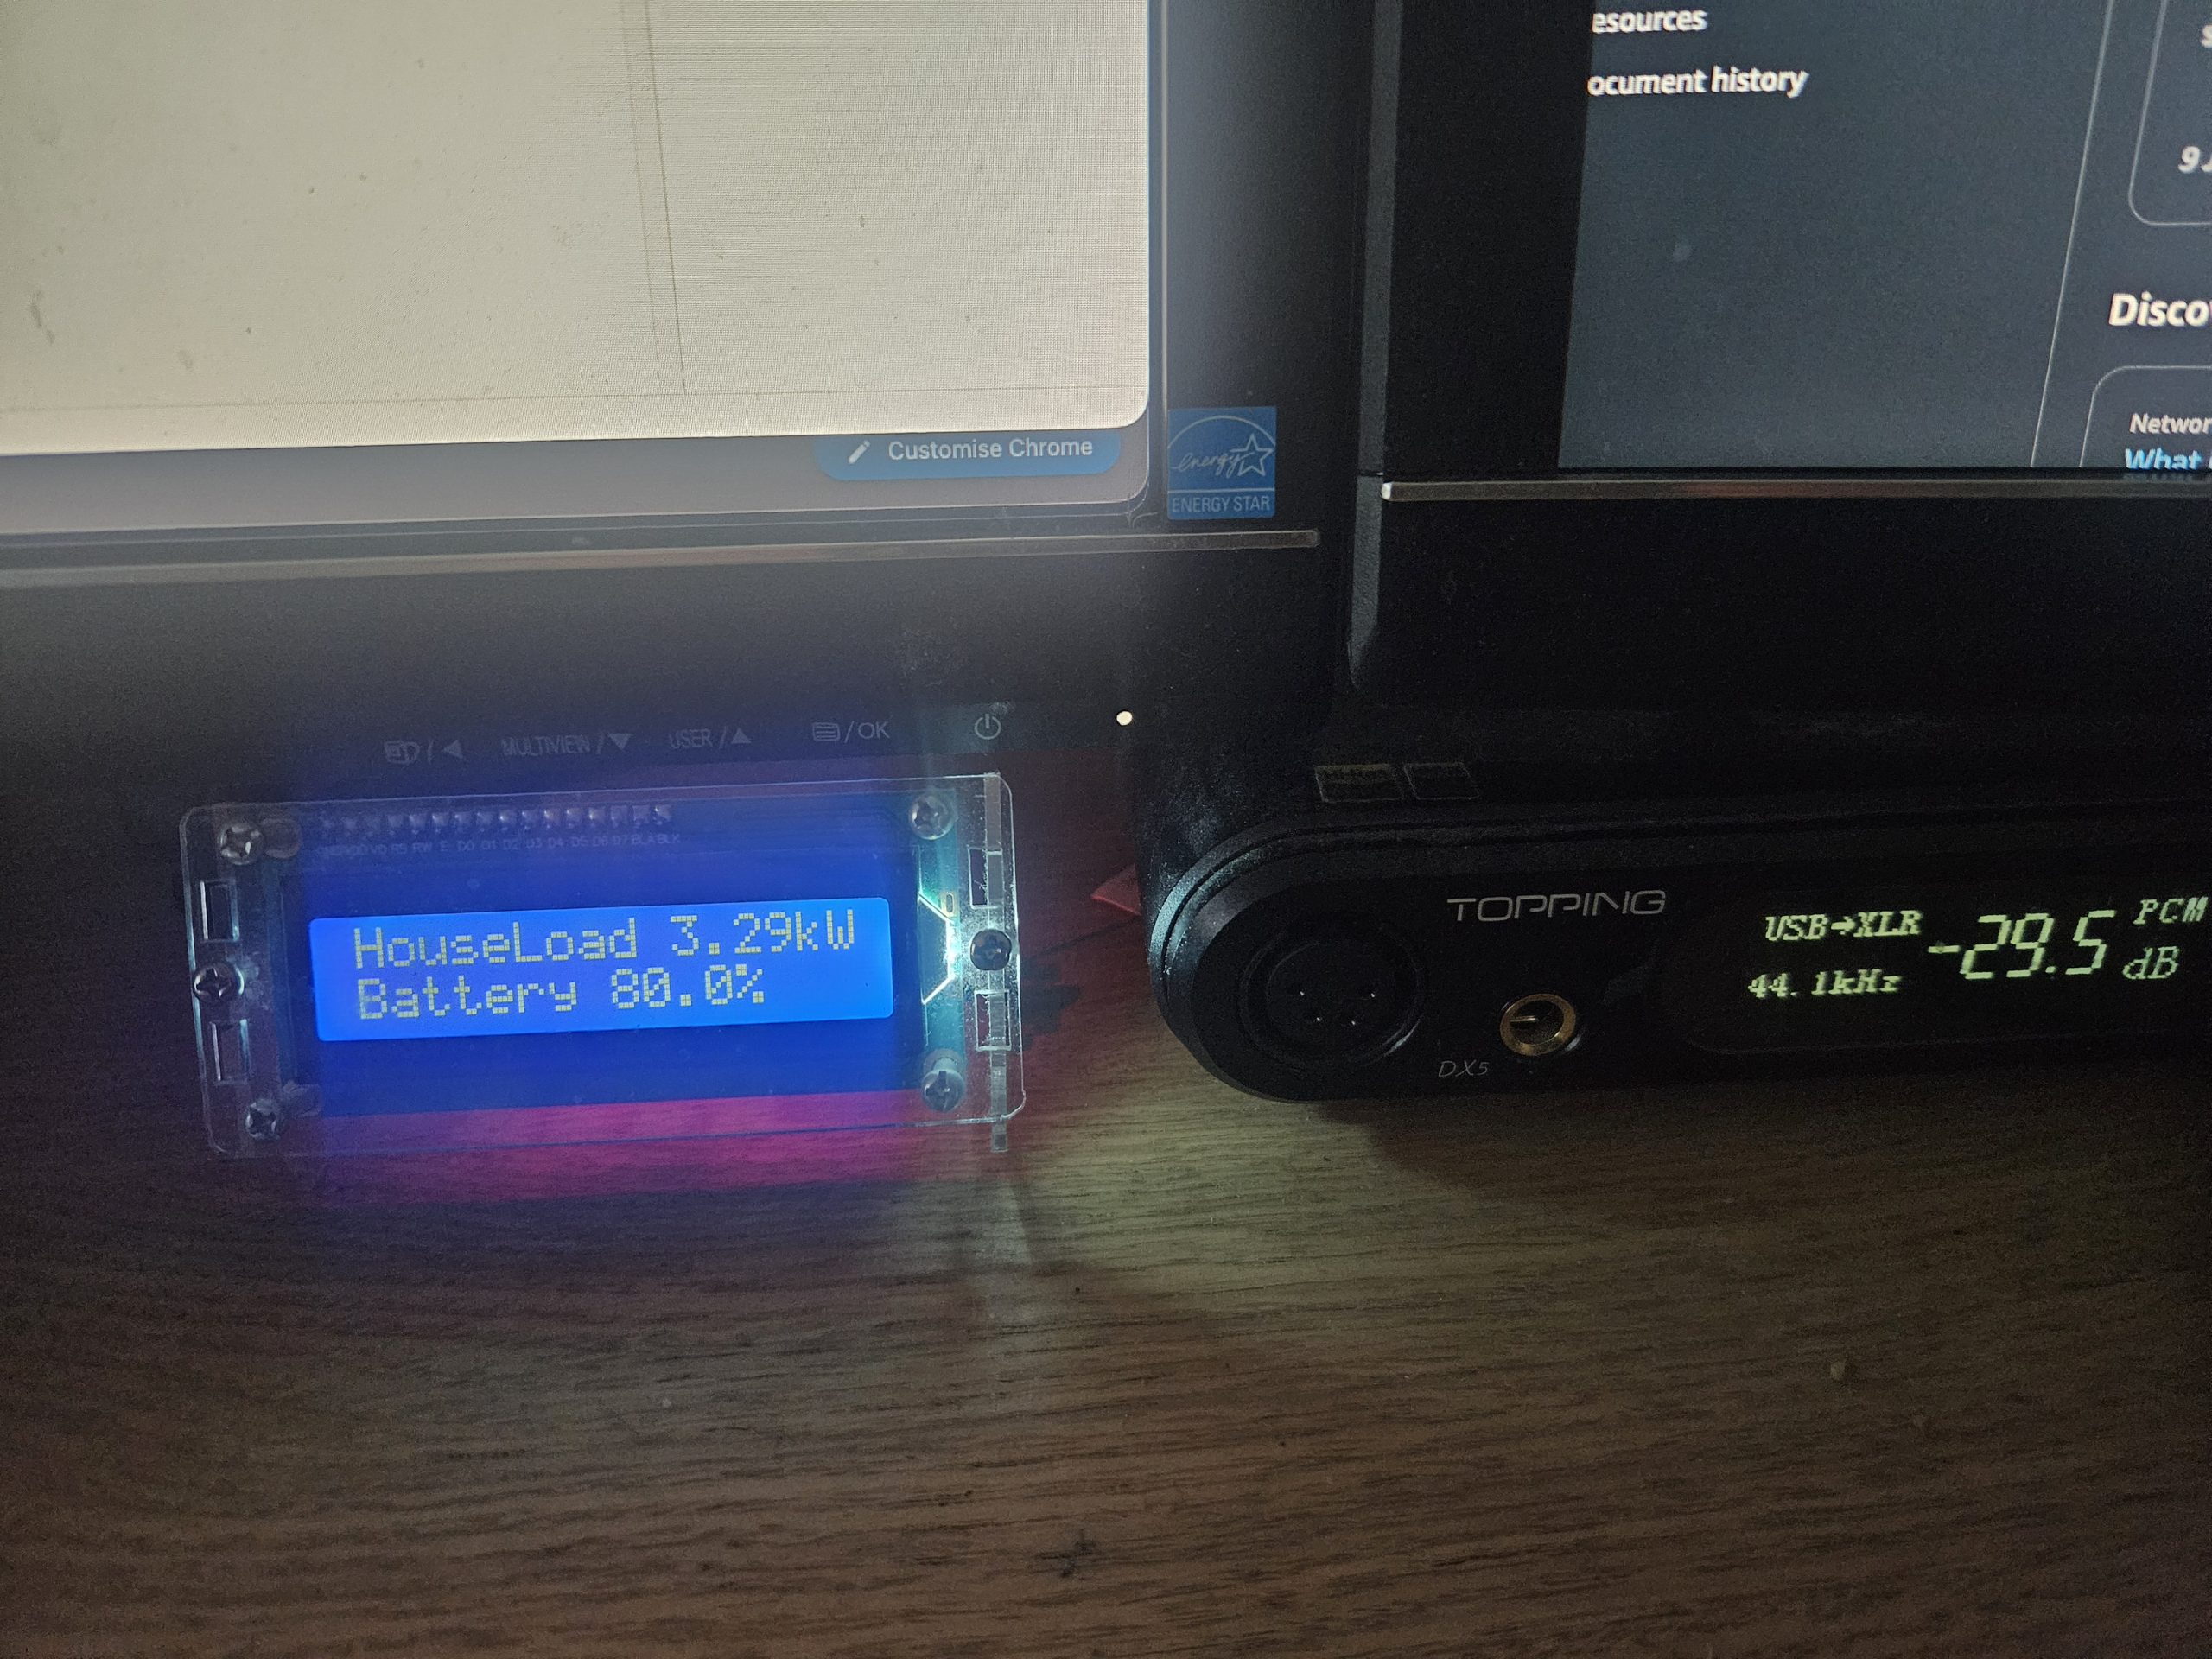
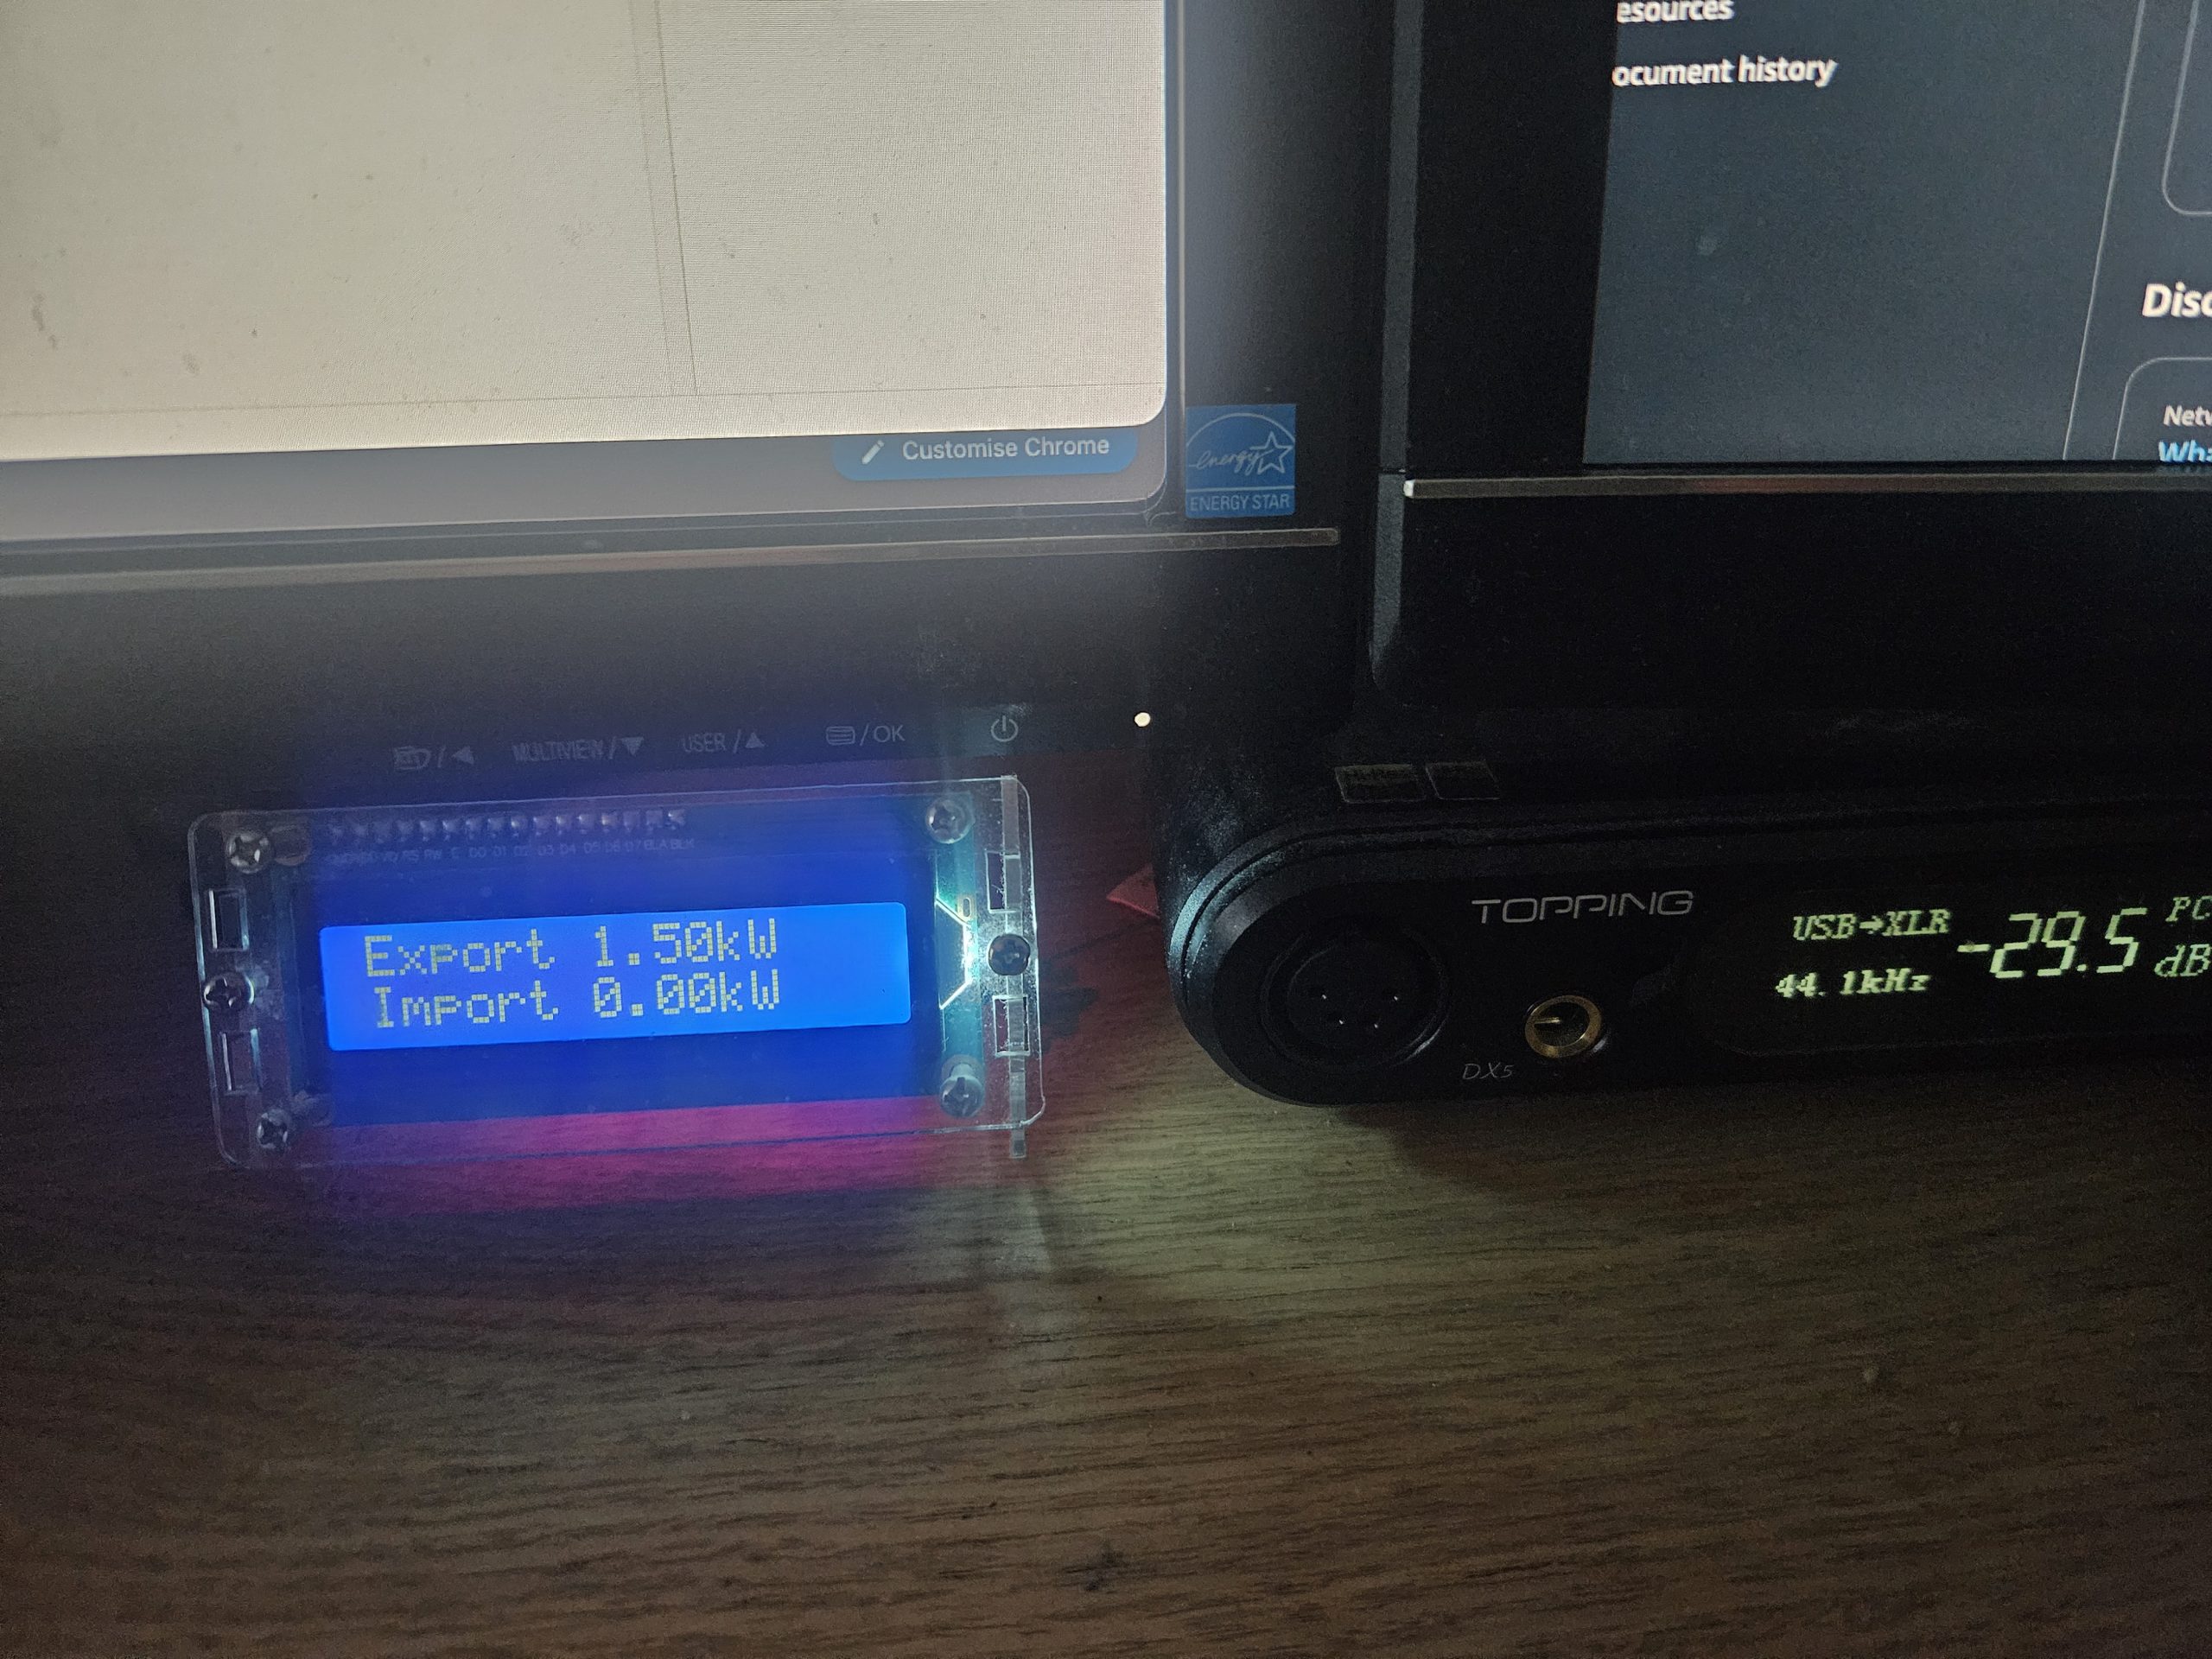
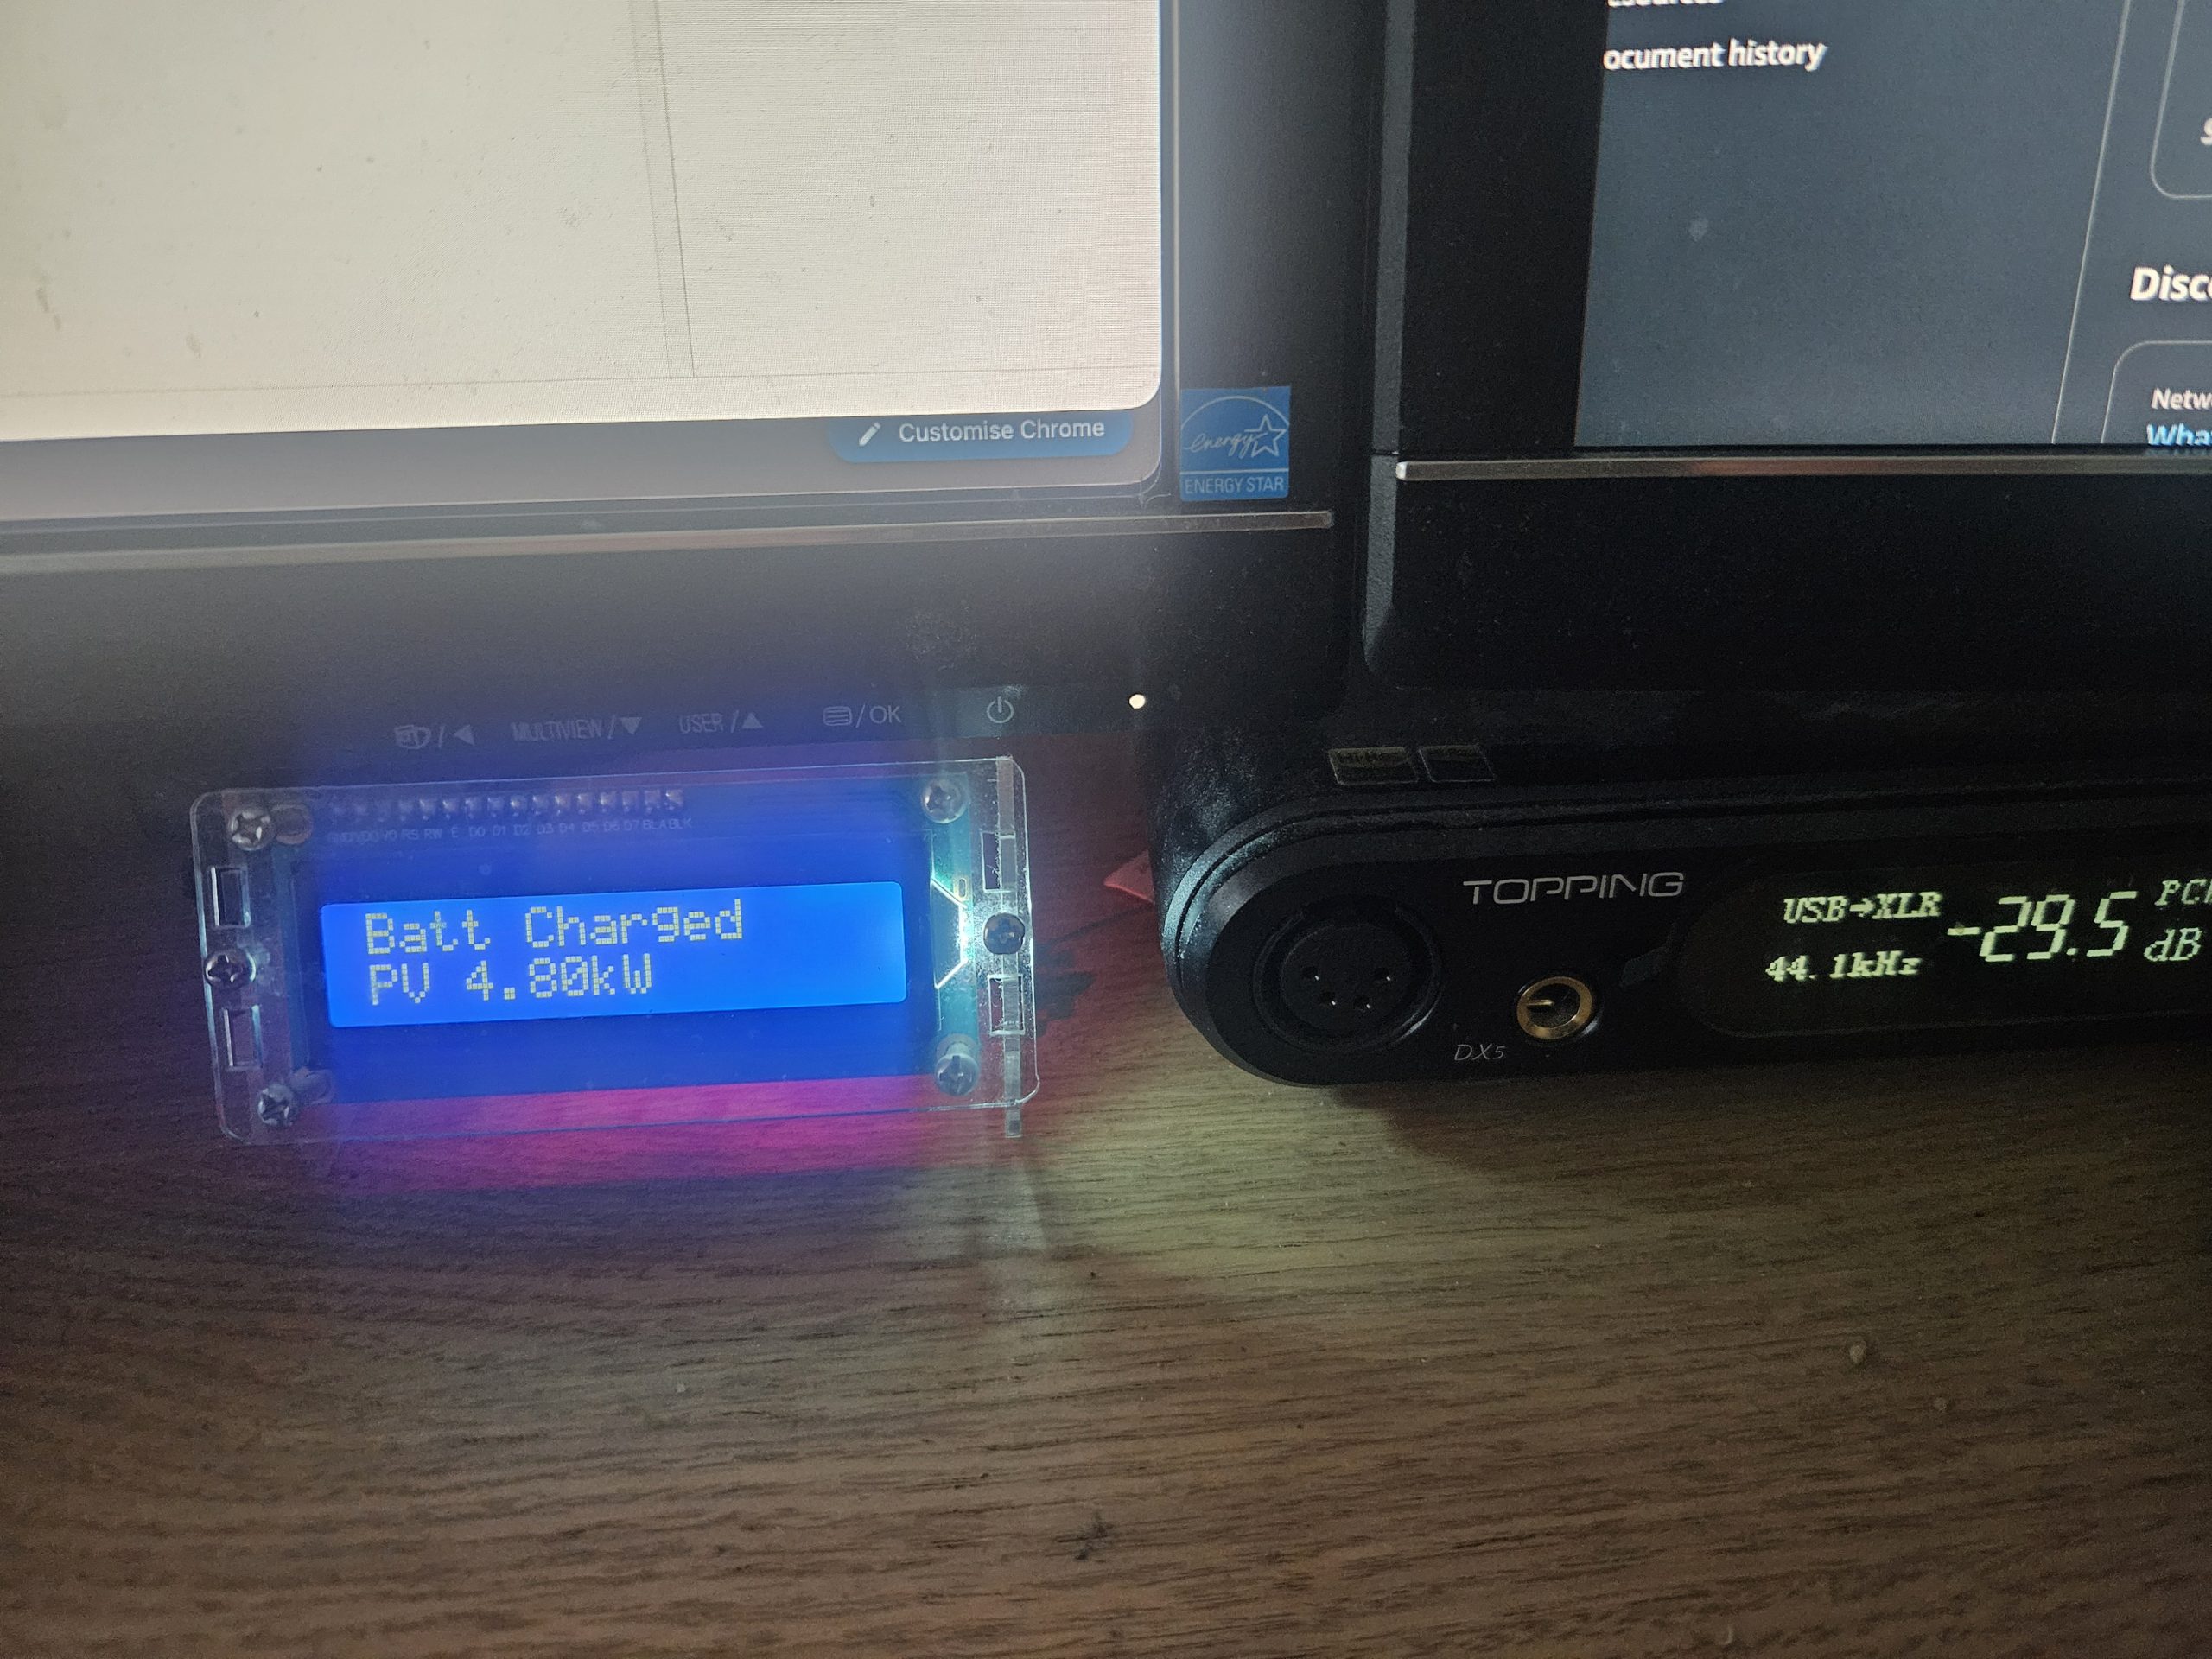
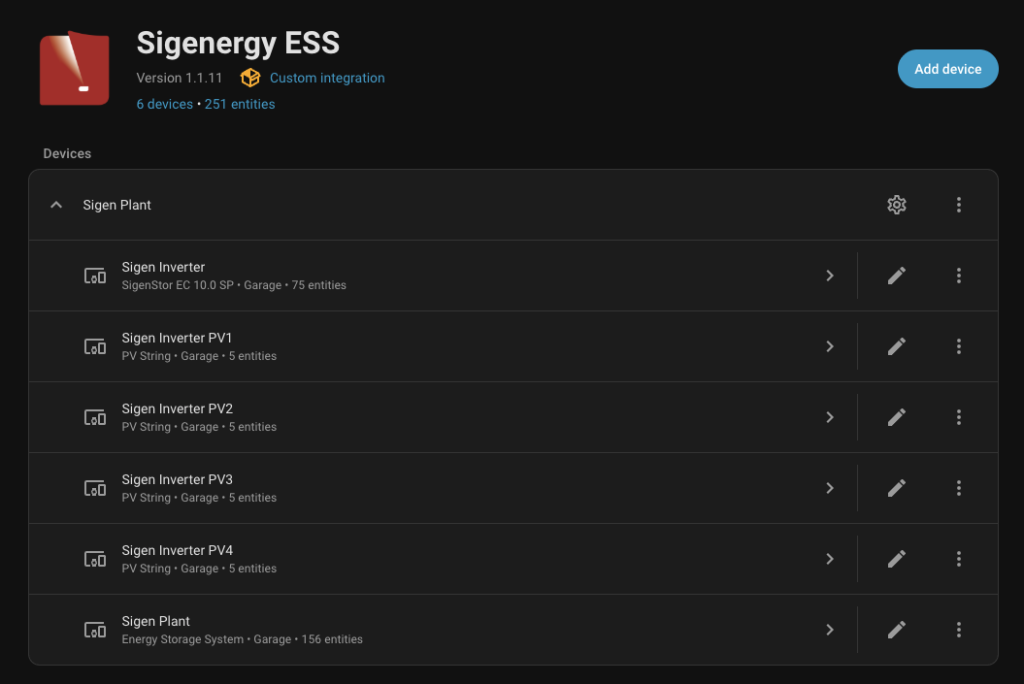
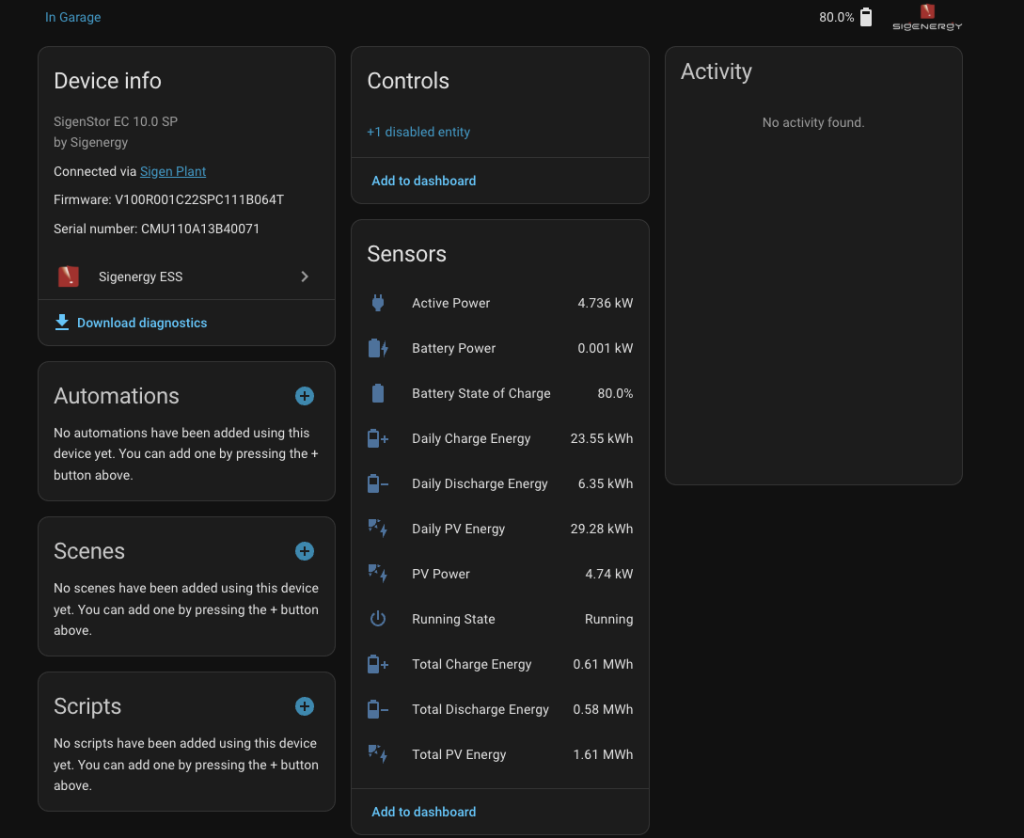
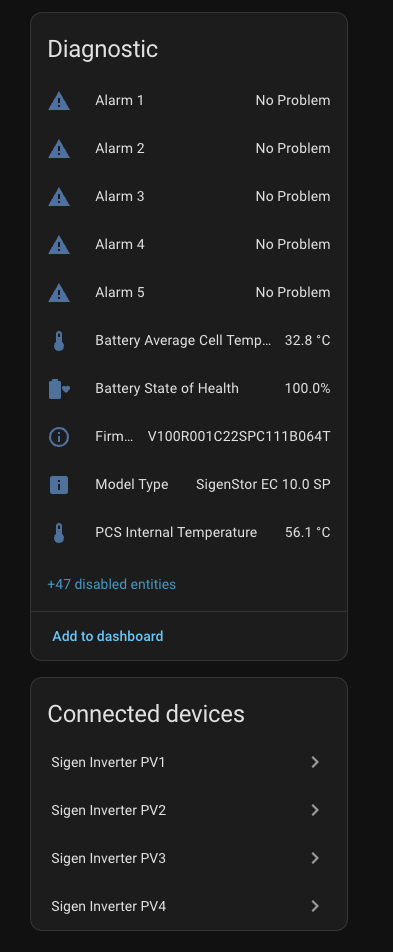
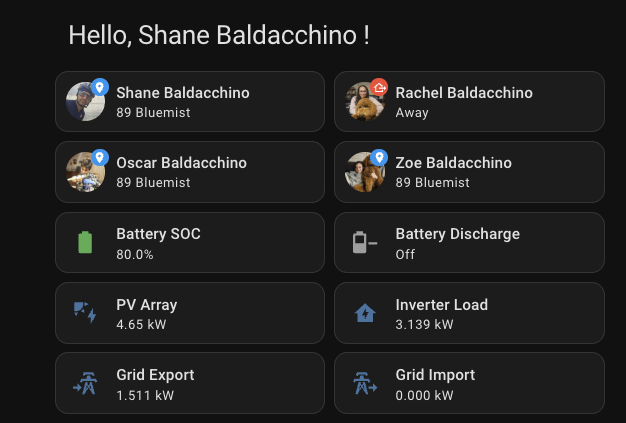
From here on you can leverage your systems 250+ entities for automation, dashboards, and energy monitoring. I actually have an Arduino on my desk with a LCD display that just rotates through metrics that matter to me via the use of HomeAssistant’s MQTTStateStream.
mqtt_statestream:
base_topic: homeassistant
include:
entities:
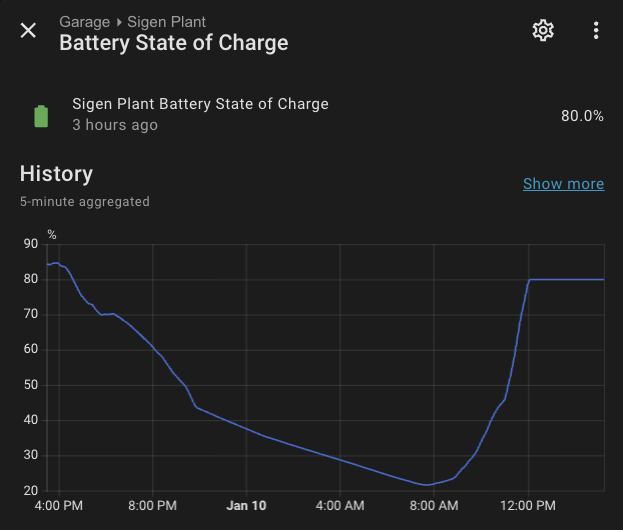
- sensor.sigen_plant_battery_state_of_charge
- sensor.sigen_inverter_pv_power
- binary_sensor.sigen_plant_battery_discharging
- binary_sensor.sigen_plant_battery_charging
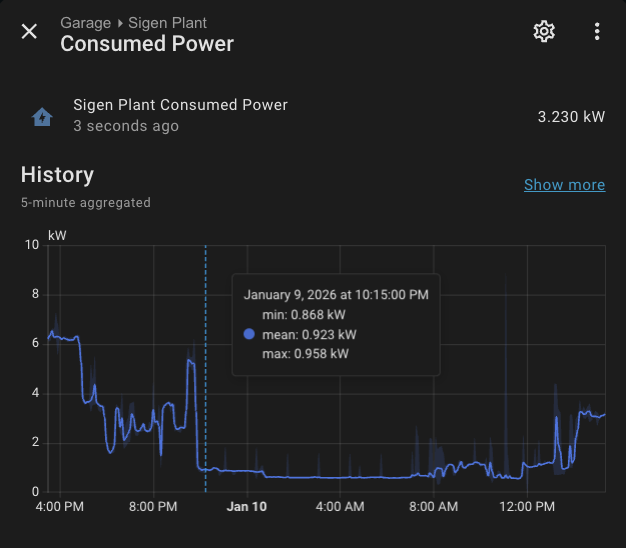
- sensor.sigen_plant_consumed_power
- sensor.sigen_plant_grid_export_power
- sensor.sigen_plant_grid_import_power
- sensor.downstairs
- sensor.outside
When you have data, what you can do is limited to your imagination.
SigEnergy SigenStor
If you found this post, then you probably already know what SigenStor is, it’s Sigenergy’s all-in-one energy storage system, module by design allowing you to use different inverters, different battery blocks to arrive at your desired system/ budget.
My systems is made up of:
- 40kw/h (5 x 8 KWh stacks)
- 10kw single phase inverter
- Four PV strings (14kw of panels)
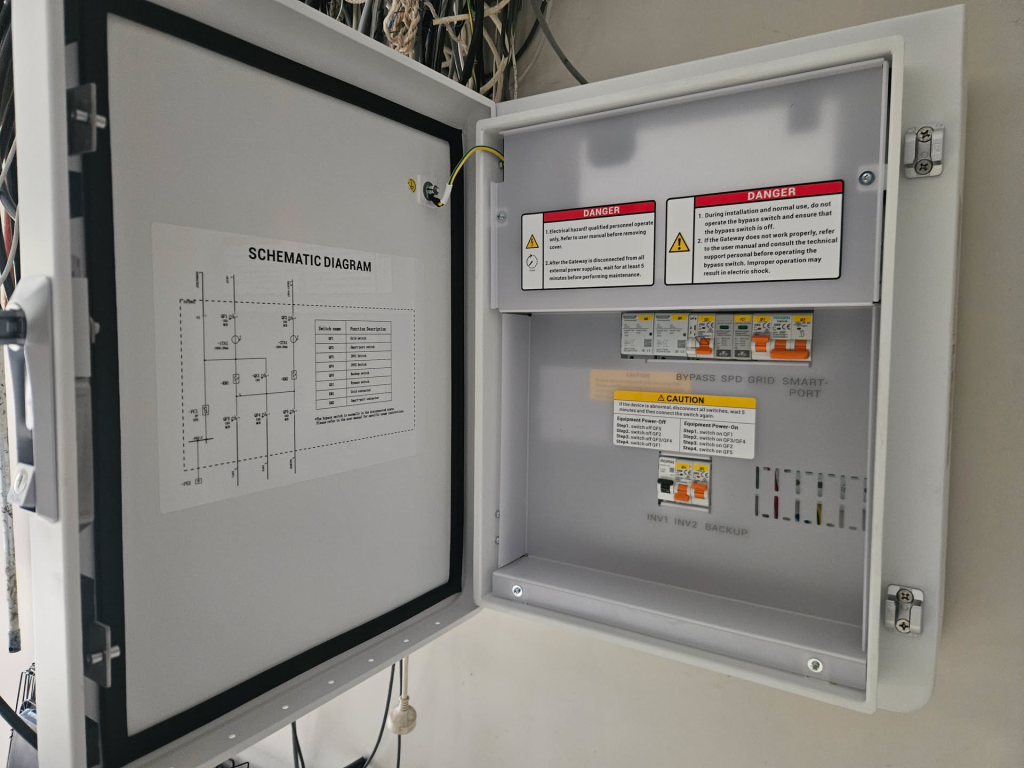
It replaced my SMA setup and and not only has give me more generation and storage it is consolidating the inverter and battery in to one, a very modular approach. The system is installed in my garage and connected to Home Assistant via local ModBus TCP and over Ethernet with Wifi as a backup (I like this touch of being able to have multiple connections active).
Modbus
This is my first foray in to Modbus and I always like to understand the basics behind what I am working with.
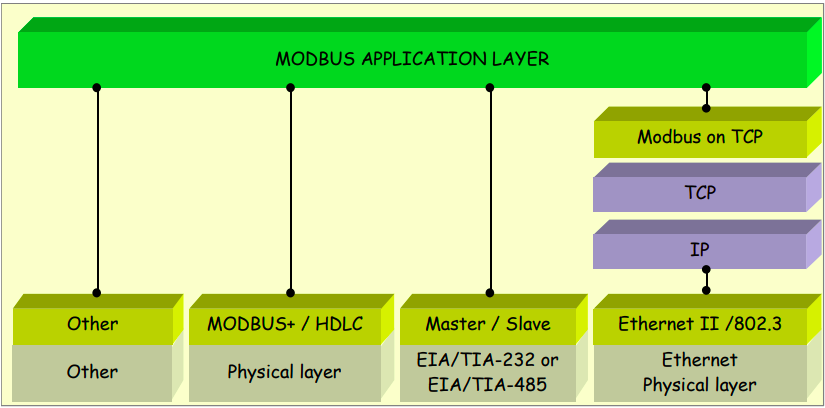
Modbus is a client/server data communications protocol in the application layer (Layer 7). It was originally designed for use with PLCs but has become a de facto standard communication protocol for communication between industrial electronic devices in a wide range of buses and networks.
Whilst MQTT I would argue is becoming more and more popular in the industrial space, Modbus has been a main stay of industrial systems. Before I even knew what MQTT was, I knew about Modbus.
Modbus is popular in industrial environments because it is openly published and royalty-free.
On the tech front Modbus uses serial communication lines, Ethernet, or the TCP/IP as a transport layer. Modbus supports communication to and from multiple devices connected to the same cable or Ethernet network.
In this context, Modbus allows Home Assistant to query the inverter, battery, and PV strings for real-time data. The SigEnergy implementation uses ModBus TCP over LAN, with no cloud dependency, which I like.

Step 1 – Enabling Modbus On SigEnergy
To enable ModBus you need to be more than an end user. This is a show stopper and given Modbus atleast via this plugin has no ability to drive configuration I wish this was not tied in to elevated permissions/
Either ask your installer to do this or gain installer level permissions. Enabling ModBus can be done in the Sigenergy mobile phone application or via the Sigenergy Web Portal.
Below are instructions for the mobile application, they are similar for the Sigenergy Web Portal. Just note with the webportal, you will see the region in the top right hand corner. Select the region to which your device is associated to. The link above is for the Australian portal.
For the mobile phone version open the SigEnergy
- Open the Sigenergy mobile application.
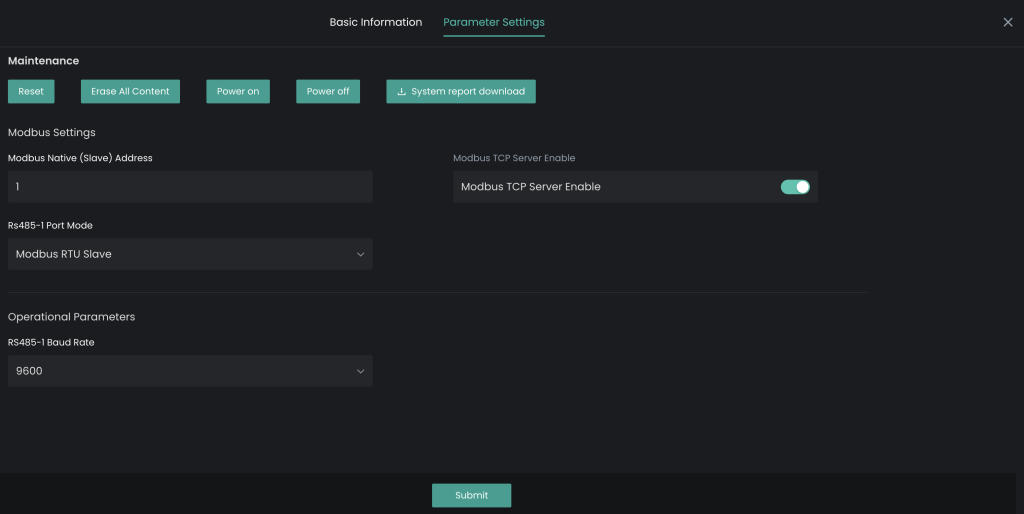
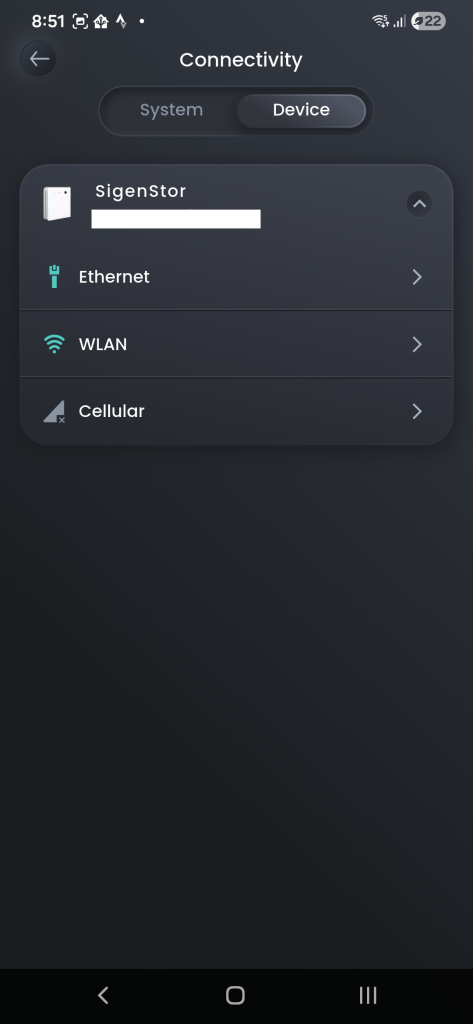
- Navigate to System > Devices > SigenStor > Operation > Parameter Settings > ModBus Settings.
- Enable Local ModBus TCP.
- Note the IP address of your Inverter
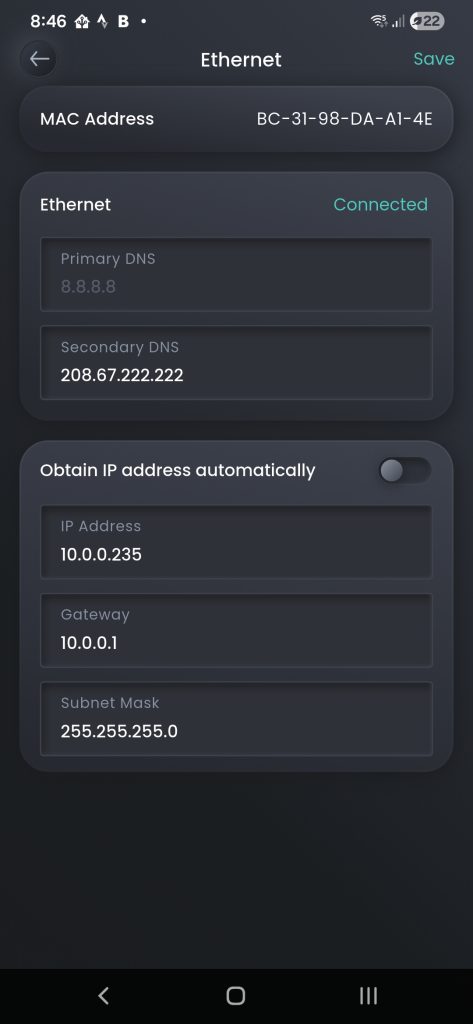
Validate this is working. You should now be able to telnet to your device IP on TCP 502. In my example I have a static IP address of 10.0.0.235
baldacchino_admin@Shanes-MacBook-Pro ~ % telnet 10.0.0.235 502
Trying 10.0.0.235...
Connected to 10.0.0.235.
Escape character is '^]'.
Step 2 – Home Assistant Integration
You have validated Modbus is enabled and working. If you can not telnet to your device on TCP 502, stop and debug this. From here it is just like adding in most other plugins.
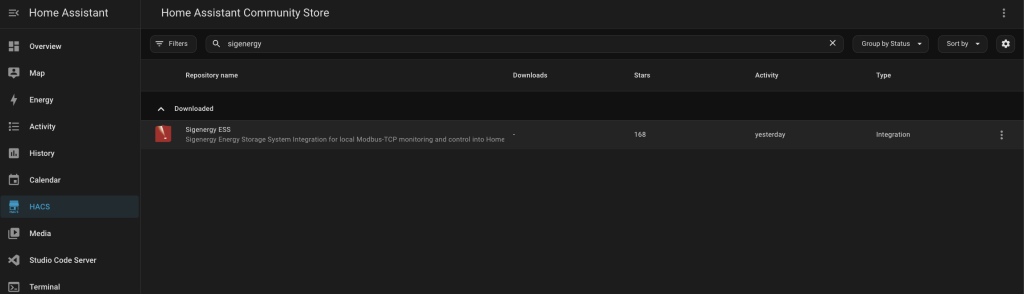
In HACS search for ‘Sigenergy ESS’ and install the integration. Once installed enter in the IP address of your inverter. From here all of your entities will be visible. Whilst there is a base number of entities, the number will vary based on the number of battery modules and PV strings you have connected.
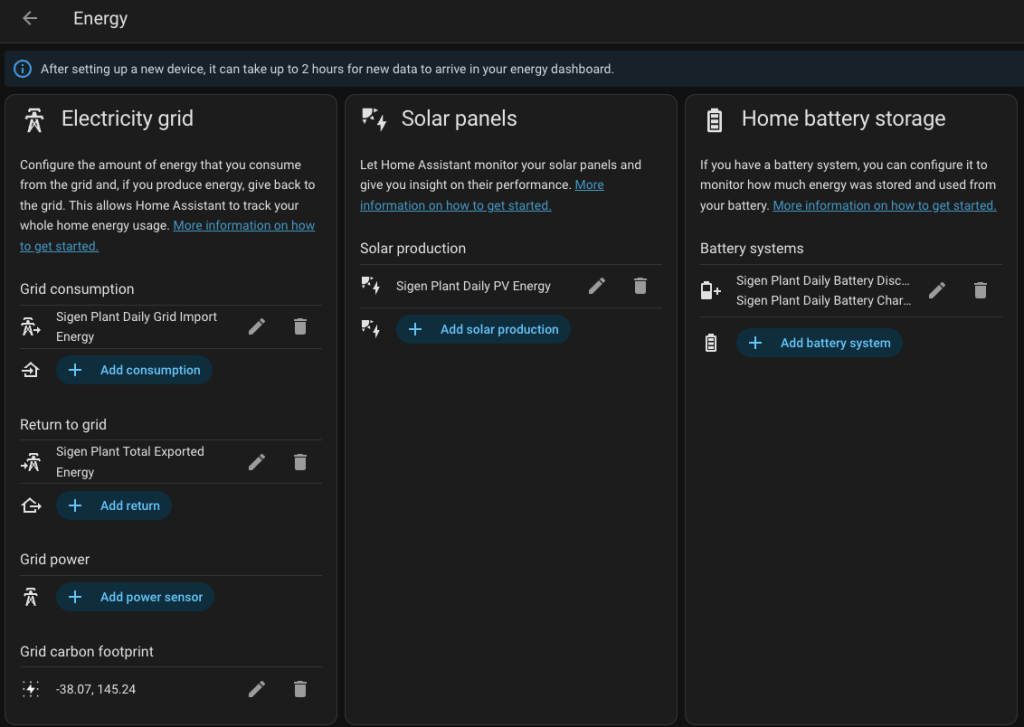
Step 3 – Home Assistant Energy Dashboard
Once you have your data flowing in to Home Assistant, from here you can configure your energy dashboard.
The entities below are what I am using, there are multiple that will derive the same outcome.
- Grid Consumption:
sensor.daily_grid_import_energy - Grid Return:
sensor.daily_grid_export_energy - Solar Production:
sensor.daily_pv_energy - Battery Charge/Discharge:
sensor.daily_battery_charge_energy,sensor.daily_battery_discharge_energy
On a side note I have been a bit lazy on this front, whilst Home Assistant can have an entity to track the current price I have yet to do the required, hence when I charge from the grid (11am –> 2pm is free with my retail service provider) it is classed as a cost.

Step 4 – Lovelace Dashboard & Automations
With the system configured you can use these entities for either dashboards of automation. At this stage I dont have automations in place but am thinking about it. Depending on the size of your battery and the loads you are powering you may choose to further optimise.
With my 40kw battery I am finding unless my HVAC is being used in anger for hours I can in almost all cases last a night. How ever I am most likely going to stop my lighting being turned on by default after sunset (135 watt load for 2 hours) if the inverter load is > 3000 watts. These are just entities so use them like you would with any other entity in Home Assistant.

Summary
This is pretty simple task, integrating your SigEnergy SigenStor in to Home Assistant is a pretty straight forward job, assuming you have the right level of permissions. We learnt about Modbus, leveraged a HACS plugin and leveraged our entities for both LoveLace and the Energy Dashboard.
It is now January 2026 and I have yet to intentionally pull from the grid. If you have a SigEnergy system, connect it to Home Assistant and leverage the entities in your event driven house.
Thanks
Shane Baldacchino
How to tell if the modbus tcp port has been enabled?
I think your instruction “Navigate to System > Devices > SigenStor > Operation ”
fails – ‘Operation’ is not presented?
Also, telnet fails,
telnet: connect to address : Connection refused
Also, to find IP of stor
> nmap -Pn
Starting Nmap 7.92 ( https://nmap.org ) at 2026-02-11 15:31 GMT
Nmap scan report for fc42 ()
Host is up (0.00013s latency).
Not shown: 998 closed tcp ports (conn-refused)
PORT STATE SERVICE
139/tcp open netbios-ssn
445/tcp open microsoft-ds
I think this is as far as I can get till the modbus is open.
Thanks for your info
Modbus does not look to be enabled but also your nmap, looks to be running against your local machine. Do you have your SigEnergy IP?
Netbios & Microsoft DS is not going to be running on your SigEnergy (its Linux based).
You need to extract the IP address of your unit.
thanks for your help. I knew what questions to ask my installer and got everything up and going very quickly.
I did find that for Home assistant this is a bit out dated as the energy pdashboard has changed a lot. and also the integration now has a plant device which seems to be global for all your batteries and solar panels so I used the entities off the plant and not the inverter.
Hey Gordon,
Yeah it may be a tad bit out of date. The plant is what I use to draw a lot of data from. There are a lot of entities and I just pick and choose what makes sense for my needs.
Glad it helped.