This is an article I have been meaning to write for some time. I guess I haven’t as this sensor has been something that has just worked out of the box and hasn’t skipped a beat in almost 5 years.
I use OpenSprinkler to drive my irrigation and I will soon share how I integrate with it in a future article. The 101 overview is, OpenSprinkler is a commercial irrigation controller based on an Arduino (ESP32) platform. It is controllable by a web-interface or a HTTP based API.
It is really good and I think I would rate it an 8/10, its the best controller on the market for the modern age. It is stand-alone has rich integration but there are limitations with a closed platform.
Why Detect Rainfall?
The biggest problem with OpenSprinkler is that it has no context of how much rain has fallen over a given period of time. If we receive 50mm of rain yesterday and its sunny today do we need to irrigate?
I would say no, but OpenSprinkler has other ideas.
Here in lies the problem and hence why I utilise a Hyrdeon RG-11 in my house.
The task this sensor performs is to measure rain-fall which is then feed in to the PLC, which manipulates OpenSprinkler via its REST API, the whole process looks something like this
Hydreon RG11 –> PLC (HomeVision Pro) Input Port –> PLC Logic –> OpenSprinkler
You can buy cheaper sensors but the reason why I bought the Hydreon RG-11 is simple.
Reliability.
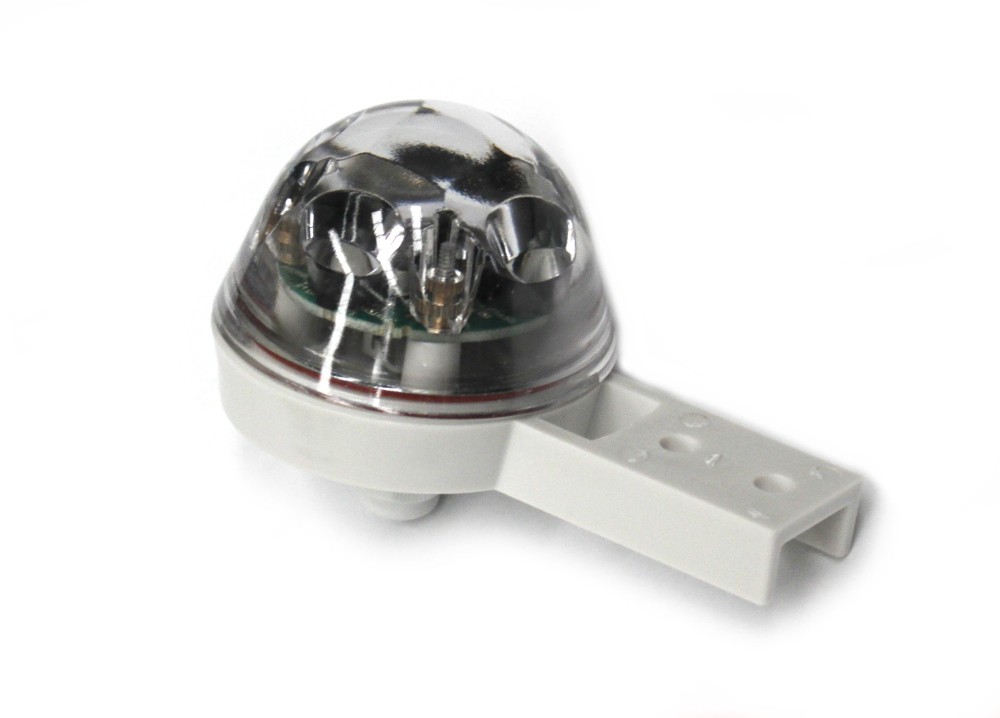
It has no moving parts and if my automation journey has taught me anything it is that things with moving parts will eventually break. The Hydreon RG-11 senses water hitting its outside surface using beams of infrared light. It uses the same sensing principle used in millions of automotive rain sensing windshield wiper controls.
Being optical (and not mechanical, chemical, or conductive) it’s far more rugged, sensitive and reliable than other offerings. Leaves cant clog its mechanism and it just works.
In the last 5 years I have not experienced any false positives.

Enough about the sensor, lets get started
Bill of Materials
– 1 x Hyrdeon RG-11 ($99AUD)
– 1 x 12VDC 500ma PSU ($0AUD – Leverage existing PLC PSU)
– 1 x Galvanised L Bracket ($8AUD)
– 1 x Quad Core Cable Between Hyrdeon RG-11 And PLC ($15AUD)
Total Cost = $122AUD
Tools used
– Pliers
– Screw Driver
– Electric Drill
Step 1: Configure the Hyrdeon RG-11
The device includes a series of dip switches that allows it to be set up for the mode of operation that best matches the application. The output I chose is to use a NO/NC which can interpreted by your application. Depending on your mode selected the output will vary.

- Tipping Bucket – Replace your tipping bucket with a low maintenance alternative
- It’s Raining – Close a skylight at the first sign of rain, and open it when it stops raining
- Condensation Sensing – In this mode, the Rain Gauge continuously monitors the clarity of the sensing surface.
- Wiper control – This mode will control the wipers from off through intermittent and steady-slow speeds.
- Irrigation Control – This mode will measure both rain accumulation and rain intensity.
- Drop Detection – Use this mode if you want to do your own external data interpretation.
So for my use case given I want all of the logic to be controlled by the Homevision Pro I have gone for “Drop Detection” with the NO/NC pulsing every time 1mm of rain is detected.
Step 2: Mount The Device
It should go without saying but this device needs to be mounted in a position that isn’t susceptible to shade by buildings. I have chosen to mount this off my garage using a galvanised L bracket to distant it even further from the house.


Step 3: Connect It All Up
Following the instruction push your cable through the cable gland, wire up your power (get the right polarity) and PLC input settings, validate your dip switches and grease the O-ring before sealing it all up. Connect the PLC end, enable your port (if needed) and away you go.


Step 4: Test and Add Your Logic
That’s it, simple. You now need to add your logic. My logic is to
– track the total rain fall (mm) stored in a variable
– roll up to a per hour (mm) stored in a variable
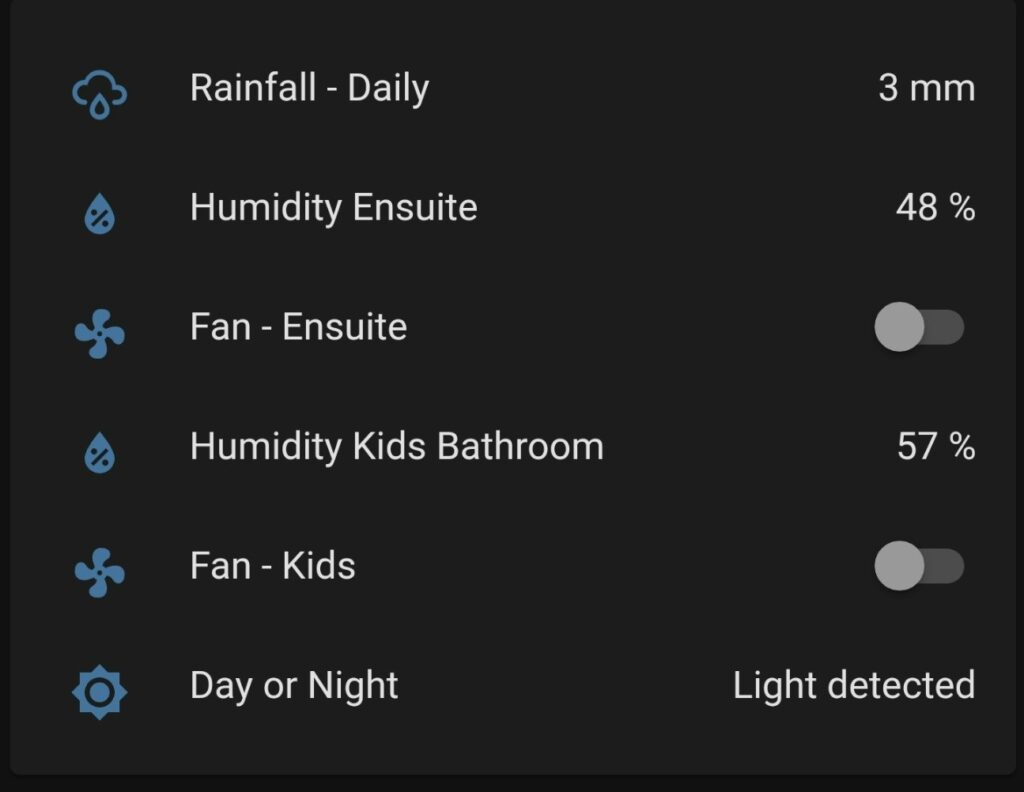
– display data via HomeAssistant (see below)
– Depending on the maximum temperature of the day subtract 3-5mm from total rainfall, when rainfall is at 0mm fire OpenSprinkler early in the morning and again at night if outside temp was greater than 25C and send push notification to state what happened.

Step 5: Visualise in Home Assistant
The easiest means to visualise rainfall is to leverage the built in graphing capabiity of HomeAssistant.
Every time the RG-11 toggles between high and low, for a given day I count the millimeters of rain. By presenting this variable as a MQTT topic, I can display the total amount of rain for a 24 hour period in HomeAssistant along with getting a 24 hour breakdown.
Below is my configuration.yaml entry to track my rainfall
sensor:
#Rainfall
  - platform: mqtt
    unique_id: rainfall_daily
    name : "Rainfall - Daily"
    state_topic: "stat/VAR_Rain_Day/RESULT"
    value_template: "{{ value_json.STATE }}"
    payload_available: "Online"
    payload_not_available: "Offline"
    expire_after: 604800
    unit_of_measurement: 'mm'
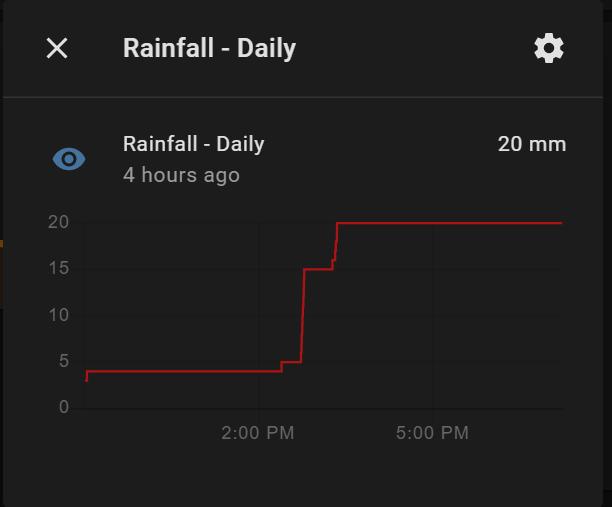
and here is how this visualised.
Conclusion
Automation is journey, and whilst this article covers the high level steps there is many ways to achieve a given outcome. Sensors such as this Hydreon RG-11 are another input that allow you to make richer decisions.
I can’t stress the reliability factor of sensors without moving parts, the price you pay is soon forgotten.
So what’s next? In a future post I will explain what I do with rainfall and how I use this to drive additional automations within my house.
Happy automating.
I work for @Microsoft but opinions expressed are my own.