
Amazon Workspaces Pools recently launched on June 27th 2024, it augments the Amazons Workspaces line up by providing non-persistent desktops in the cloud. In terms of a price to value ratio, this offering greatly reduces the cost to serve when comparing against Amazon Workspaces Personal, Amazon Workspaces Core and other VDI solutions (Citrix, Azure Virtual Desktops, etc). But there are tradeoffs, mainly the fact as soon as you log-out you loose everything. In this post we will illustrate that with a bit of extra effort we can smooth off these rough edges so that these tradeoffs aren’t noticeable.
As usual, lets start with an end-2-end demo of what this post will build out.
I recently had the opportunity to build out a production ready Amazon Workspaces Pools environment, and in this post, I am going to walk you through at a high level the process of setting up Amazon Workspaces Pools utilising Okta as an IdP (Identity Provider). This post wont include everything you need to do to take this to production (such as Active Directory / Scaling / Monitoring / Automation / Custom Images) but will enable you get started with the core functionality with Okta as an IdP.
Amazon Workspaces Pools vs. any other VDI offering is complex (like many AWS offerings) but once you understand the setup and configuration process offers a level of usability to price ratio that is unmatched.
Pricing of Amazon Pools can be found here.
I just spoke about tradeoffs, and there is no escaping the fact that these sessions are non-persistent, so as a bonus I will illustrate how you you can accomplish setting persistence of user settings using Microsoft using FSXLogic, providing you extremely cost effective partially persistent desktops in the cloud.
I will break this post down in to the following steps.
- Okta Configuration – Part 1 – Application Creation & Base Configuration
- IAM – Identity Provider Creation
- Amazon Workspaces Pools – Directory Creation
- Amazon Workspaces Pools – Pool Creation
- AWS IAM – Wiring Everything Together
- Okta Configuration – Part 2 – Adding WorksSpaces Configuration
- Enabling Session Persistence
- Testing
Amazon Workspaces Pools whilst being part of the Amazon Workspaces family is loosely based on Amazon AppStream 2.0 and I mention this because in order to use Amazon Workspaces Pools you need to use a SAML 2.0 authentication provider such as Okta, Auth0, Entra ID and so on. Unlike Workspaces Personal, Workspaces Pools does not support local authentication.
Okta Configuration – Part 1 – Application Creation & Base Configuration
Okta configuration will need to take place in two parts. As of now, we dont have all of our Amazon Workspaces Pools Directory configuration details, IAM roles and other data to pass in to Okta, but we do need the idP MetaData thats generated by creating a SAML 2.0 configuration which we need to import in to AWS IAM so that we can build out our solution.
Sign in to your organisations Okta environment
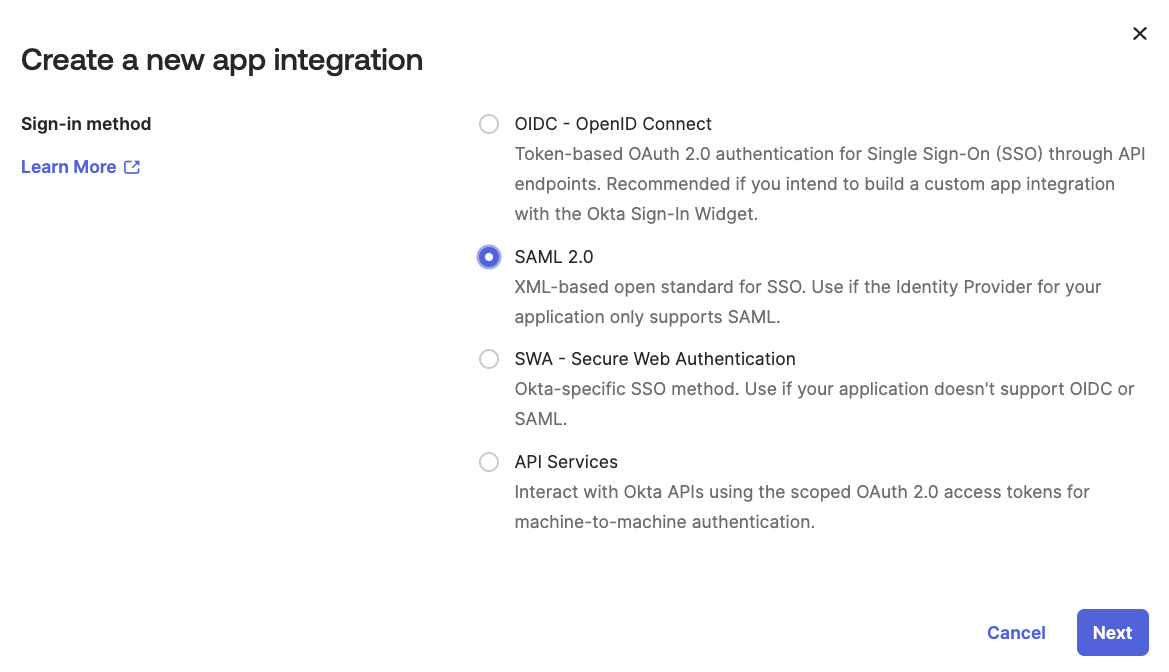
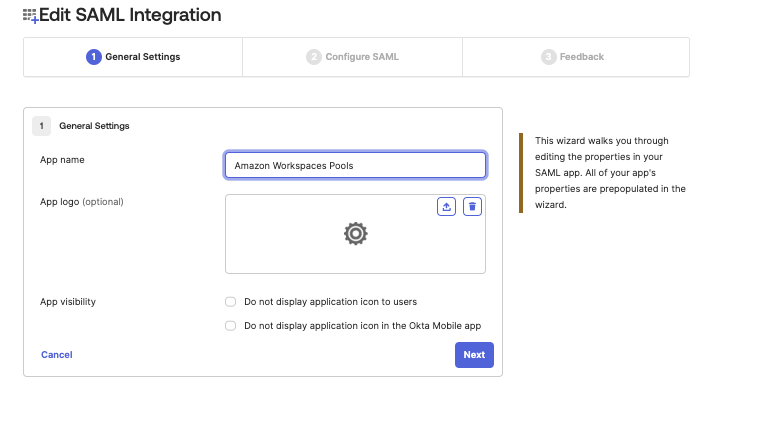
Once logged in to Okta, select Applications and Create App Integration, this will result in a pop up. Select SAML 2.0 as the application type and click Next.
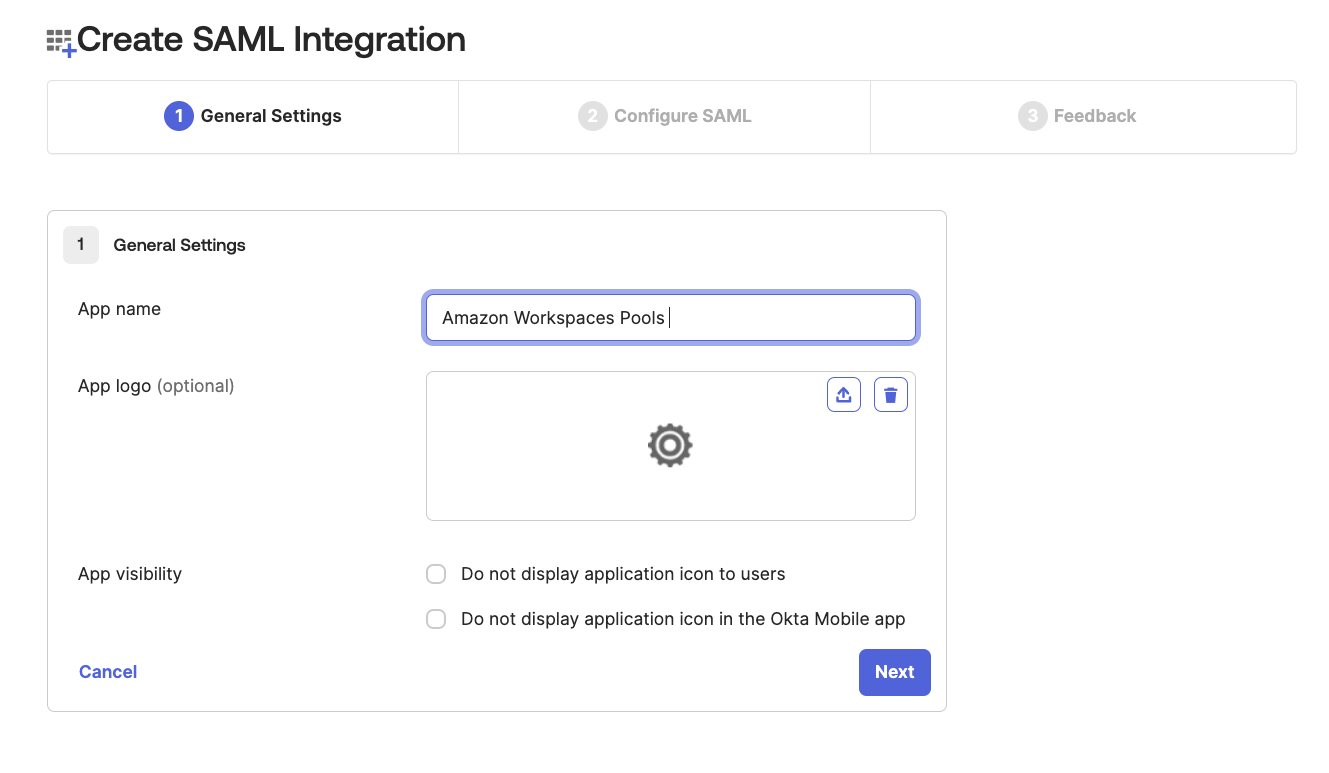
Give your App Integration a Name (I called mine Amazon Workspaces Pools) and a logo (optional) and click Next.
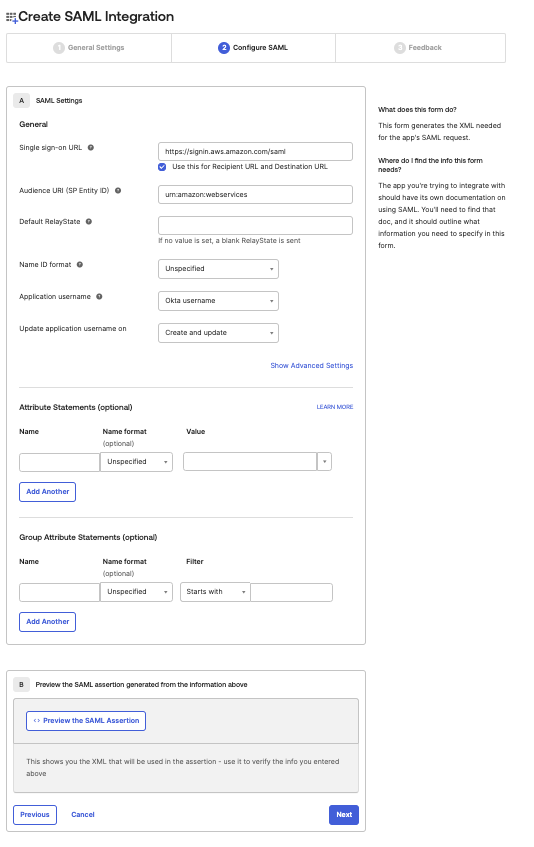
On the SAML 2. 0 integration page enter data in the following fields, for all other fields accept the defaults
| Sign In URL | https://signin.aws.amazon.com/saml |
| Audience URI (SP Entity ID) | urn:amazon:webservices |
Click Next and then Finish

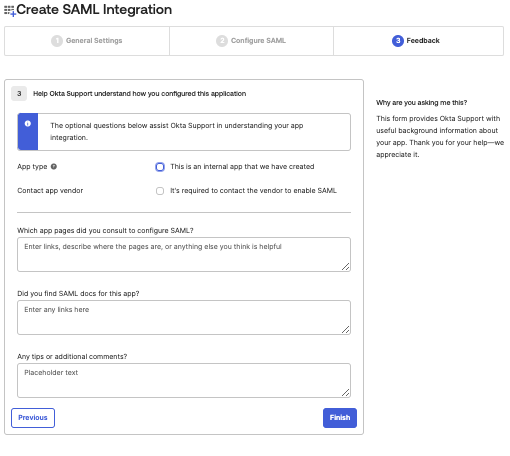
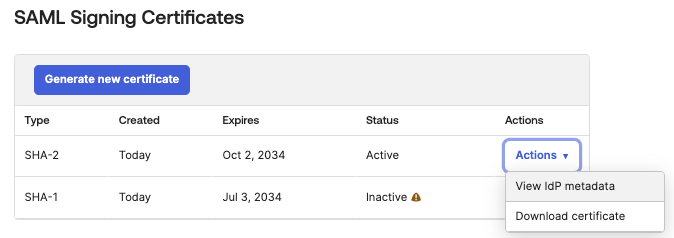

After you are returned back to the main page, scroll down to the SAML Signing Certificates section, select Actions on SHA-2 and select View IdP metadata. This will result in a new window, save the page as XML (name of file is not important).
From here we will now pivot in to AWS, but keep Okta open as we will return.
IAM – Identity Provider Creation
Login in to your AWS Account and go to IAM (Identity & Access Management). From the left hand menu tree, under Access Management select Identity Providers from the left hand menu tree.
Select Add Provider, select SAMLas the provider type, enter in a descriptive name for the Provider Name (I chose Okta_Amazon_Workspaces) and select the xml file you saved earlier from Okta as the Metadata document. Finally click add provider


This will add the provider (for 10 years) and you can click through to see the SSO Service Location and Issuer URL which will have a relationship to your Okta account.
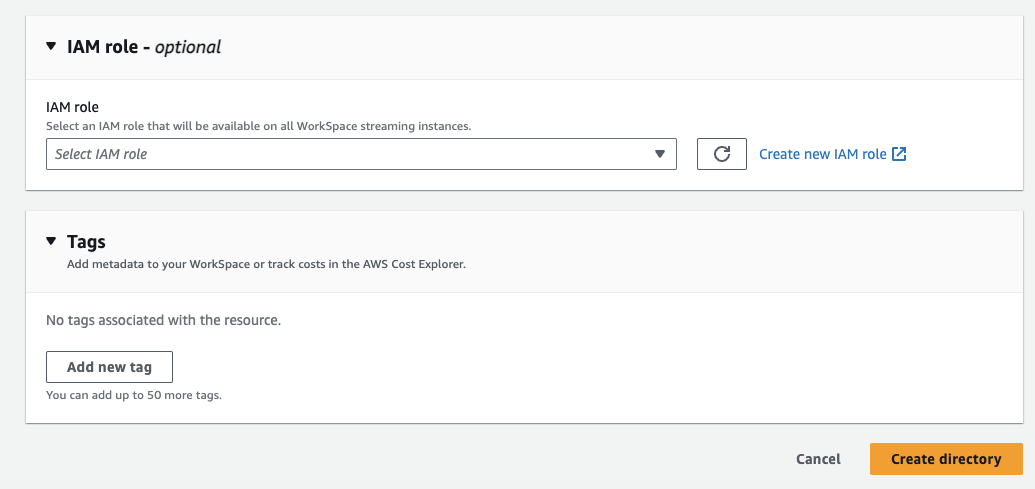
Amazon Workspaces Pools – Directory Creation
A directory is a prerequisite for creating an Amazon Workspaces Pool. By setting up identity federation using SAML 2.0 with Okta we will use an IAM role and relay state URL(we need to apply this in Okta) to grant your federated users access to a WorkSpace Pool directory. The relay state is the WorkSpaces directory endpoint to which users are forwarded after successful authentication in Okta.
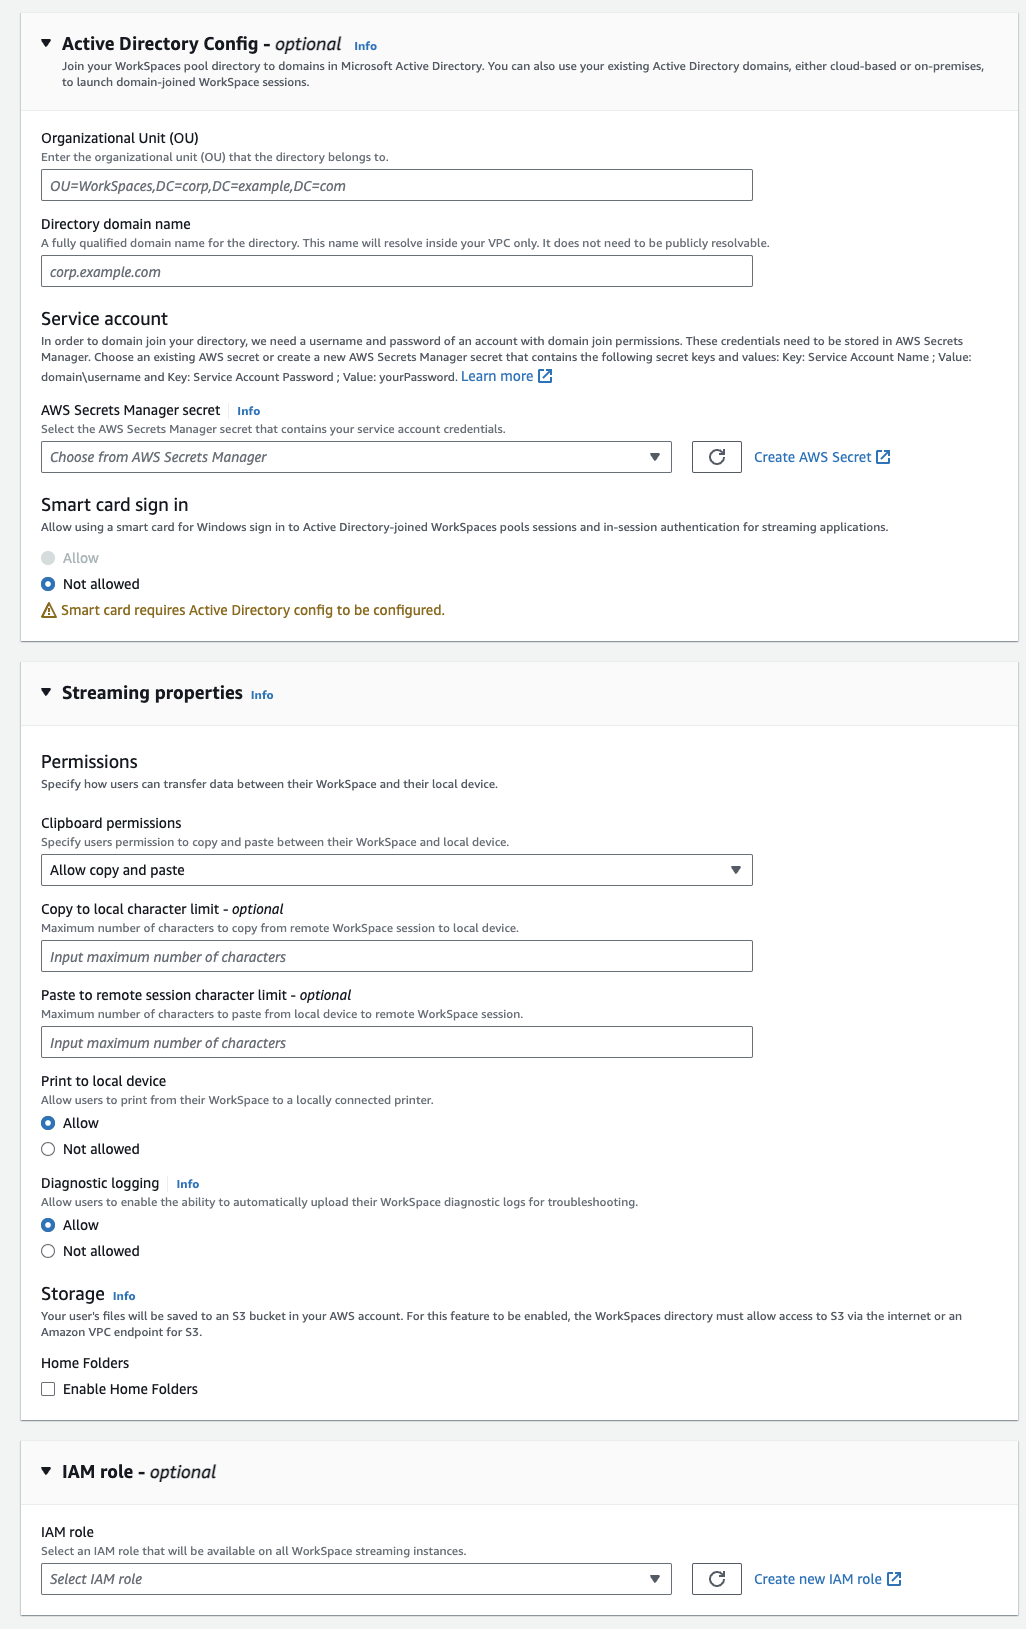
Worth noting at the time of authoring this post (October 2024), whilst the console makes it known that ‘Active Directory Config’ is optional. If you choose not to enter in Active Directory details, you can not edit this later (not even from the AWS CLI), it will require termination of the directory and re-creation (which has cascading configuration changes). Worth taking into consideration and something I hope Amazon will change in the future. You can not use placeholder credentials in this field as the Workspaces Pool will fail to start if it the Active Directory configuration is invalid.
Before you enter values, switch back to Okta as we need to extract the User Access URL for our directory. In order to do this edit your application. Click Sign On and then View SAML setup instructions
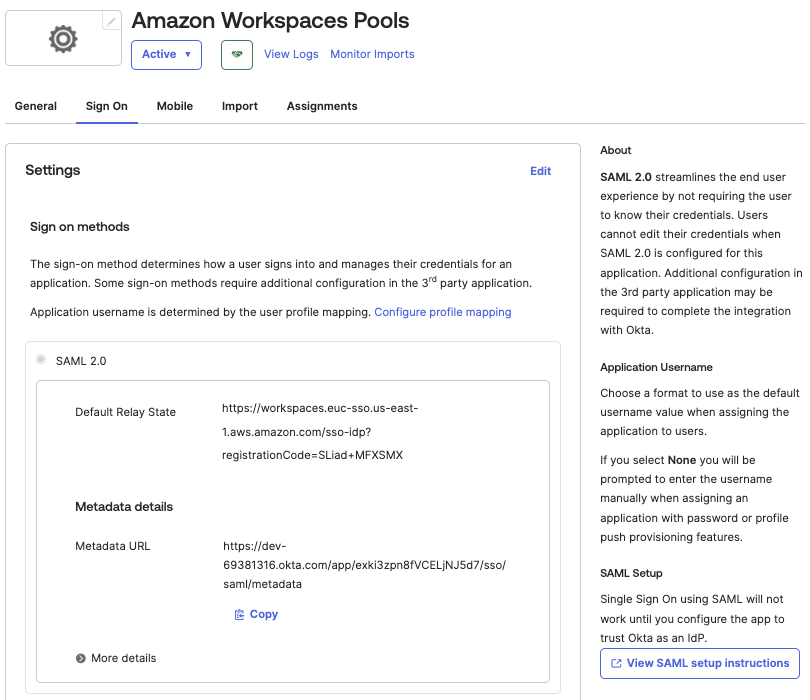

Copy the Identity Provider Single Sign-On URL and Identity Provider Issuer values to a text editor and swicth back to the AWS Workspaces Directory (Pooled) in your browser.
Whilst some fields are optional the following need values.
| User Access URL | Enter the Identity Provider Single Sign-On URL from Okta |
| VPC | Select a VPC |
| Subnet 1 | Choose a subnet from an Availability Zone |
| Subnet 2 | Choose a subnet from another Availability Zone |
| Security Group | A security group that will be applied to your workloads. |
| Directory Name | Name of your directory |

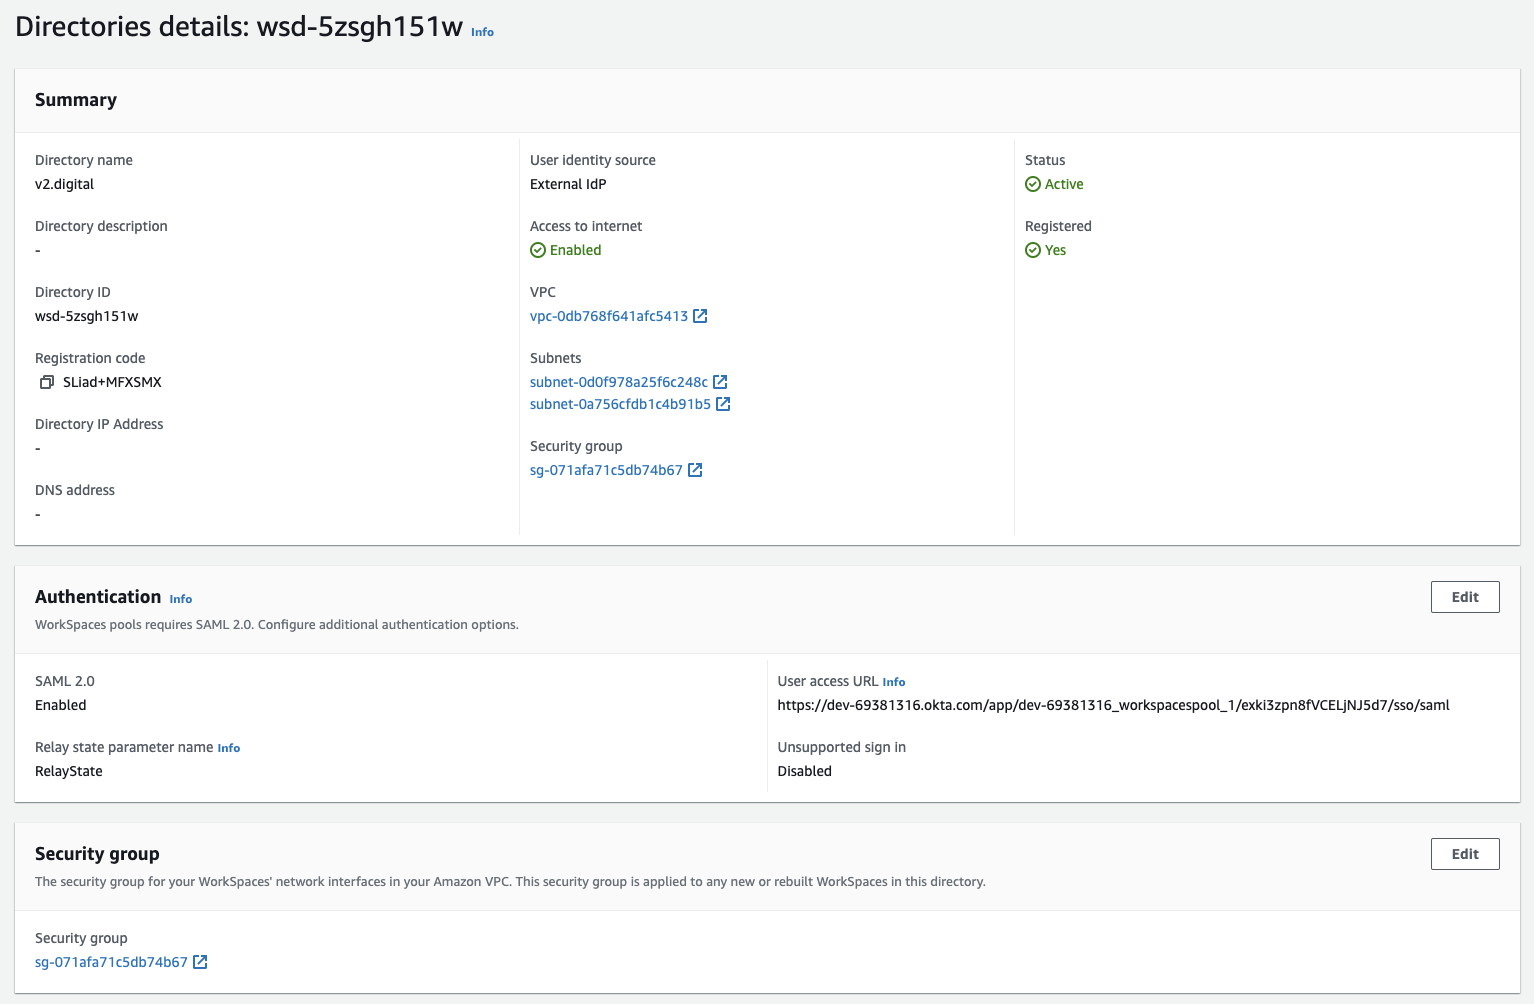
After your directory is created, copy the Directory ID and Registration code to your text editor.
Amazon Workspaces Pools – Pool Creation
After creating your directory, select Pools from the left menu and Create Workspace. In this post I will not cover scaling policies for Workspaces Pools, you can read about it here. The only values you need to enter in are as follows
| Name | Name of Workspaces Pool |
| Description | Description Of Workspaces Pools |
| Workspaces Pool Directory | Directory ID Of Workspace Pool Directory |
| Bundle and Hardware | Choose a default image of one that you have created and turned in to a bundle. |
Worth noting there is a 1:1 mapping between pools and directories at this point in time, meaning that if you have multiple Workspace Pools, you will also need multiple Workspace Pool Directories (even if you have the same users in them – feature request Amazon).
Click through your pool details are there are lot of settings you can modify from scaling to timeouts and more.
AWS IAM – Wiring Everything Together
AWS IAM is the glue to ensuring Okta, your Amazon Workspaces Directory and the Amazon Workspaces Pool all are able to communicate for authorisation and authentication in a least privileged manner.
In this step we will create a Role, Policy and a Permissions Policy
In the AWS Console go to IAM. Choose Roles in the navigation pane.
Choose Create role.
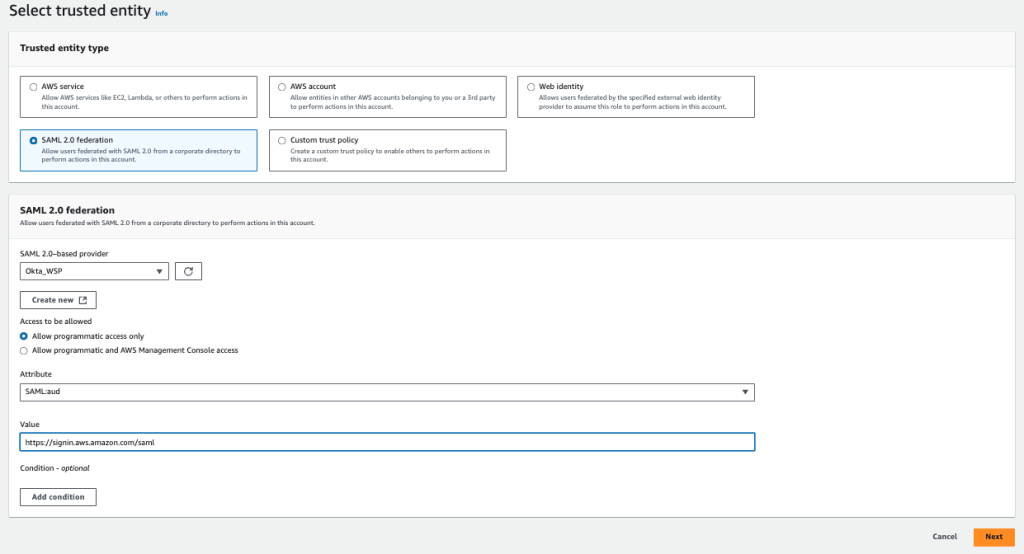
Choose SAML 2.0 federation for the trusted entity type.
For the SAML 2.0-based provider, choose the identity provider you created earlier, it should be in the drop down box. Choose Allow programmatic access only for the access to be allowed.
Choose SAML:aud for the attribute. For Value, enter https://signin.aws.amazon.com/saml. This value restricts role access to SAML user streaming requests that include a SAML subject type assertion with a value of persistent.
Choose Next to continue. Don’t make changes or selections in the Add permissions page.
Enter a name and a description for the role.
Choose Create role. In the Roles page, choose the role you must created.Choose the Trust relationships tab. Choose Edit trust policy.
In the Edit trust policy JSON text box, add the sts:TagSession action to the trust policy. When finished your trust policy should look similar to this.
{
	"Version": "2012-10-17",
	"Statement": [
		{
			"Effect": "Allow",
			"Principal": {
				"Federated": "arn:aws:iam::123456789:saml-provider/your_identity_provider"
			},
			"Action": [
				"sts:AssumeRoleWithSAML",
				"sts:TagSession"
			],
			"Condition": {
				"StringEquals": {
					"SAML:sub_type": "persistent"
				}
			}
		}
	]
}
Choose Update policy.
We now need to craft a permissions policy.
Choose the Permissions tab.
In the Permissions policies section of the page choose Add permissions and then choose Create inline policy.
In the Policy editor section of the page, choose JSON. In the Policy editor JSON text box, enter the following policy. Be sure to replace:
<region-code>with the code of the AWS Region in which you created your WorkSpace Pool directory.<account-id>with the AWS account ID.<directory-id>with the ID of the directory you created earlier.
{
    "Version": "2012-10-17",
    "Statement": [
        {
            "Effect": "Allow",
            "Action": "workspaces:Stream",
            "Resource": "arn:aws:workspaces:<region-code>:<account-id>:directory/<directory-id>",
            "Condition": {
                "StringEquals": {"workspaces:userId": "${saml:sub}"}
            }
        }
    ]
}
Choose Next.
Enter a name for the policy, and then choose Create policy.
Phew, thats a lot to take in and thats all we need to do in AWS IAM, we will now need to pivot back to Okta.
Okta Configuration – Part 2 – Adding WorksSpaces Configuration
Having configured Amazon Workspaces Pools our Amazon Workspaces Pools Directory and IAM, we are now armed with configuration data which we can use to complete Okta configuration
Log back in to your Okta account and edit the application you created in Part 1 of our Okta configuration
Edit SAML Settings
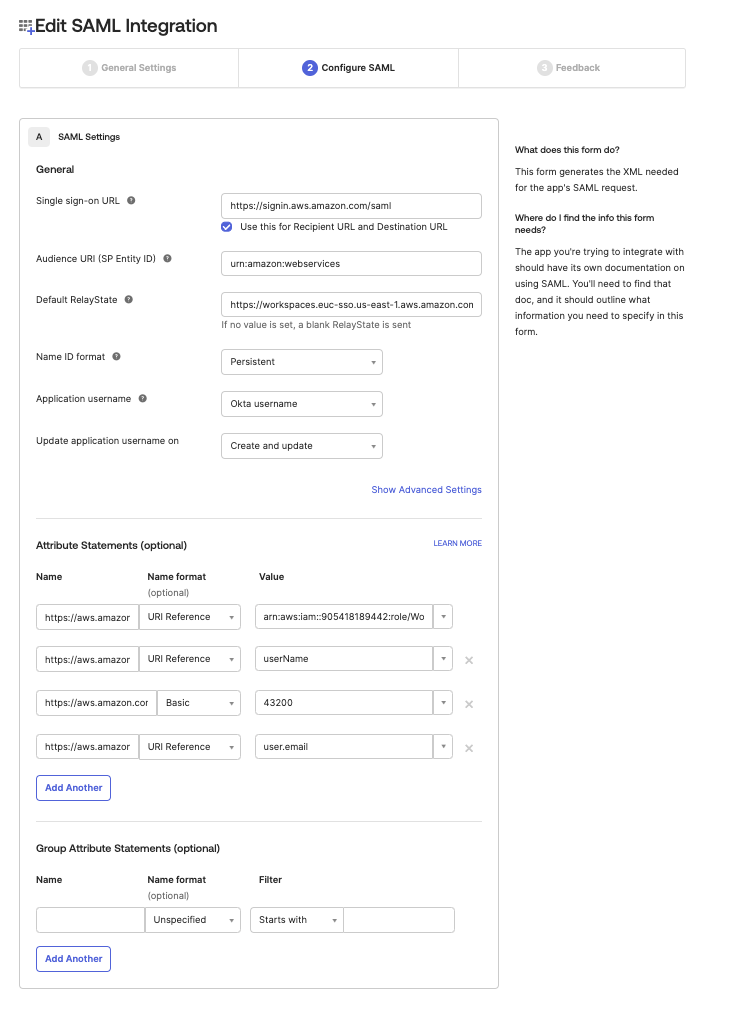
Click Next to move to Configure SAML. Edit SAML Settings so that they read as follows. Worth noting
- Default Relay State – replace the region end point, you can find them here along with your AWS Workspaces Directory registration code when editing the table below
| Single sign-on URL | https://signin.aws.amazon.com/saml |
| Use this for Recipient URL and Destination URL | Tick |
| Audience URI (SP Entity ID) | urn:amazon:webservices |
| Default RelayState | https://relay-state-region-endpoint/sso-idp?registrationCode=registration-code |
| Name ID format | Peristent |
| Application username | Okta username |
| Update application username | Create and update |
You will also need to add in SAML Attribute Statements, whilst listed as optional they are required. Worth noting
- The first statement will require you to gather the ARN’s of both the IAM role that was created along with your Okta identity provider. These values will be a string separated by a comma.
- Values are sensitive (userName & user.email)
| Name | Name Format | Value |
| https://aws.amazon.com/SAML/Attributes/Role | URI Reference | arn:aws:iam::123456789:role/role_name,arn:aws:iam::123456789:saml-provider/Provider_/Name |
| https://aws.amazon.com/SAML/Attributes/RoleSessionName | URI Reference | userName |
| https://aws.amazon.com/SAML/Attributes/SessionDuration | Basic | 43200 |
| https://aws.amazon.com/SAML/Attributes/PrincipalTag:Email | URI Reference | user.email |
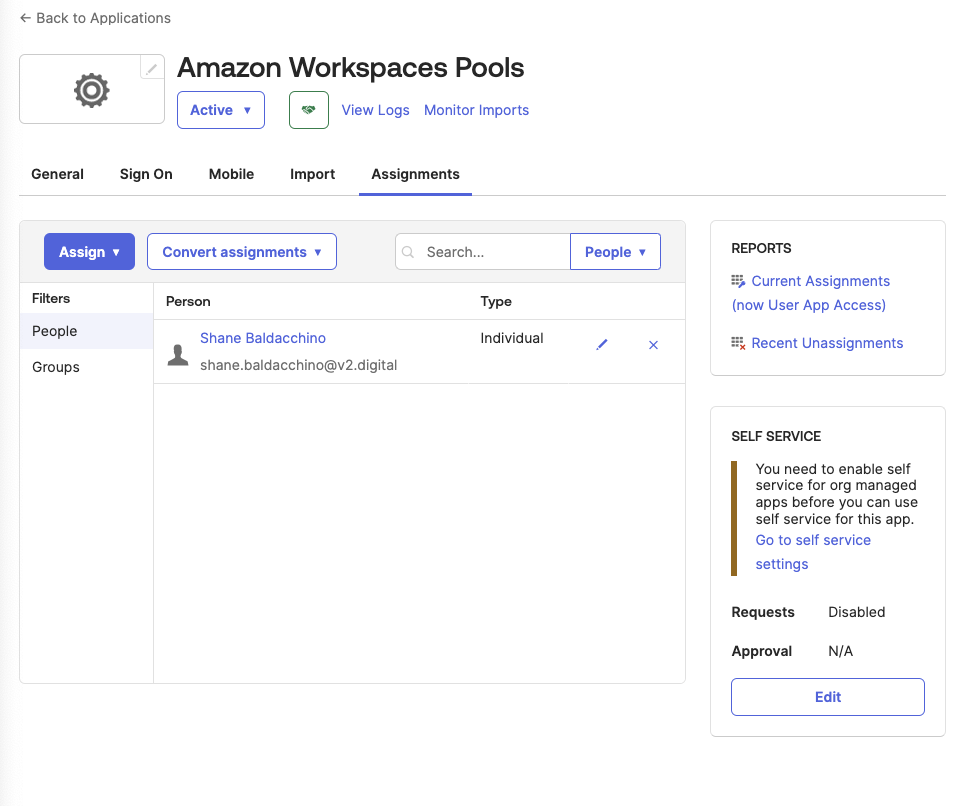
Finally add your assignments to this application.
Enabling Session Persistence
Session persistence is not supported with Amazon Workspaces Pools, because of this, it really reduces the viability to offer virtual desktops in the cloud using just Amazon Workspaces Pools. If one is to use Amazon Workspaces Personal, the cost to serve would increase by many factors. Just like one would externalise session state to a persistence store (Dynamo DB / Amazon S3) in web applications we can redirect our session state and other key functions using Microsoft FSLoigix.
FSLogix enhances and enables a consistent experience for Windows user profiles in virtual desktop computing environments. FSLogix isn’t limited to Azure, it works on Amazon Workspaces Pooled by redirecting folders that you specify to a SMB share. Using Group Policy we can apply this to user profiles effectively redirecting folders to a SMB share.
This way on session login user settings are copied back over. This guide will not go in to detail on how to setup FSLogix but you can see the setup instructions at https://learn.microsoft.com/en-us/fslogix/how-to-install-fslogix along with the Group Policy Templates at https://learn.microsoft.com/en-us/fslogix/how-to-use-group-policy-templates
My suggestion would be to redirect %USERPROFILE% and any other folder on the Workspaces instances that pertains to user state.
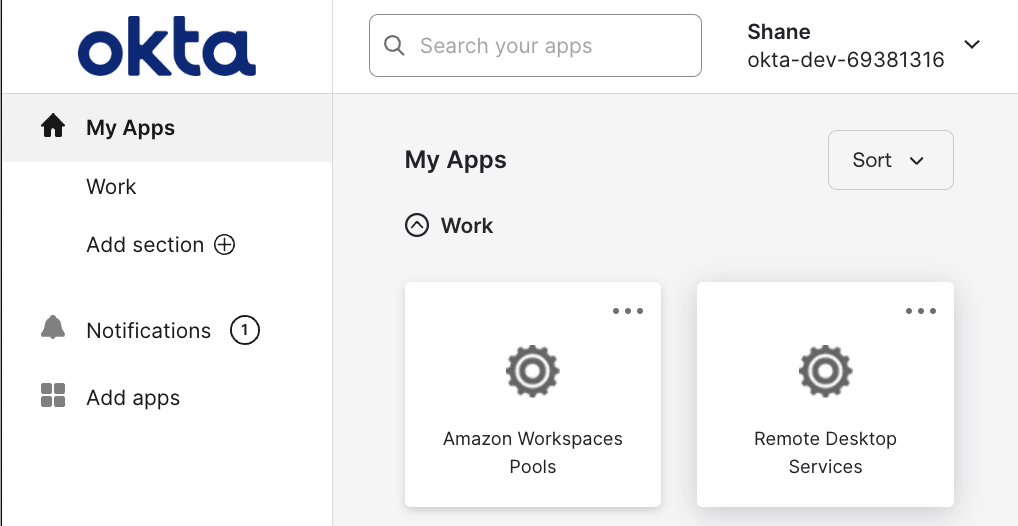
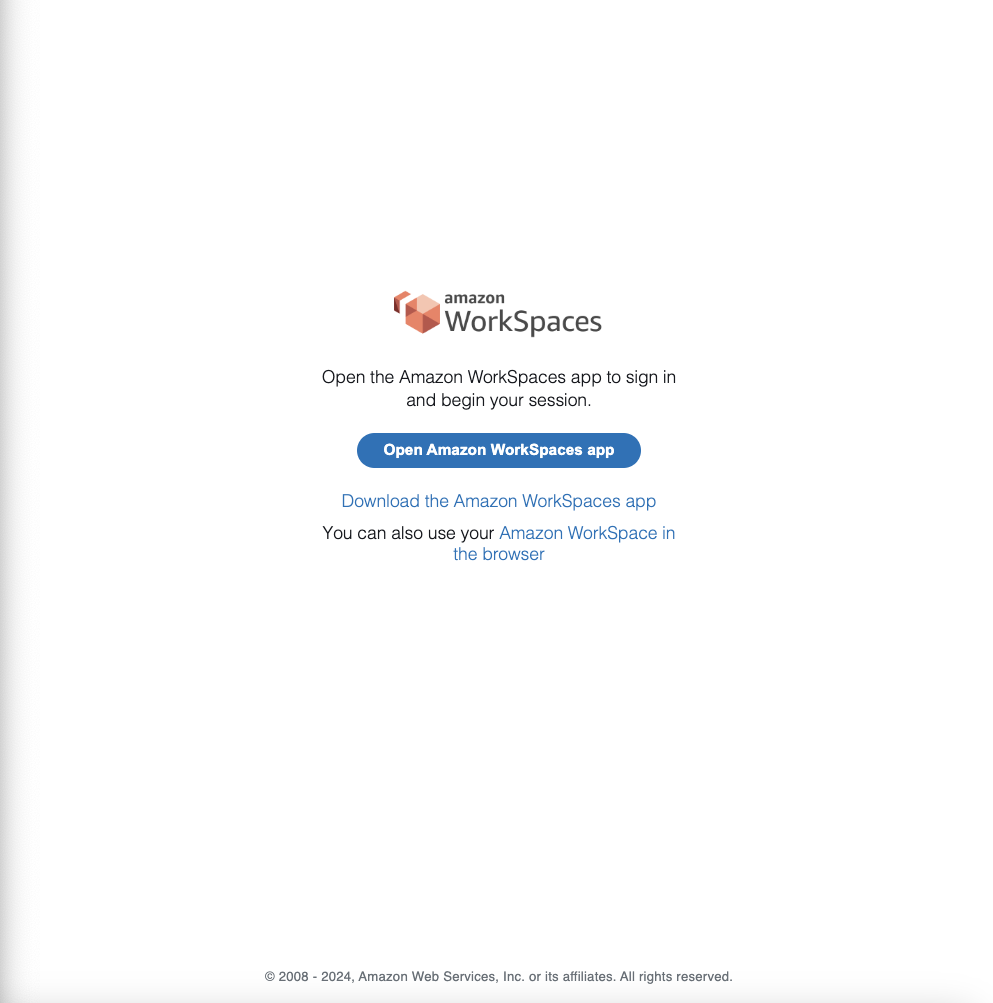
Testing
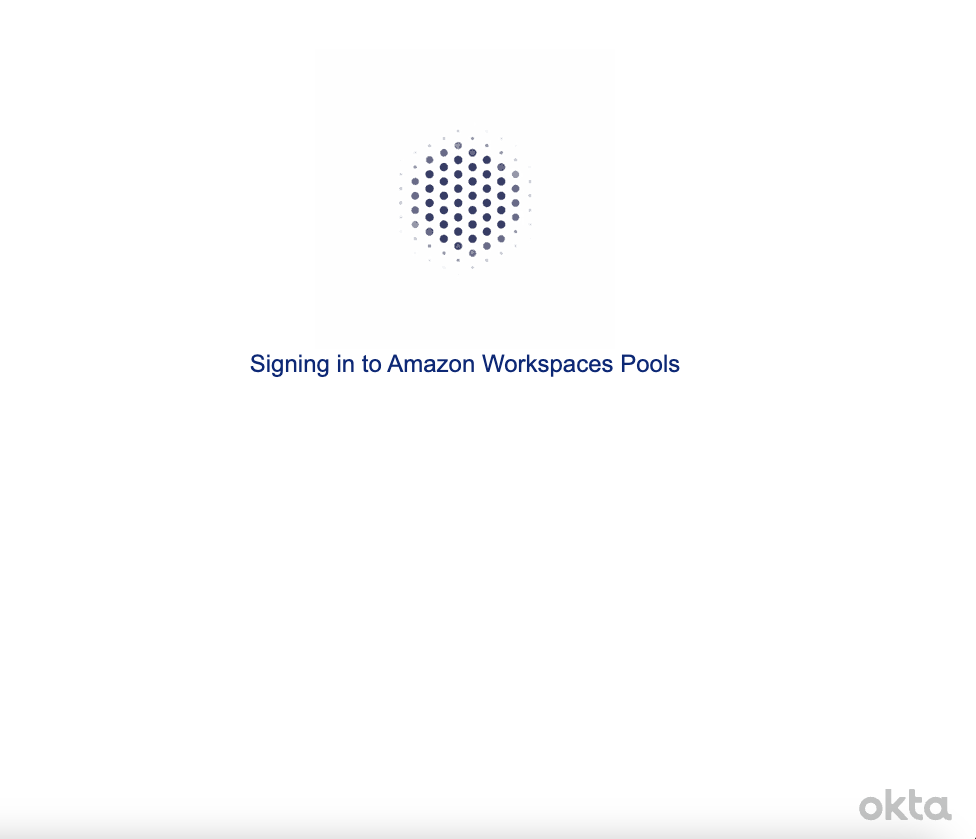
If you followed this guide, you are now ready to test. Go to your end-user dashboard in Okta and select your Amazon Workspaces Pools Application. This should invoke Amazon Workspaces Pools, connecting to the relay state you defined in Okta. If you have the Amazon Workspaces client installed you will notice the registration key will be passed in.
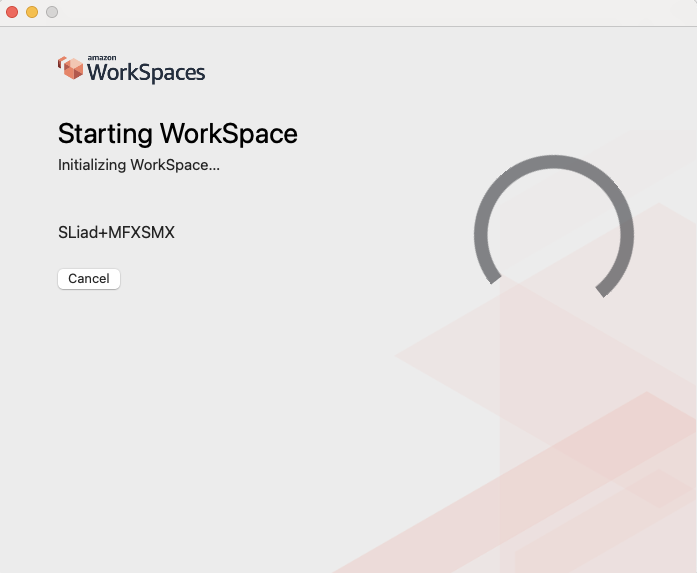
Just note of this is the first time you have logged in, there will be a cold start of a few minutes whilst the underlying infrastructure is being created.

Summary
We covered a lot in this post, but there is still so much more to do (Active Directory, Group Policy, Scaling and and more), but this should be a helpful guide to get you started.
Amazon Workspaces Pools is a cost effective VDI solution, but in it’s standard form can be quite hard to operationalise with very few use cases (kiosks, labs etc).
In typical Amazon style, documentation is generic at best. Workspaces Pools requires a SAML 2.0 compliant IdP, and without documentation for integration with Okta it can be a struggle as best (I know I struggled)
Learn from my experience and let me walk you through the process of Okta integration, along with illustrating how you can add session persistence in the form of Microsoft FSLogix to make Workspaces Pools really usable.
If you have questions (or comments), leave them below.
Thanks
Shane Baldacchino
I have completed the above-mentioned steps and configured the VHD locations. I can see the profile is created in the FSx share, but it is not applying to the same user upon signing off and logging back in. Could you let me know how you manage to handle this issue?
Hello Adarsh,
Apologies for the late reply, I took some time off sitting behind a keyboard. Without more detail there is 3 areas I would look in to (not covered in this post).
FSLogix Profile Container Configuration: Ensure that the FSLogix profile container is correctly configured to be persistent across sessions. This involves setting the correct registry entries and ensuring that the profile container is properly linked to the user’s session.
Group Policy Settings: Verify that the Group Policy settings are correctly applied to redirect folders to the FSLogix profile container. Sometimes, incorrect settings can cause the profile to not load properly.
Session Host Configuration: Make sure that the Ec2 instance has a role & route to get to the SMB share.
User Permissions: Check that the user has the necessary permissions to access the FSLogix profile container and the SMB share where it is stored.
If you did sort this out I would be curious to what your problem was.
Thanks
Shane
First of all, thanks for this, I would not have figured it out from AWS docs. Also note (this is incorrect in AWS documentation as well but you have the directions “Choose SAML:aud for the attribute. For Value, enter https://signin.aws.amazon.com/saml” then you have us manually change the trust policy so that is overwritten to “SAML:sub_type”: “persistent”.
In any case, I have a question, shouldn’t the user be automatically logged into the workspace when launching from Okta? The workflow I am seeing is I authenticate to Okta, I choose the workspaces pool tile in Okta –> a page opens and asks if I want to open or download the app or use workspace in the browser. I choose open workspace app –> the app opens and has a button asking if I want to continue to sign in to workspaces followed by “We will take you to your browser and bring you back here to complete sign in” –> I choose continue. It then redirects to another workspace browser window, then launches the client app with the registration code automatically added in but the user is logged out so has to enter credentials again. Same happens if I choose open in browser. This is a lot of clicking around and redirecting that seems like it would be confusing to the end user. I see some of this workflow is shown in your screenshots but it appears you actually are automatically logged in to your workspace. I tried changing the application username in Okta to see if passing the user@domain would help but it did not.
Hello Justean,
Its been a while since I touched this, but to your question of shoudln’t the user be automatically logged in to the Workspace when launching from Okta? That is what I thought, for that you actually need Active Directory in place also. For this to happen the machines need to be domain joined and then it works like you had hoped. I have experienced the same click, download, click, click click approach you mentioned. It will all go away if the machines are also AD joined.
Hope this helps.
Shane