
Do you like the trend of remotes for appliances? I don’t. They often look our of place, require you to drill tiny holes in walls for mounts and even still, they can go missing. Let alone, they need batteries and you never can find them when you need them.
But modern devices do more than just turn on and off, they contain a plethora of functionality, and hence the need of remotes. Yes applications on phone often exist, but they are cumbersome for other reasons.
So how can you keep all that functionality, but integrate these modern devices into your house so they just blend in?
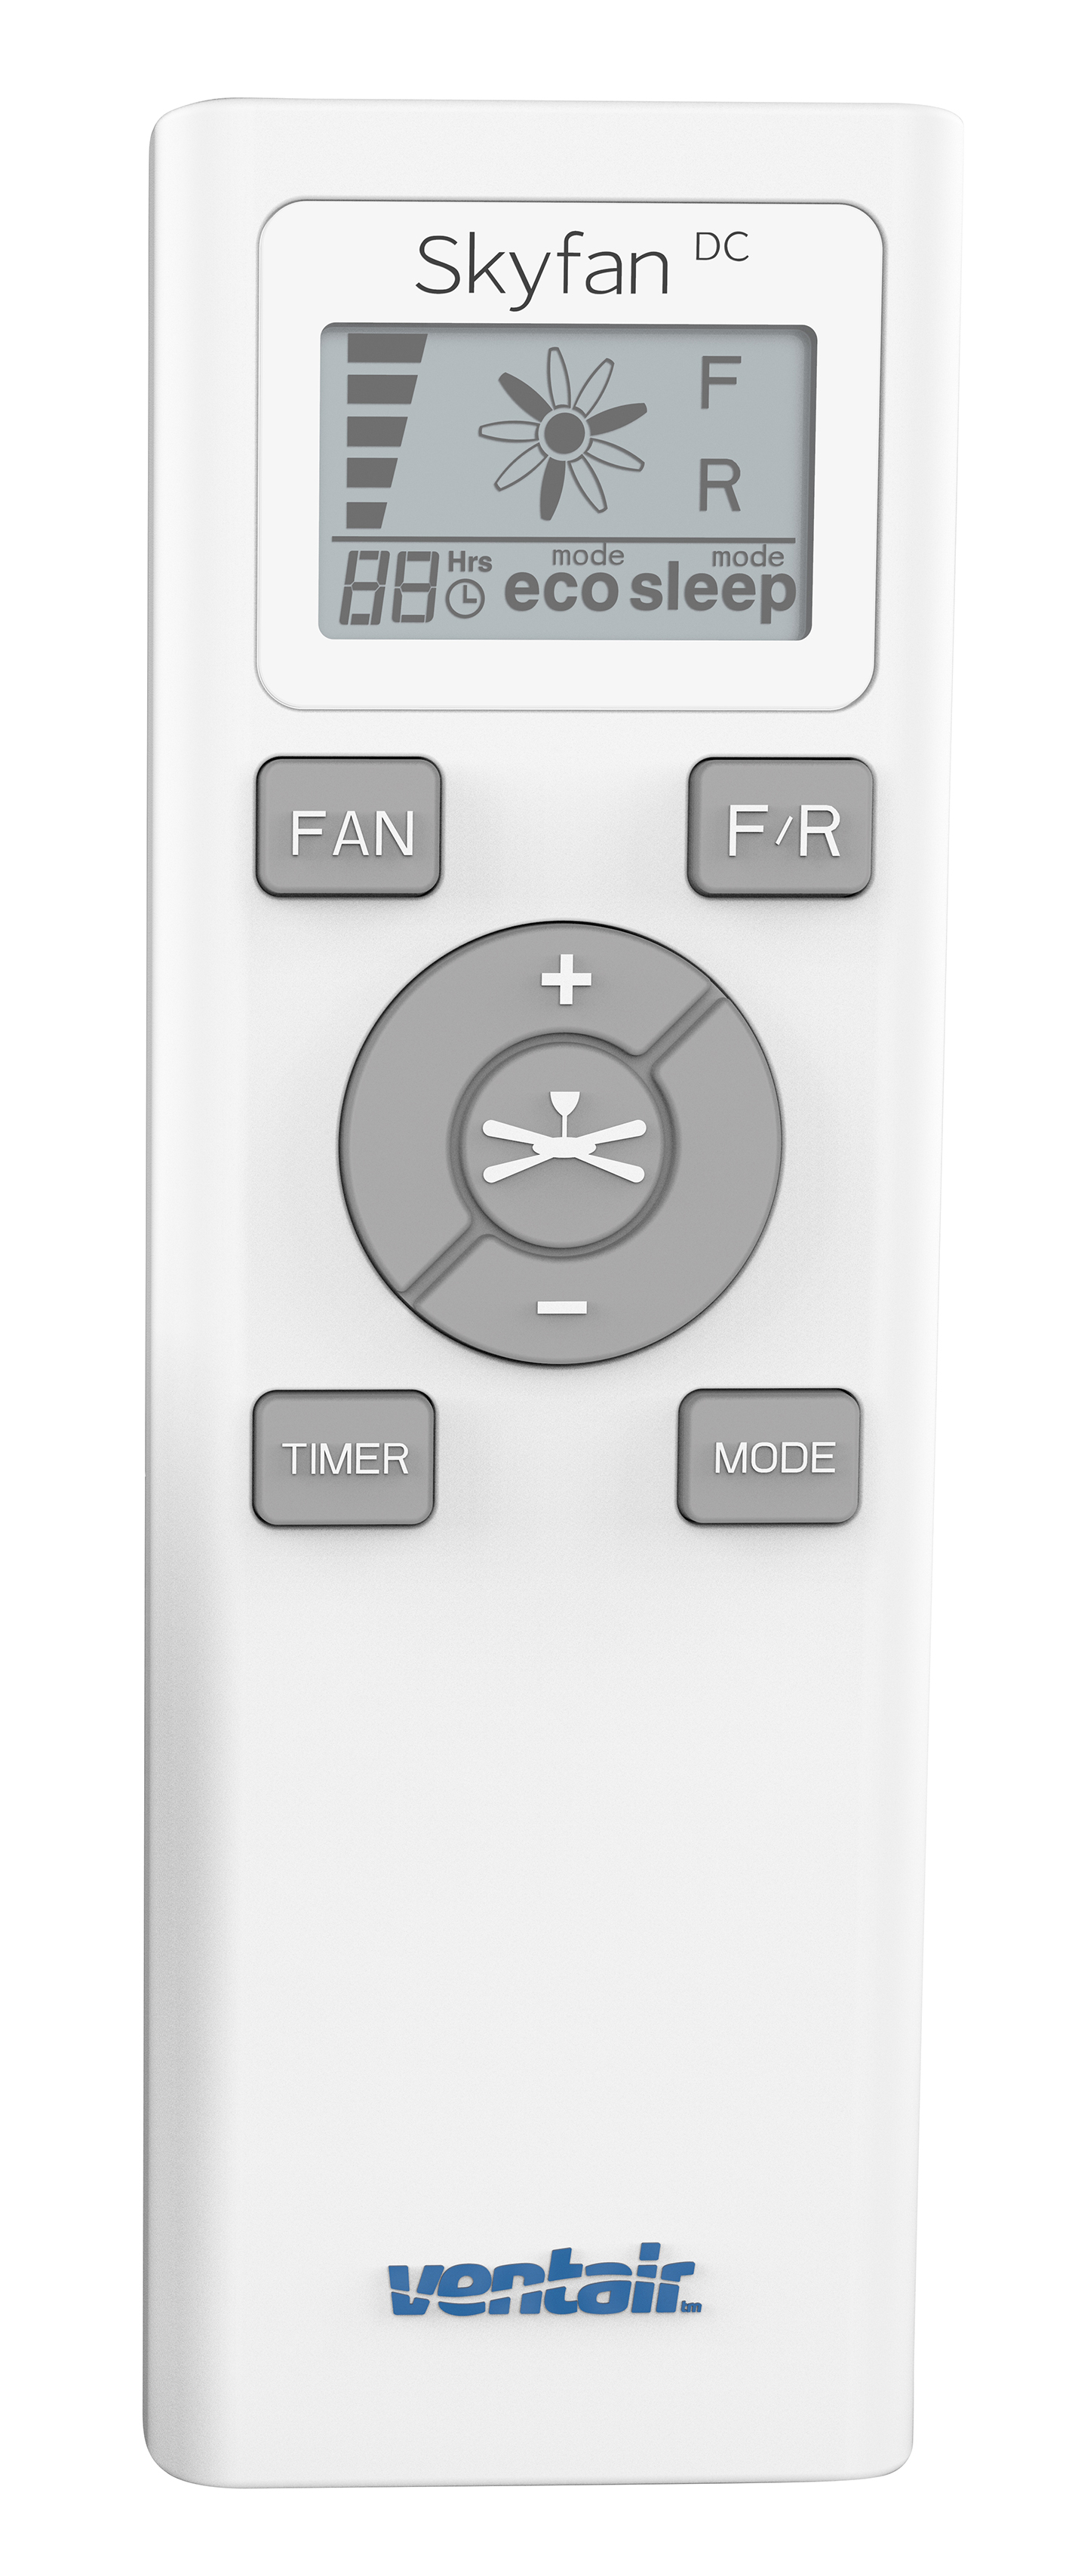
I recently purchased 4 x Ventair SkyFan’s for my house with TUYA modules. I initially explored using Amazon Alexa (one present in every bedroom) and Home Assistant, both work to varying degrees, but they are clumsy in many ways. The time it take to issue an utterance to Alexa (Alexa, Set Parents Fan to Speed 1), or to touch an Home Assistant Lovelace dashboard is dwarfed by the simplicity and speed of a button press, especially as you enter or exit a room.
So in this post, l am going to walk you can add an additional control plane to your remote controlled devices. This additional control plane will be in the form of Clipsal push button switches that match other switches in my house.
And as usual lets start with an end-2-end demo.
Whilst this post is specific to TUYA, the pattern is applicable to any device with only subtle modifications required.
What I will cover in this post
- Fan & Light Control Logic
- Adding Buttons With Clipsal & Sonoff
- Counting Button Presses with Tasmota & Arduino
- Converting MQTT Messages To TUYA Commands With Home Assistant
Arduino? You may be asking, why don’t you just use Home Assistant? It can read MQTT messages. That would be correct, however Home Assistant is not a RTOS (Real Time Operating System), and if you read on, I am needing to detect up to 3 state changes in less than 550ms. Home Assistant whilst being amazing, is not the reliability powerhouse and a Arduino is when it comes to timing. Pick the right tool for the job and in this case, the Arduino is the right tool. To date this pattern has been running 2 months without incident.
Fan & Light Control Logic
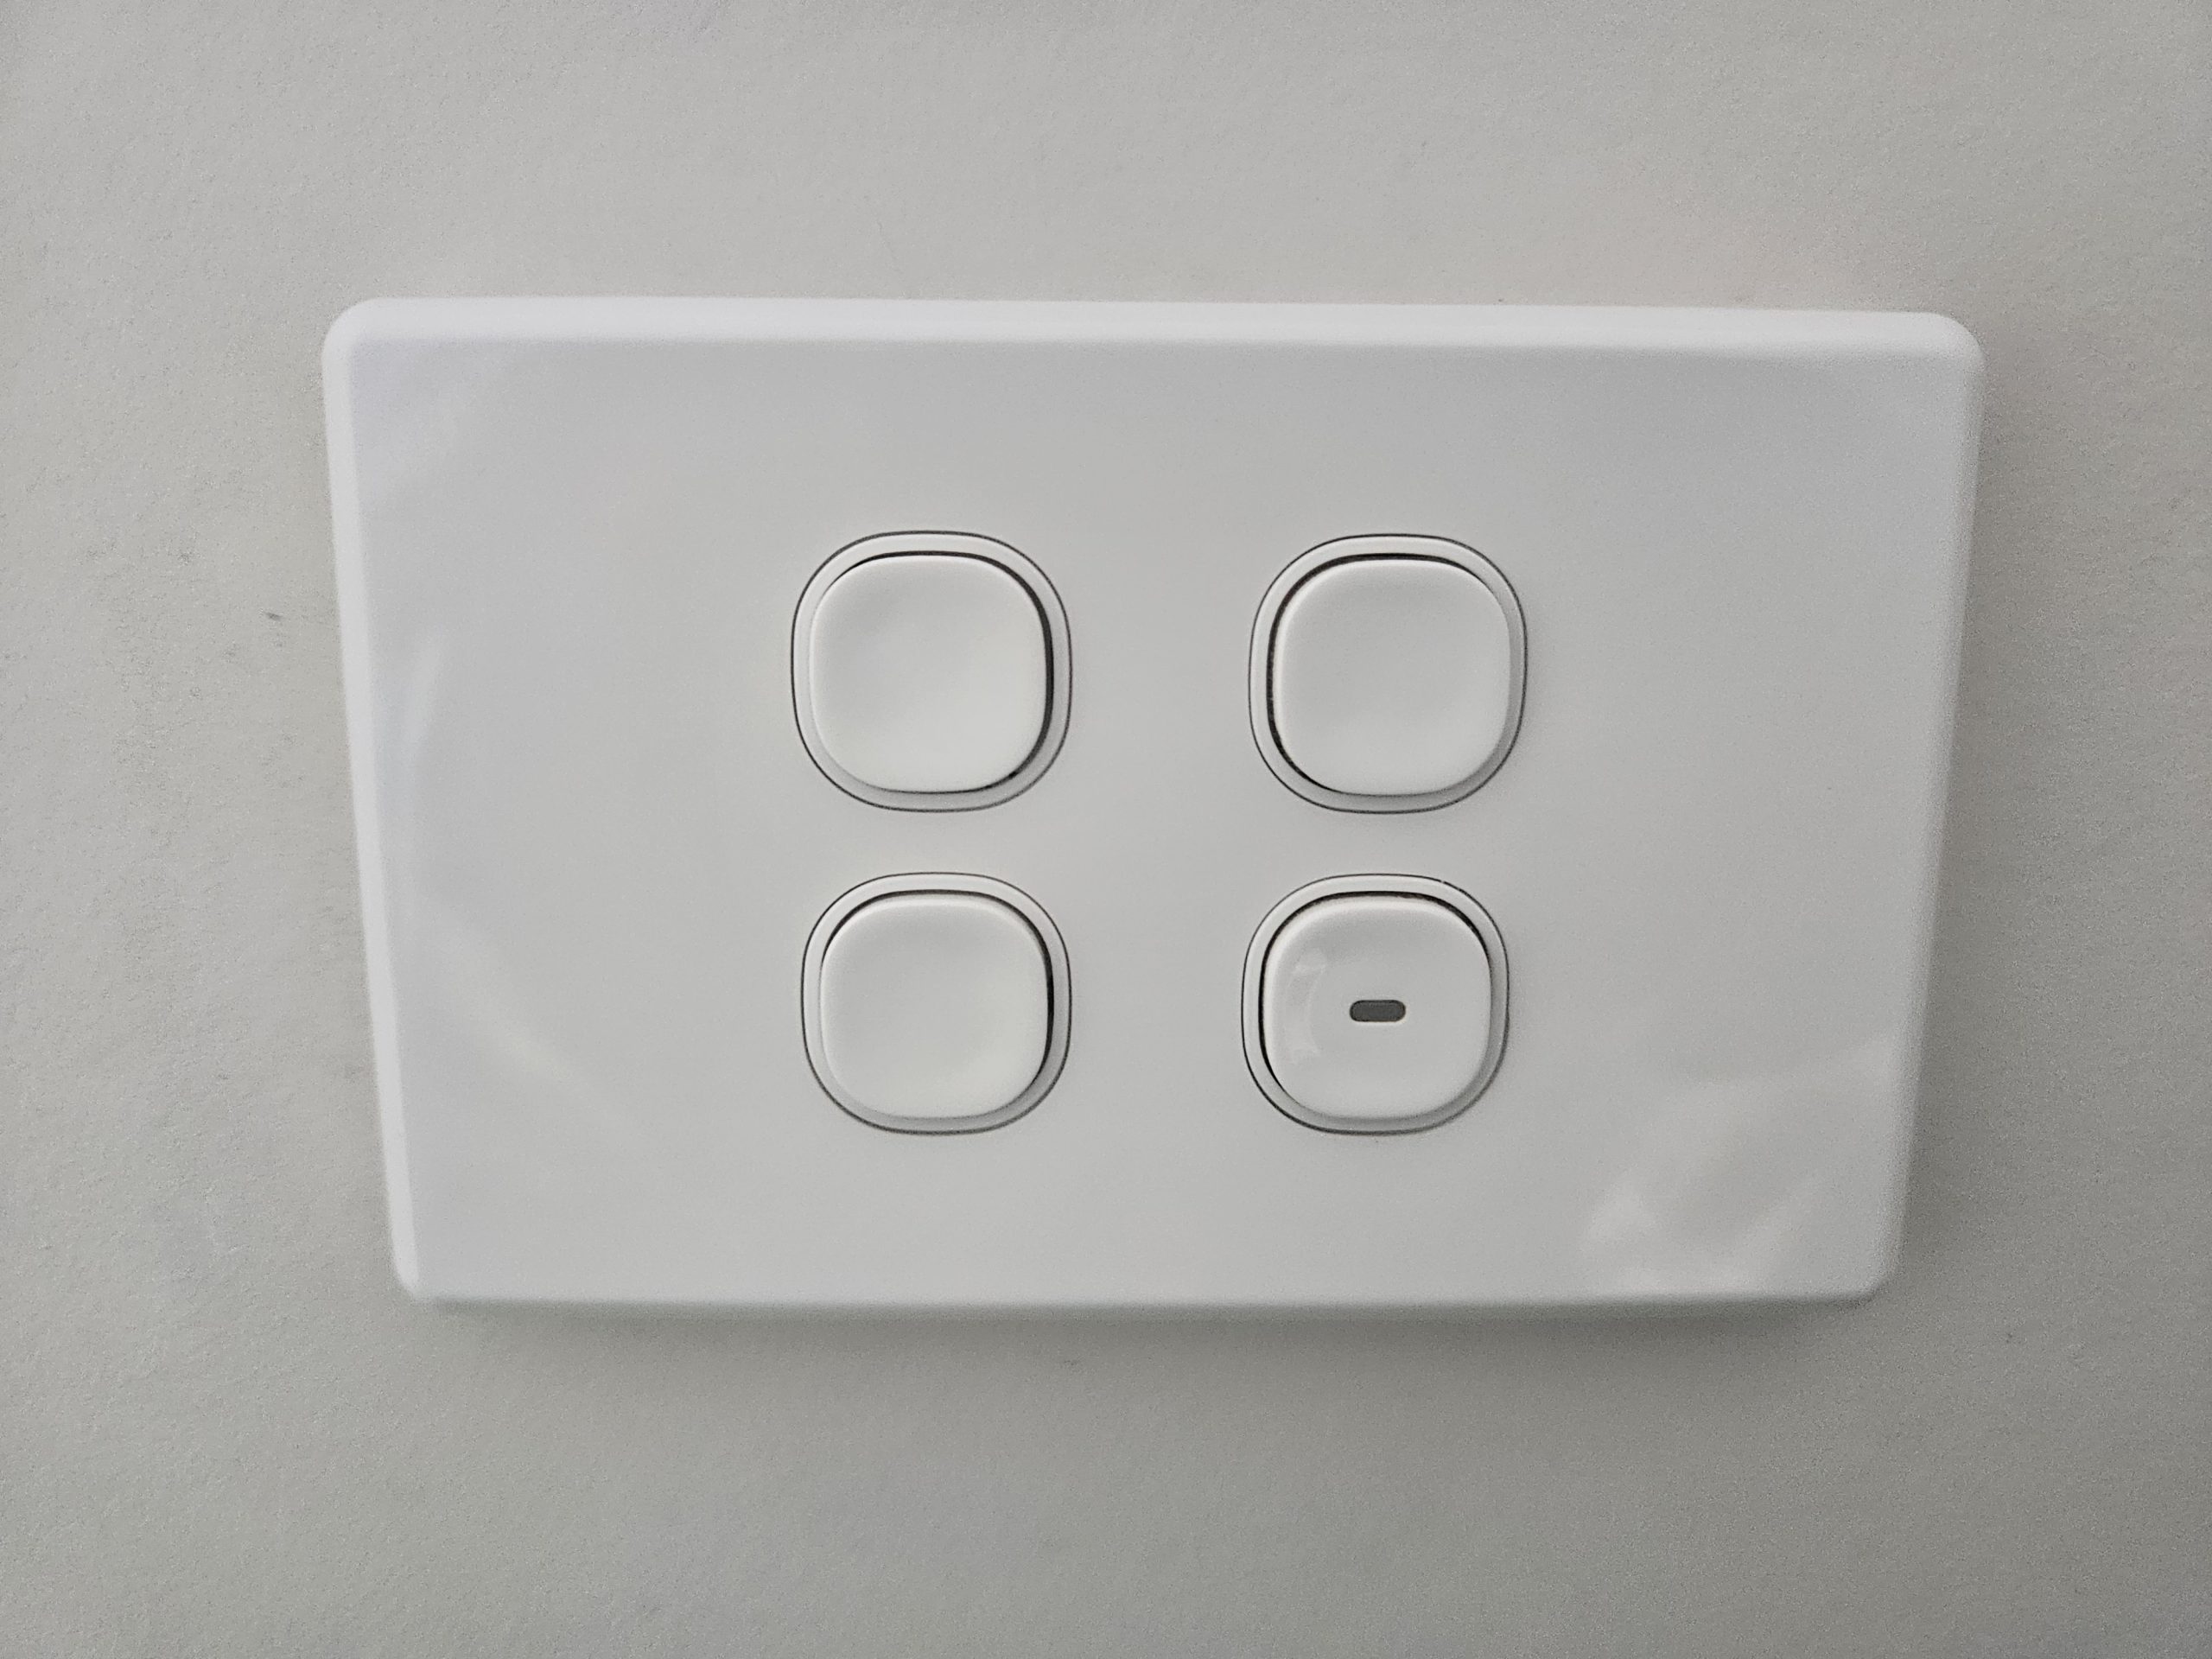
I am going to be adding an additional two buttons to every wall plate. One button for the light, one button for the fan. Electrically they are not connected to the fan in any way. I also want more than just on / off functionality, I want the ability to increase/decrease the fan speed and change the brightness of the light.
It is worth noting I am forgoing functionality that we will seldom use. For the rare occasions, there is the remote or the TUYA application (Home Assistant Integration is very watered down, come on TUYA, come on TUYA please up your game).
As the Clipsal 30PB buttons are not connected electrically to the SkyFan DC, it graces us options. This is what I settled on
| Fan | Light | |
| Single Press | Toggle state (either on or off) | Toggle state (either on or off) |
| Double Press | Increase fan speed or turn on if off | Increase brightness or turn on if off |
| Triple Press | Decrease fan speed or turn off if on | Decrease brightness or turn off if on |
Read below for more details, but the short of it is, as soon as you press a button, the number or times you press the button is evaluated after 550ms. This pattern provides a wide range of functionality for every day living.
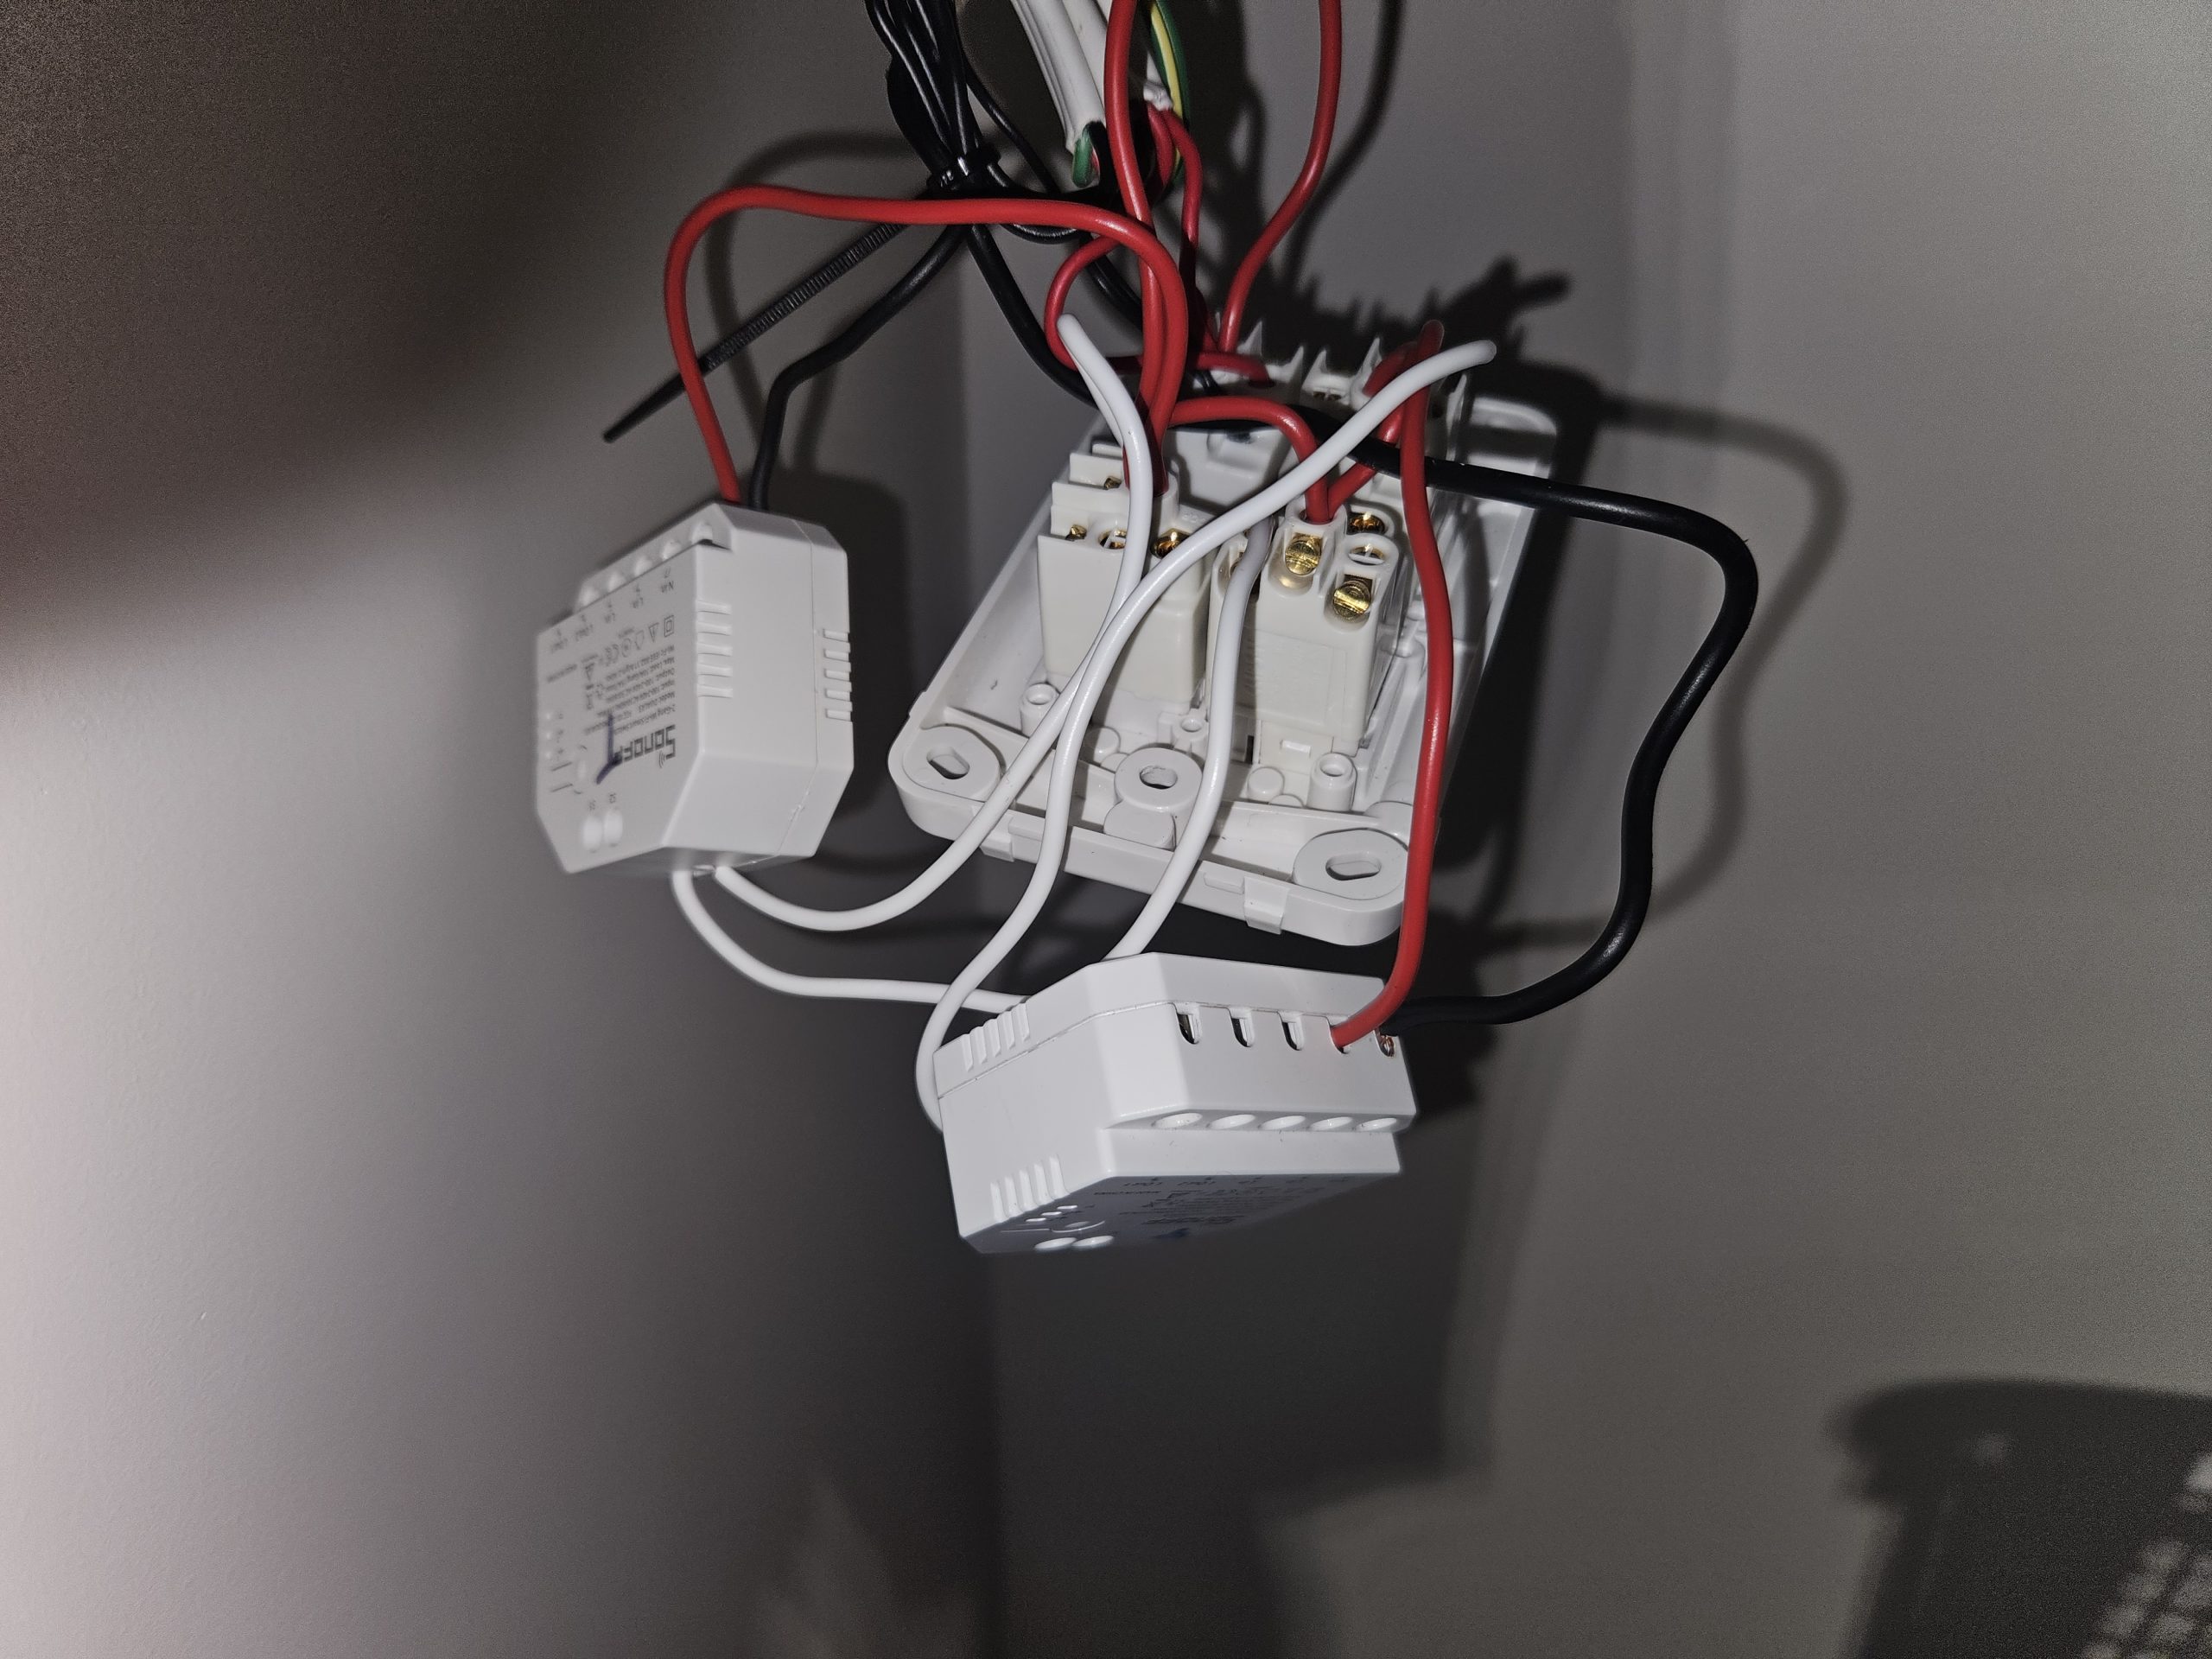
Adding Buttons With Clipsal & Sonoff
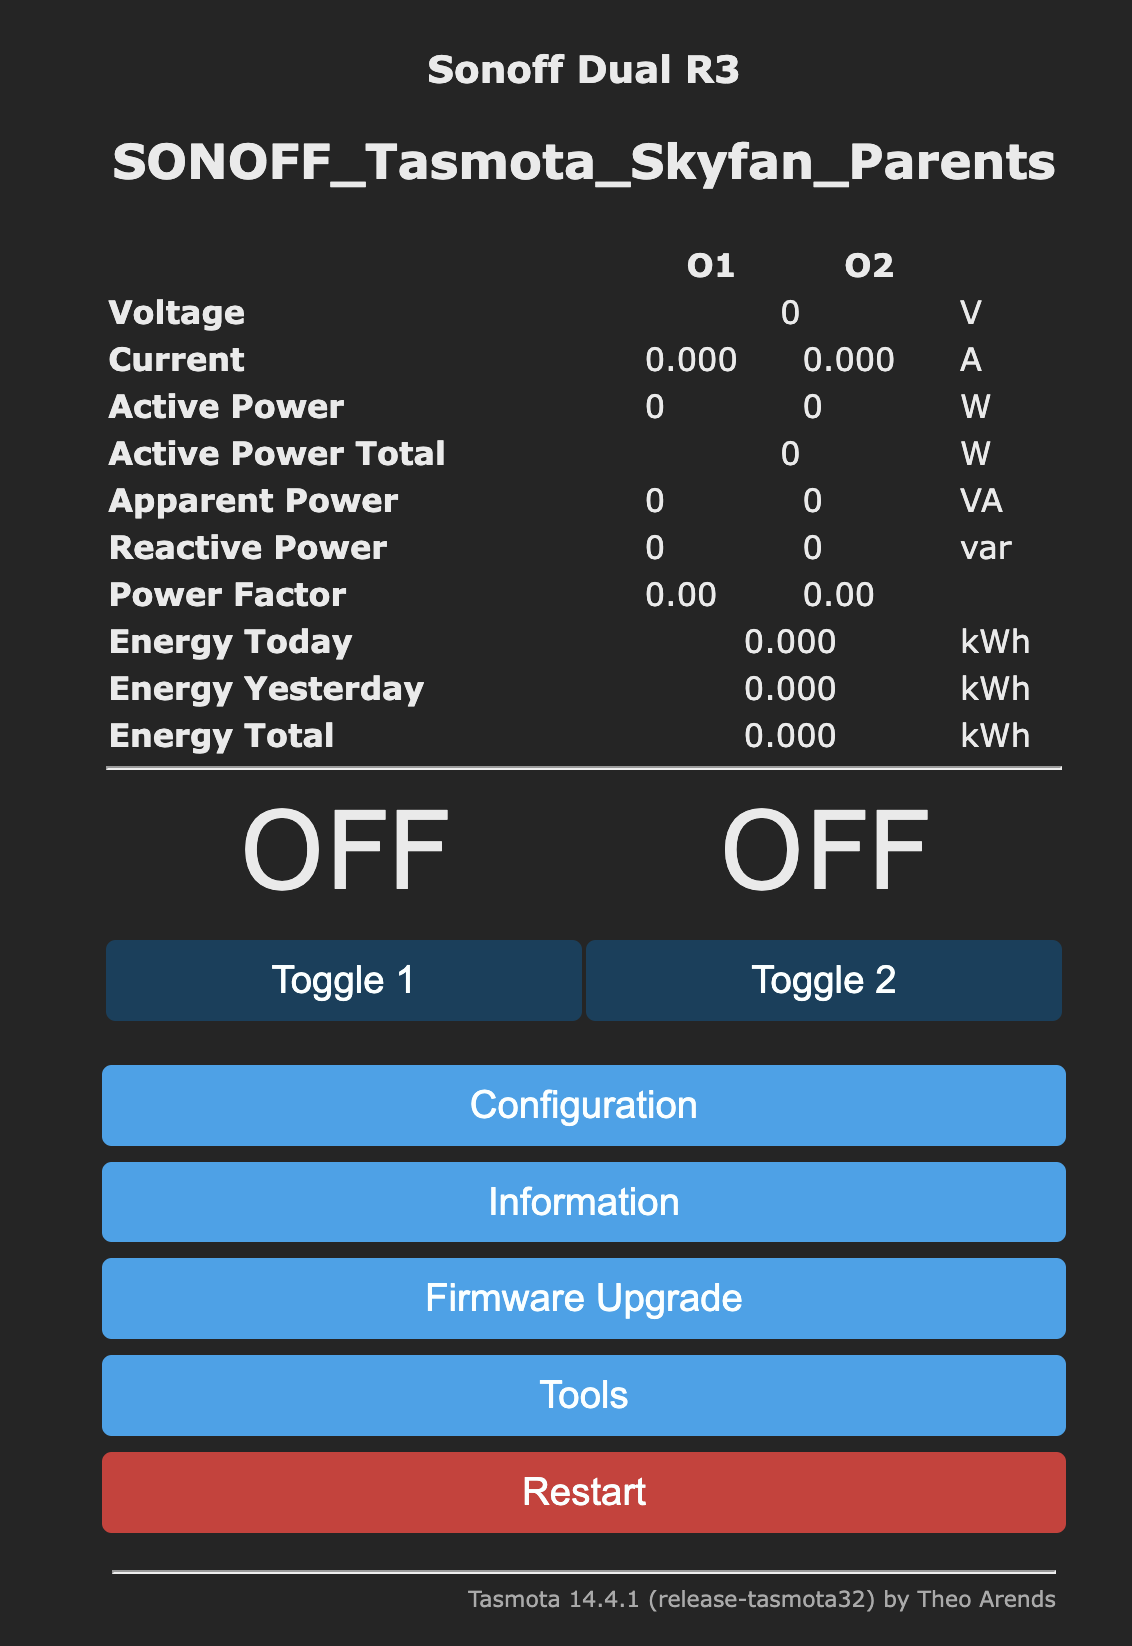
The goal here is to add two more buttons and to be able to count button presses. For that I am using an appliance module that can send MQTT messages. I am using a Sonoff DUAL R3 which is a dual channel appliance module. Out of the box it does not provide MQTT functionality but with its firmware changed to Tasmota we can generate a MQTT message every time a button is pressed. I wont cover the how of flashing Tasmota on a Sonoff Dual R3, for that see my post I authored many years ago on this very process – https://automation.baldacchino.net/sonoff-dual-r3-tasmota-home-assistant
I
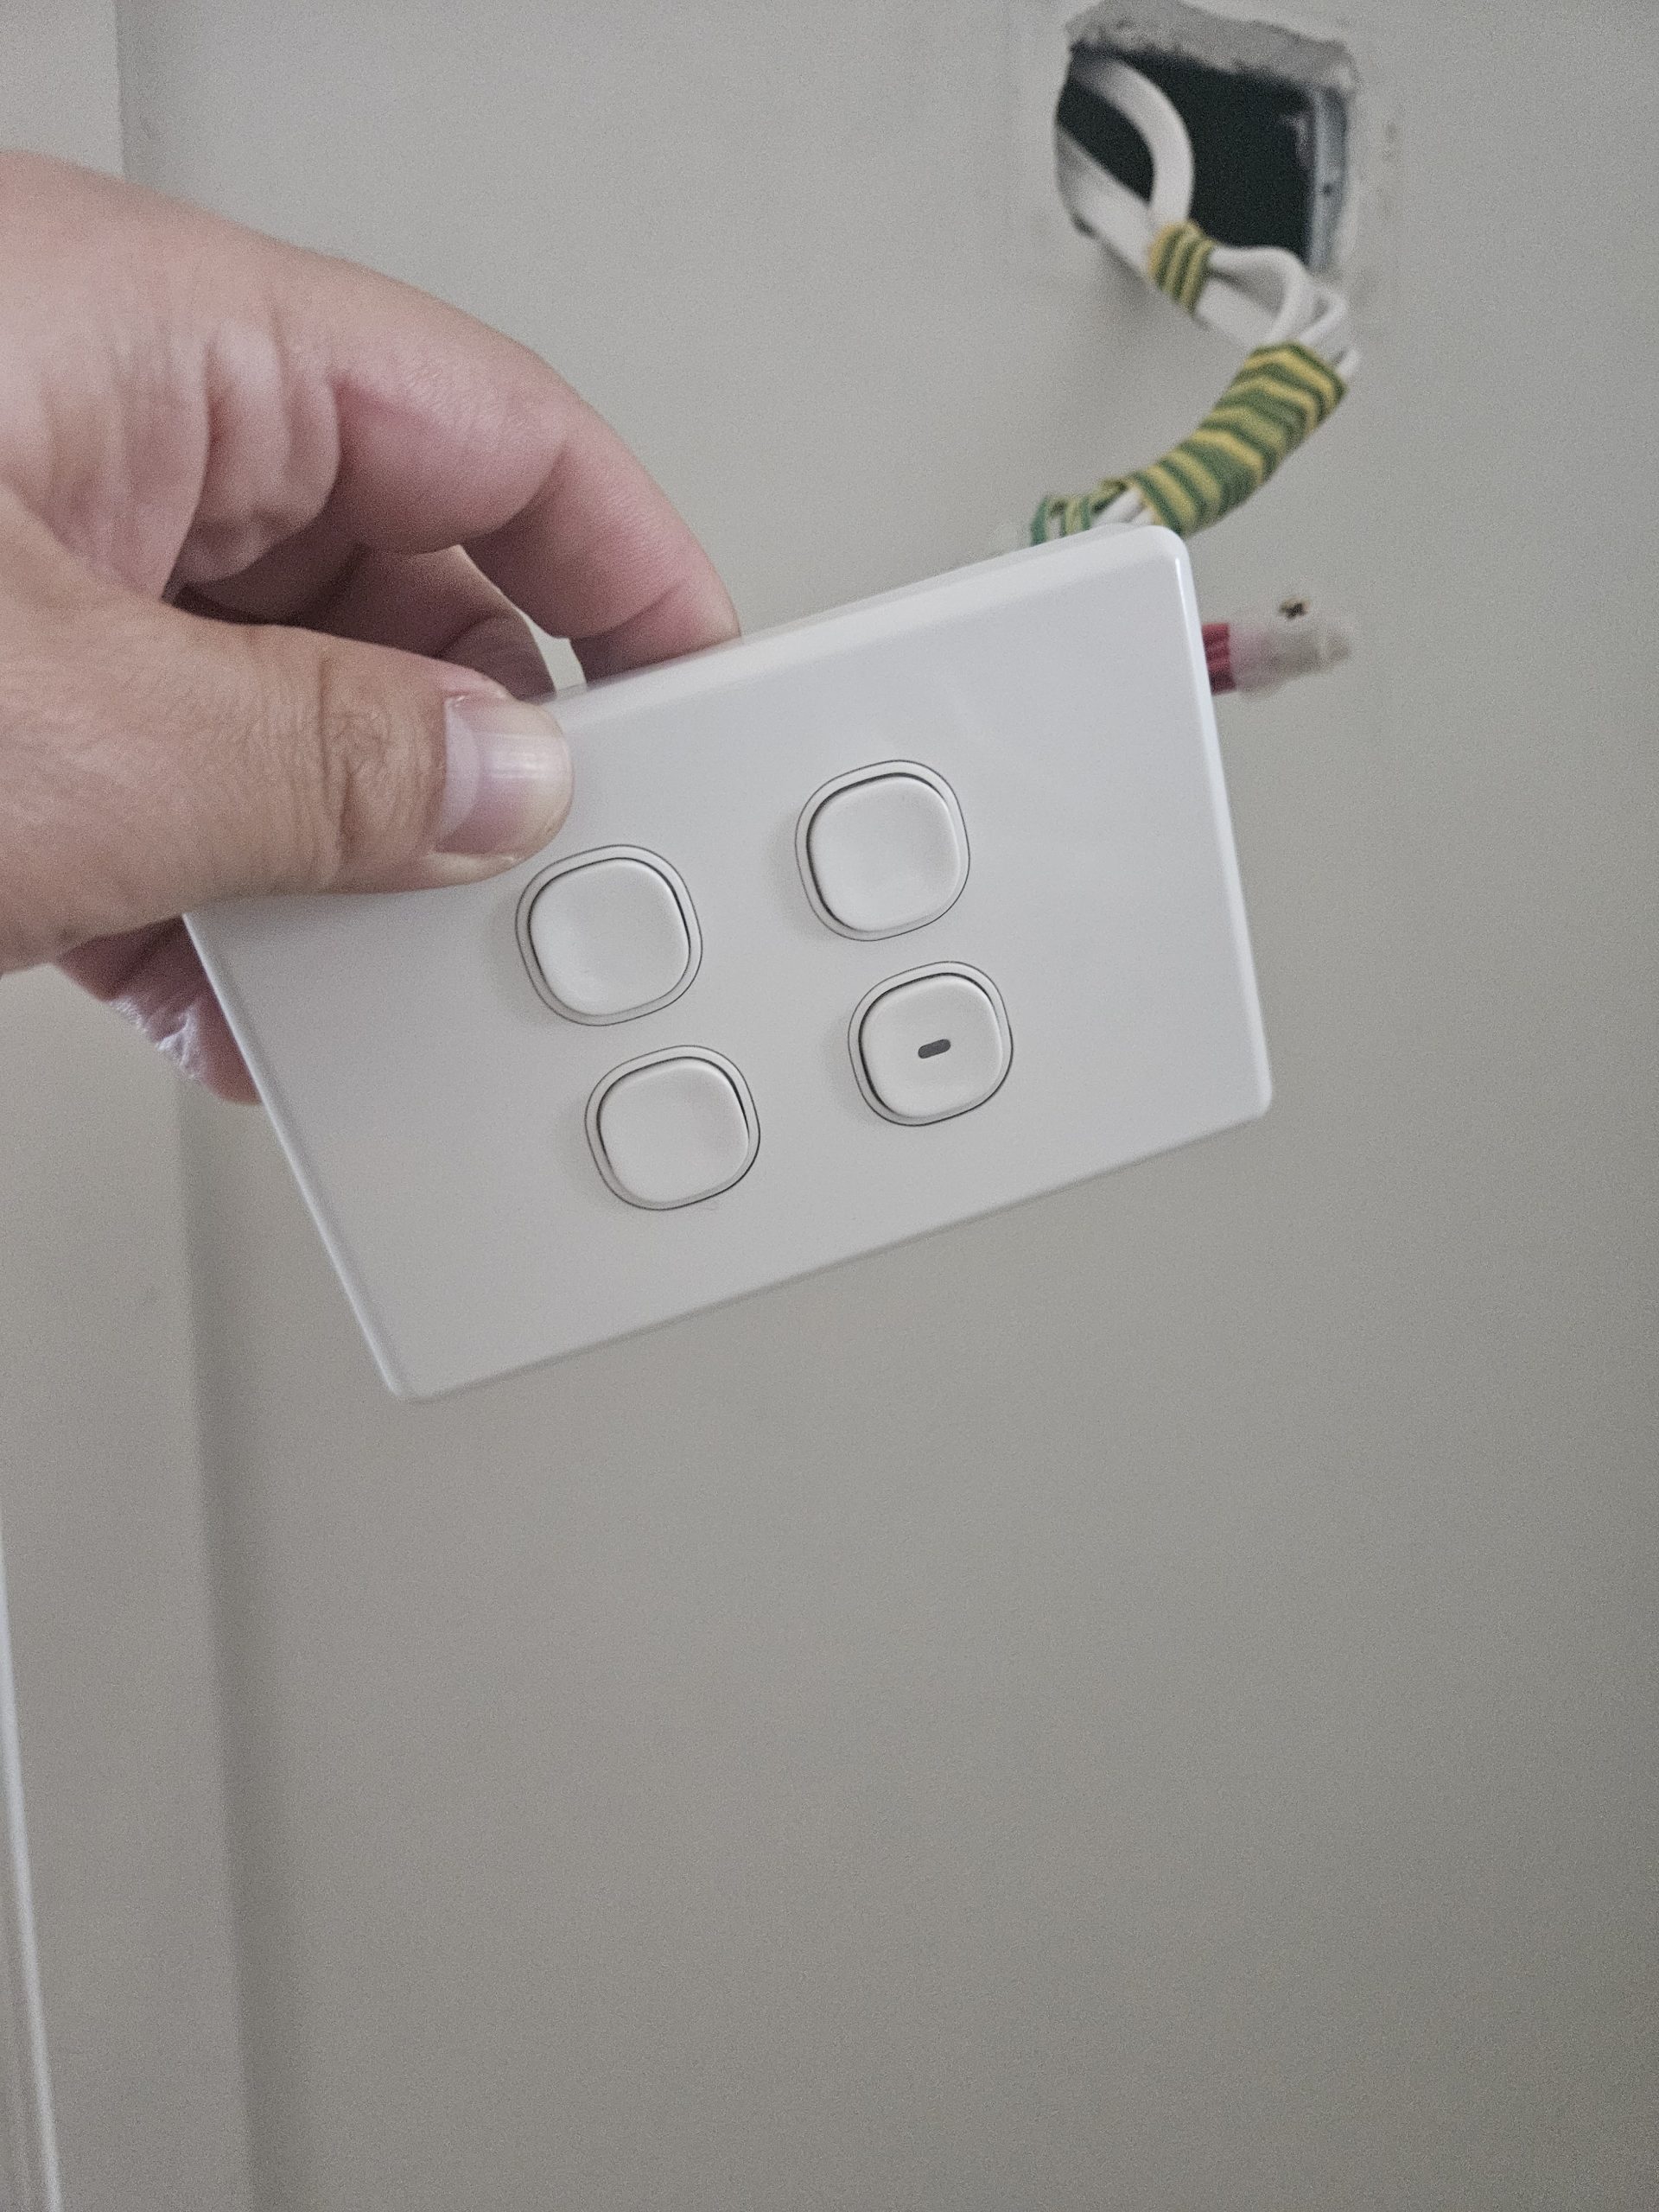
I am using Clipsal 30PB’s as my switches, you can use anything. I do like push button mechanical switches as their state looks the same regardless of how they are toggled, again back to aesthetics.
As this does require 120v/240v manipulation ensure you follow your country’s regulations as you may need to use a licenses electrician.
And with that, assemble your wall plate and configure Tasmota and ensure that each switch is broadcasting MQTT messages when a push button is pressed.

Counting Button Presses with Tasmota & Arduino
This section is where we start applying our logic. Our Arduino is there ‘hero’ device in this solution. We need to perform a few functions. Firstly we need to subscribe to the MQTT topics of the Sonoff / Tasmota device. There is a topic for each button. They are as follows
client2.subscribe("stat/SONOFF_Tasmota_Skyfan_Parents/POWER1");
client2.subscribe("stat/SONOFF_Tasmota_Skyfan_Parents/POWER2");
I am going to step you through parts of my Arduino sketch. Whilst I installed 4 fans, my examples will be for a sole SkyFan to which I call ‘SkyFan Parents’ in my code. Replace this name accordingly. This is a pattern.
Timers and variables
//SkyFan Timers - Parents
unsigned long lastMessageTime = 0;
int messageCount_Parents_Fan = 0;
int messageCount_Parents_Light = 0;
Your sketch will nee to listen for incoming MQTT messages. You will need to use a call-back pattern. For more information on this please look online
 //MQTT callback
void callback(char* topic, byte* payload, unsigned int length) {
  MQTTTopic = String(topic);
  MQTTPayload = "";
  Serial.println("MQTT topic is [" + MQTTTopic +"]");
  for (int i=0;i<length;i++) {
      MQTTPayload = String(MQTTPayload + (char)payload[i]);
  }
  Serial.println("MQTT payload is [" + MQTTPayload + "]");
}
The Arduino needs to subscribe to MQTT topics, this will ensure when the buttons are pressed and messages are published, that the Arduino is able to detect button presses. This code will connect to our MQTT broker and subscribe to our two MQTT topics. Note, in my code below, if I loose connection to my MQTT broker all other aspects of the Arduino sketch will pause. This is by design as I do not want any synchronisation issues between Home Assistant, TUYA and other systems
//IP Address of MQTT Server
IPAddress MQTTserver(10, 0, 0, 200);
// MQTT
EthernetClient ethClient2;
PubSubClient client2(ethClient2);

void reconnect() {
  // Loop until we're reconnected
  while (!client2.connected()) {
    Serial.print("Attempting MQTT connection...");
    // Attempt to connect
    if (client2.connect("arduinoClient")) {
      Serial.println("connected");
      // Once connected, publish an announcement...
      client2.publish("stat/ARDUINO/IP_Address","10.0.0.50");
      // ... and resubscribe
      client2.subscribe("stat/SONOFF_Tasmota_Skyfan_Parents/POWER1");
      client2.subscribe("stat/SONOFF_Tasmota_Skyfan_Parents/POWER2");
    } else {
      Serial.print("failed, rc=");
      Serial.print(client2.state());
      Serial.println(" try again in 5 seconds");
      // Wait 5 seconds before retrying
      delay(5000);
    }
  }
}
This block of code is listening for incoming messages and is part of the main loop.
//PARENTS SKYFAN LIGHT
    if (String(MQTTTopic) == "stat/SONOFF_Tasmota_Skyfan_Parents/POWER1") {
      lastMessageTime = millis();
      messageCount_Parents_Light++;
    MQTTPayload = "";
    MQTTTopic = "";
    }


 //PARENTS SKYFAN FAN
    if (String(MQTTTopic) == "stat/SONOFF_Tasmota_Skyfan_Parents/POWER2") {
      lastMessageTime = millis();
      messageCount_Parents_Fan++;
    MQTTPayload = "";
    MQTTTopic = "";
    }
These two functions are used to evaluate the number of button presses. As you can see we have options for 1, 2 and 3 button presses.
void evaluateParentsSkyFan_Light() {
   if (messageCount_Parents_Light == 1) {
      client2.publish("cmnd/SONOFF_Tasmota_Skyfan_Parents/Light", "Toggle");
   }
   else if (messageCount_Parents_Light == 2 {
     client2.publish("cmnd/SONOFF_Tasmota_Skyfan_Parents/Light", "Brighten");
   }
   else if (messageCount_Parents_Light == 3) {
     client2.publish("cmnd/SONOFF_Tasmota_Skyfan_Parents/Light", "Dim");
   }
}

void evaluateParentsSkyFan_Fan() {
   if (messageCount_Parents_Fan == 1) {
      client2.publish("cmnd/SONOFF_Tasmota_Skyfan_Parents/Fan", "Toggle");
      }
   else if (messageCount_Parents_Fan == 2) {
      client2.publish("cmnd/SONOFF_Tasmota_Skyfan_Parents/Fan", "Increase");
   }
   else if (messageCount_Parents_Fan == 3) {
      client2.publish("cmnd/SONOFF_Tasmota_Skyfan_Parents/Fan", "Decrease");
   }
}
Finally we go back to the main loop to stitch this together. Every 550ms we call our functions above and evaluate the number of times the button was pressed. The function that is being called will publish a MQTT message accordingly. 550ms was selected, it could be less, but this is safe amount of time for triple press for various people in my family.
//Parents Skyfan - Light
    if (millis() - lastMessageTime > 550 && messageCount_Parents_Light > 0) {
      evaluateParentsSkyFan_Light();
      messageCount_Parents_Light = 0; // Reset the message count after evaluation
    }

 //Parents Skyfan - Fan
    if (millis() - lastMessageTime > 550 && messageCount_Parents_Fan > 0) {
      evaluateParentsSkyFan_Fan();
      messageCount_Parents_Fan = 0; // Reset the message count after evaluation
    }
Converting MQTT Messages To TUYA Commands With Home Assistant
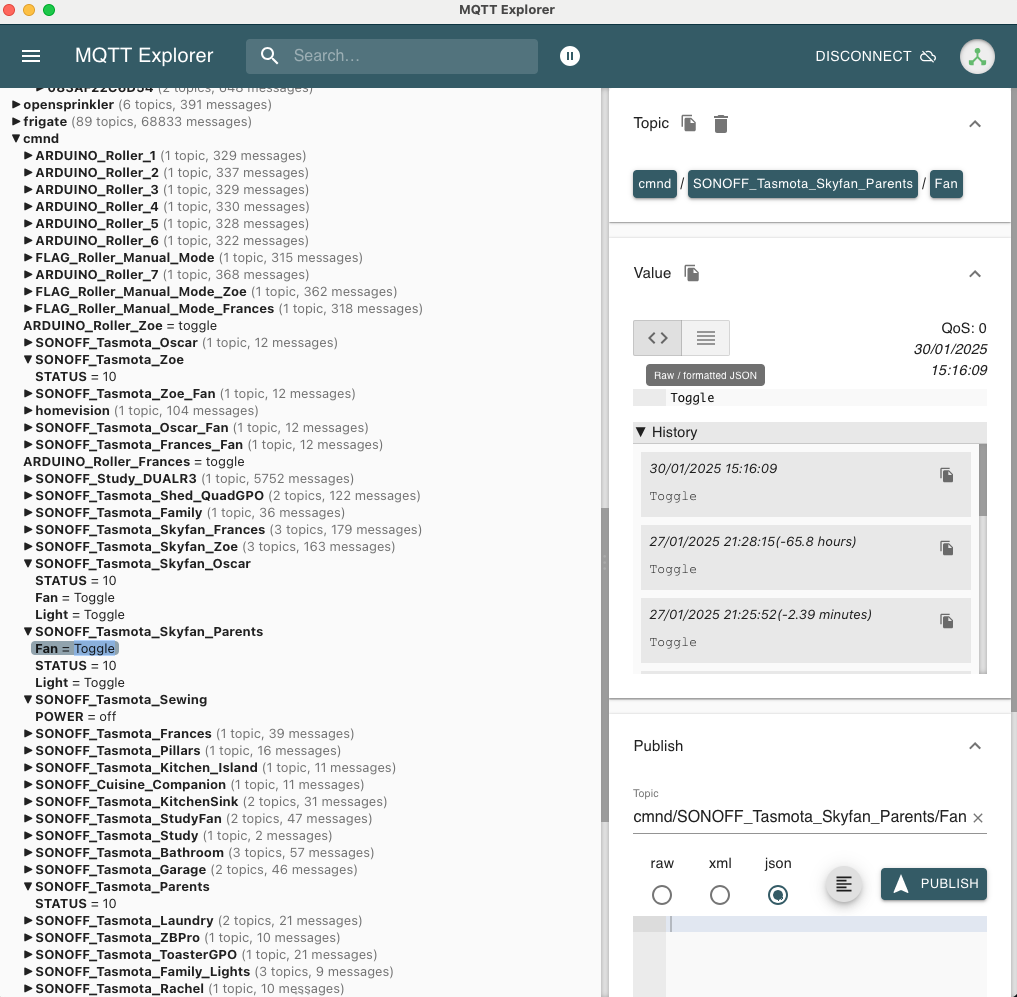
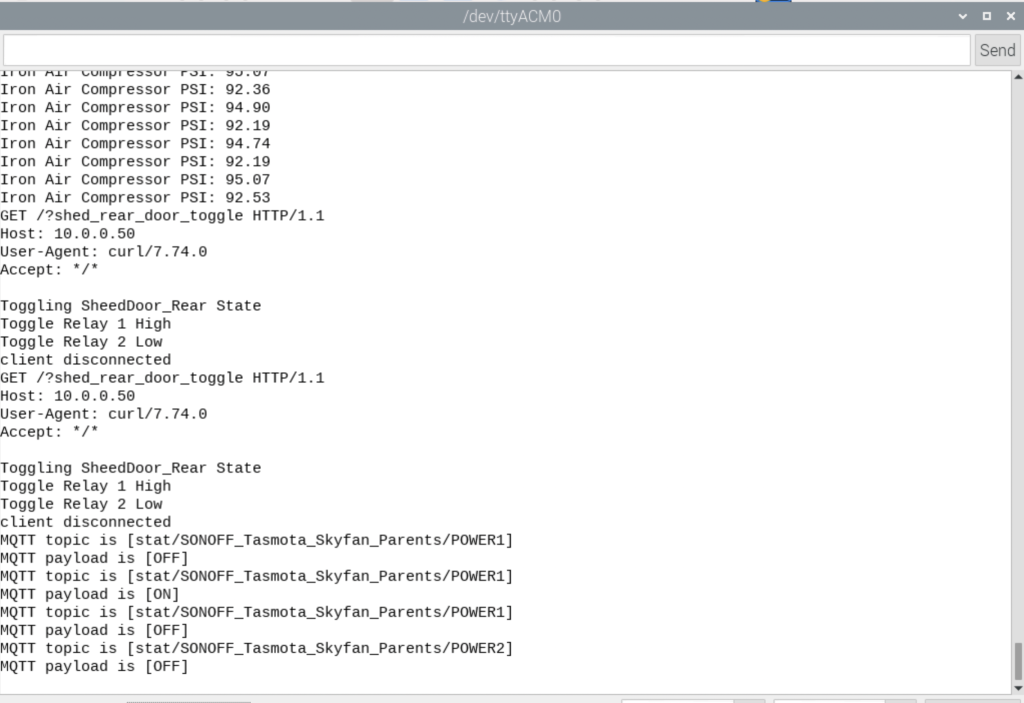
Messages are now being sent back to our MQTT broker, these messages state the action Home Assistant needs to take. The first thing one should be do after uploading your sketch is to validate it is working. I like to publish messages in the Arduino Serial Console, but I also look to ensure the desired message ends up in my MQTT broker. This is about validating as we build. I am using MQTT Explorer in the images above to ensure my messages are in-fact being sent correctly. This acts as a proof point for our Arduino code. If you have any issues, stop and debug.
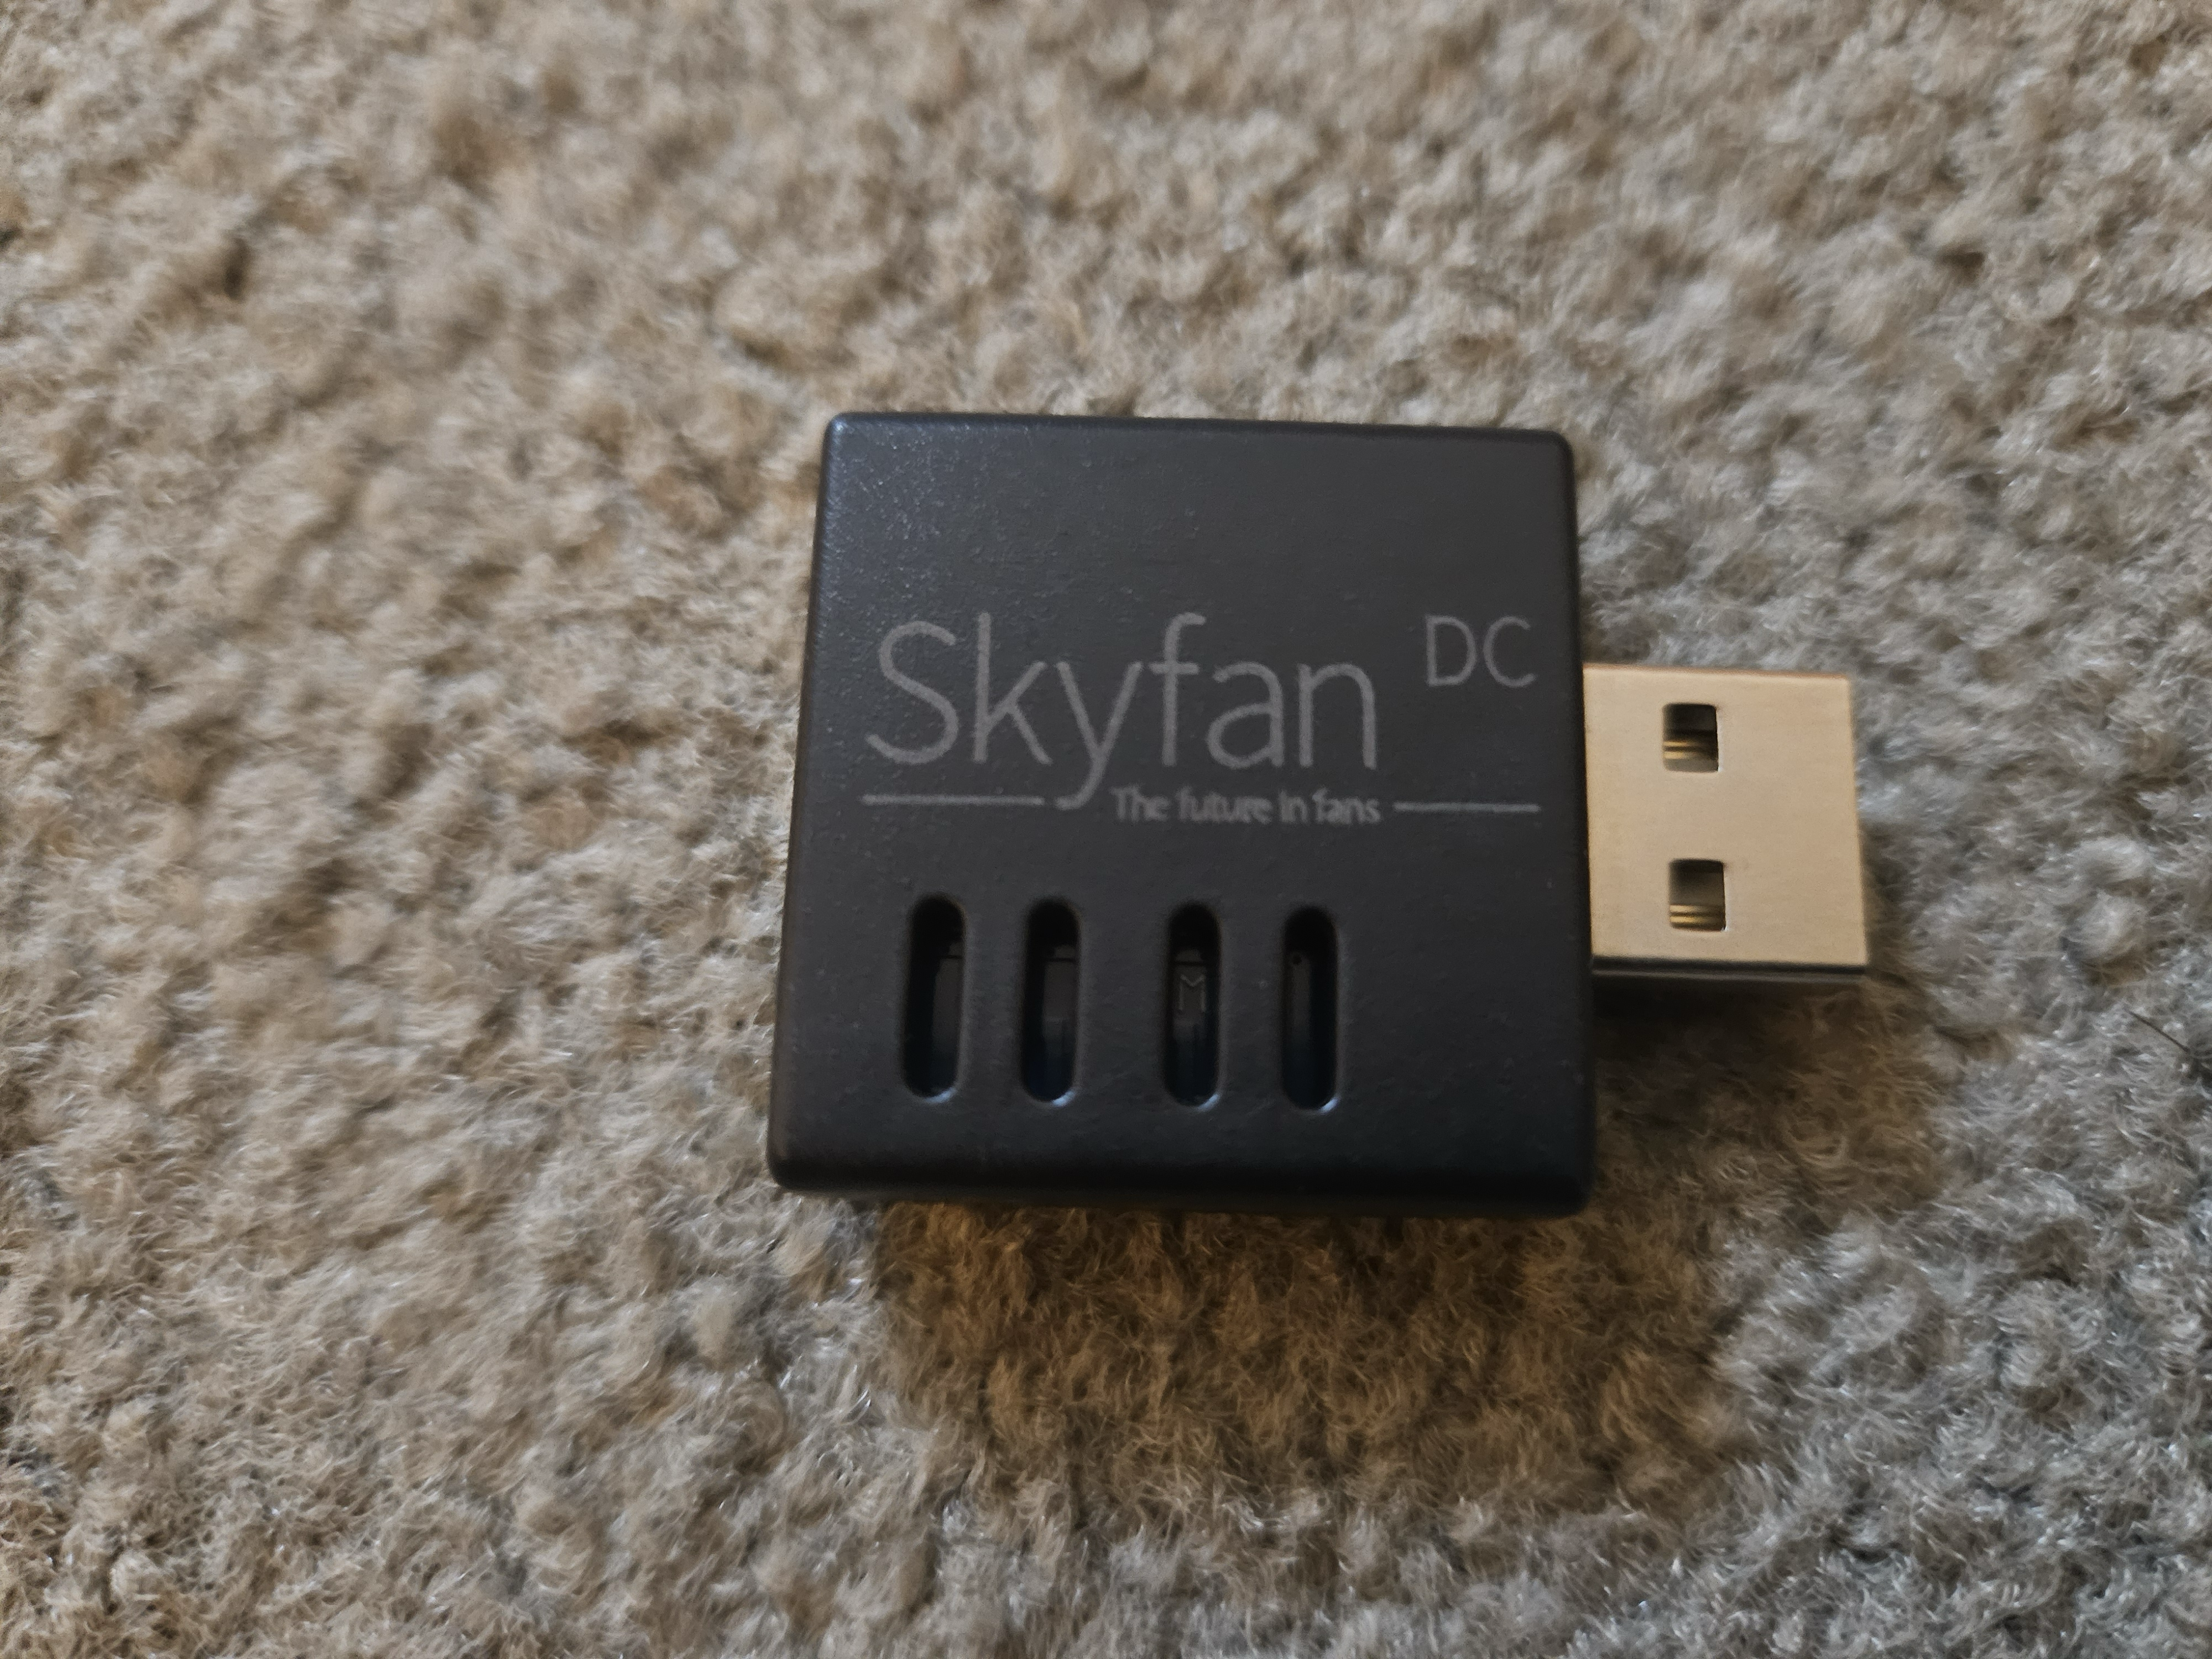
Lastly, it should be obvious but you need to ensure you have installed your TUYA module in the SkyFan DC. This is not standard and can be purchased separately online.

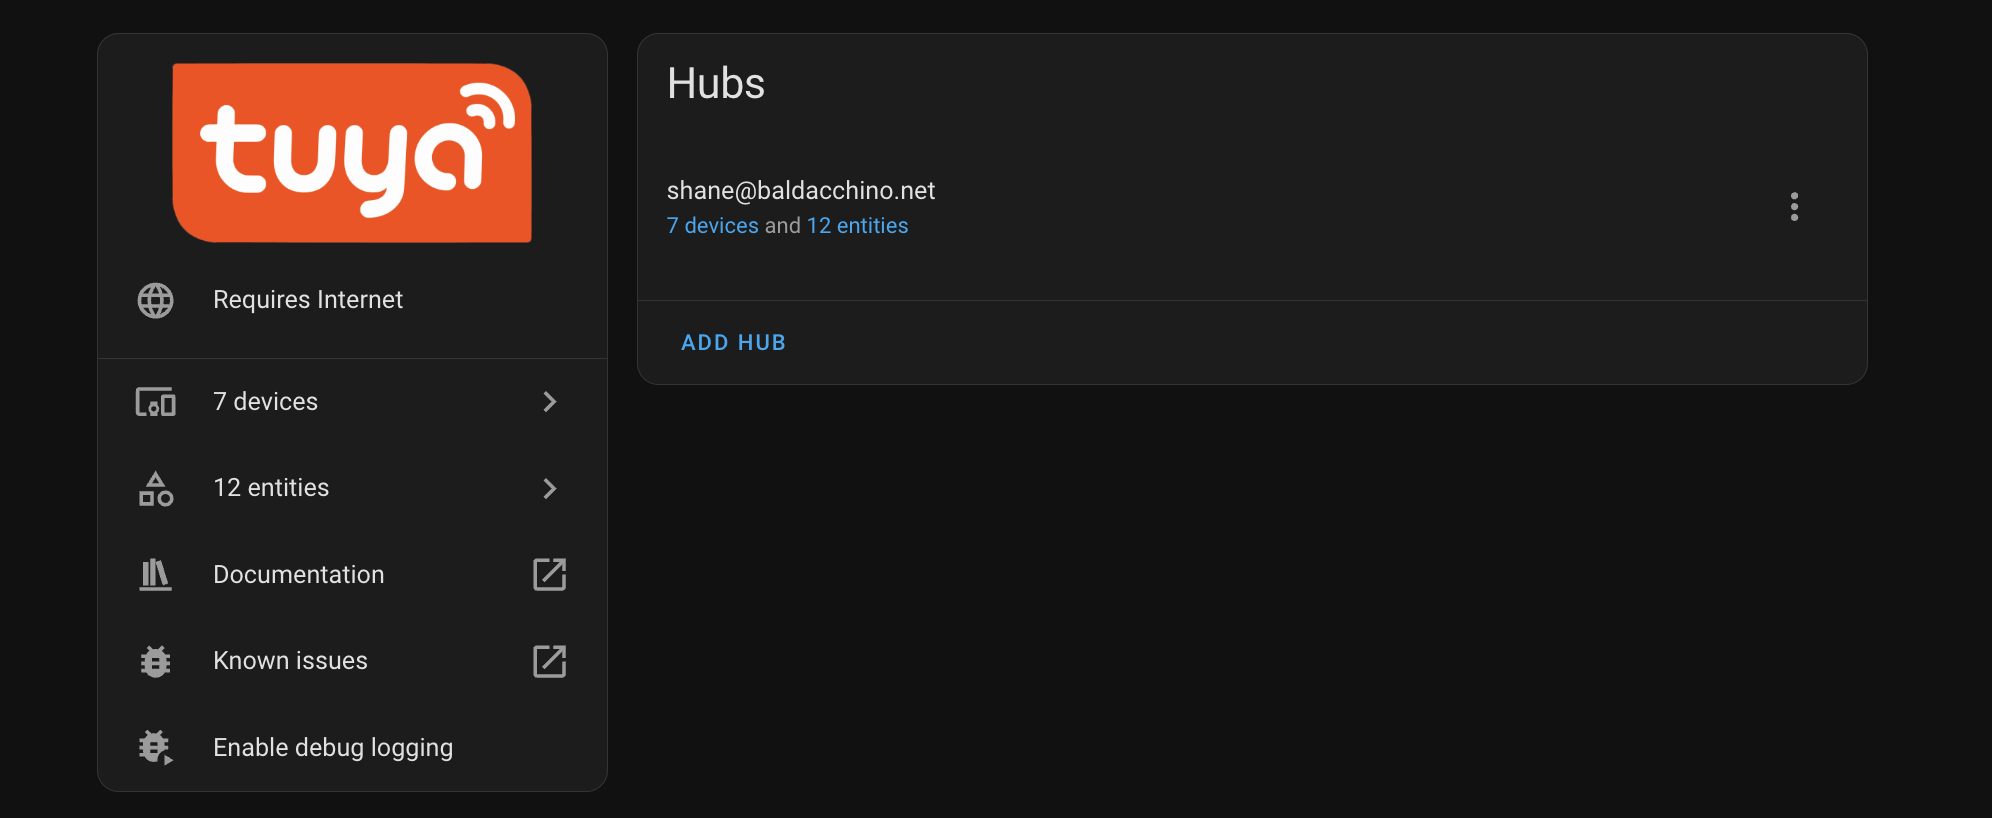
In Home Assistant ensure your integrations between Home Assistant and TUYA is setup correctly. This post wont cover this, but follow the TUYA instructions that come with the module. You can use TUYA or TUYA Local. There are pro’s and cons of each. Thus far I have found TUYA to be reliable. Validate your integration is working and allowing you to alter the fan speed and light brightness.
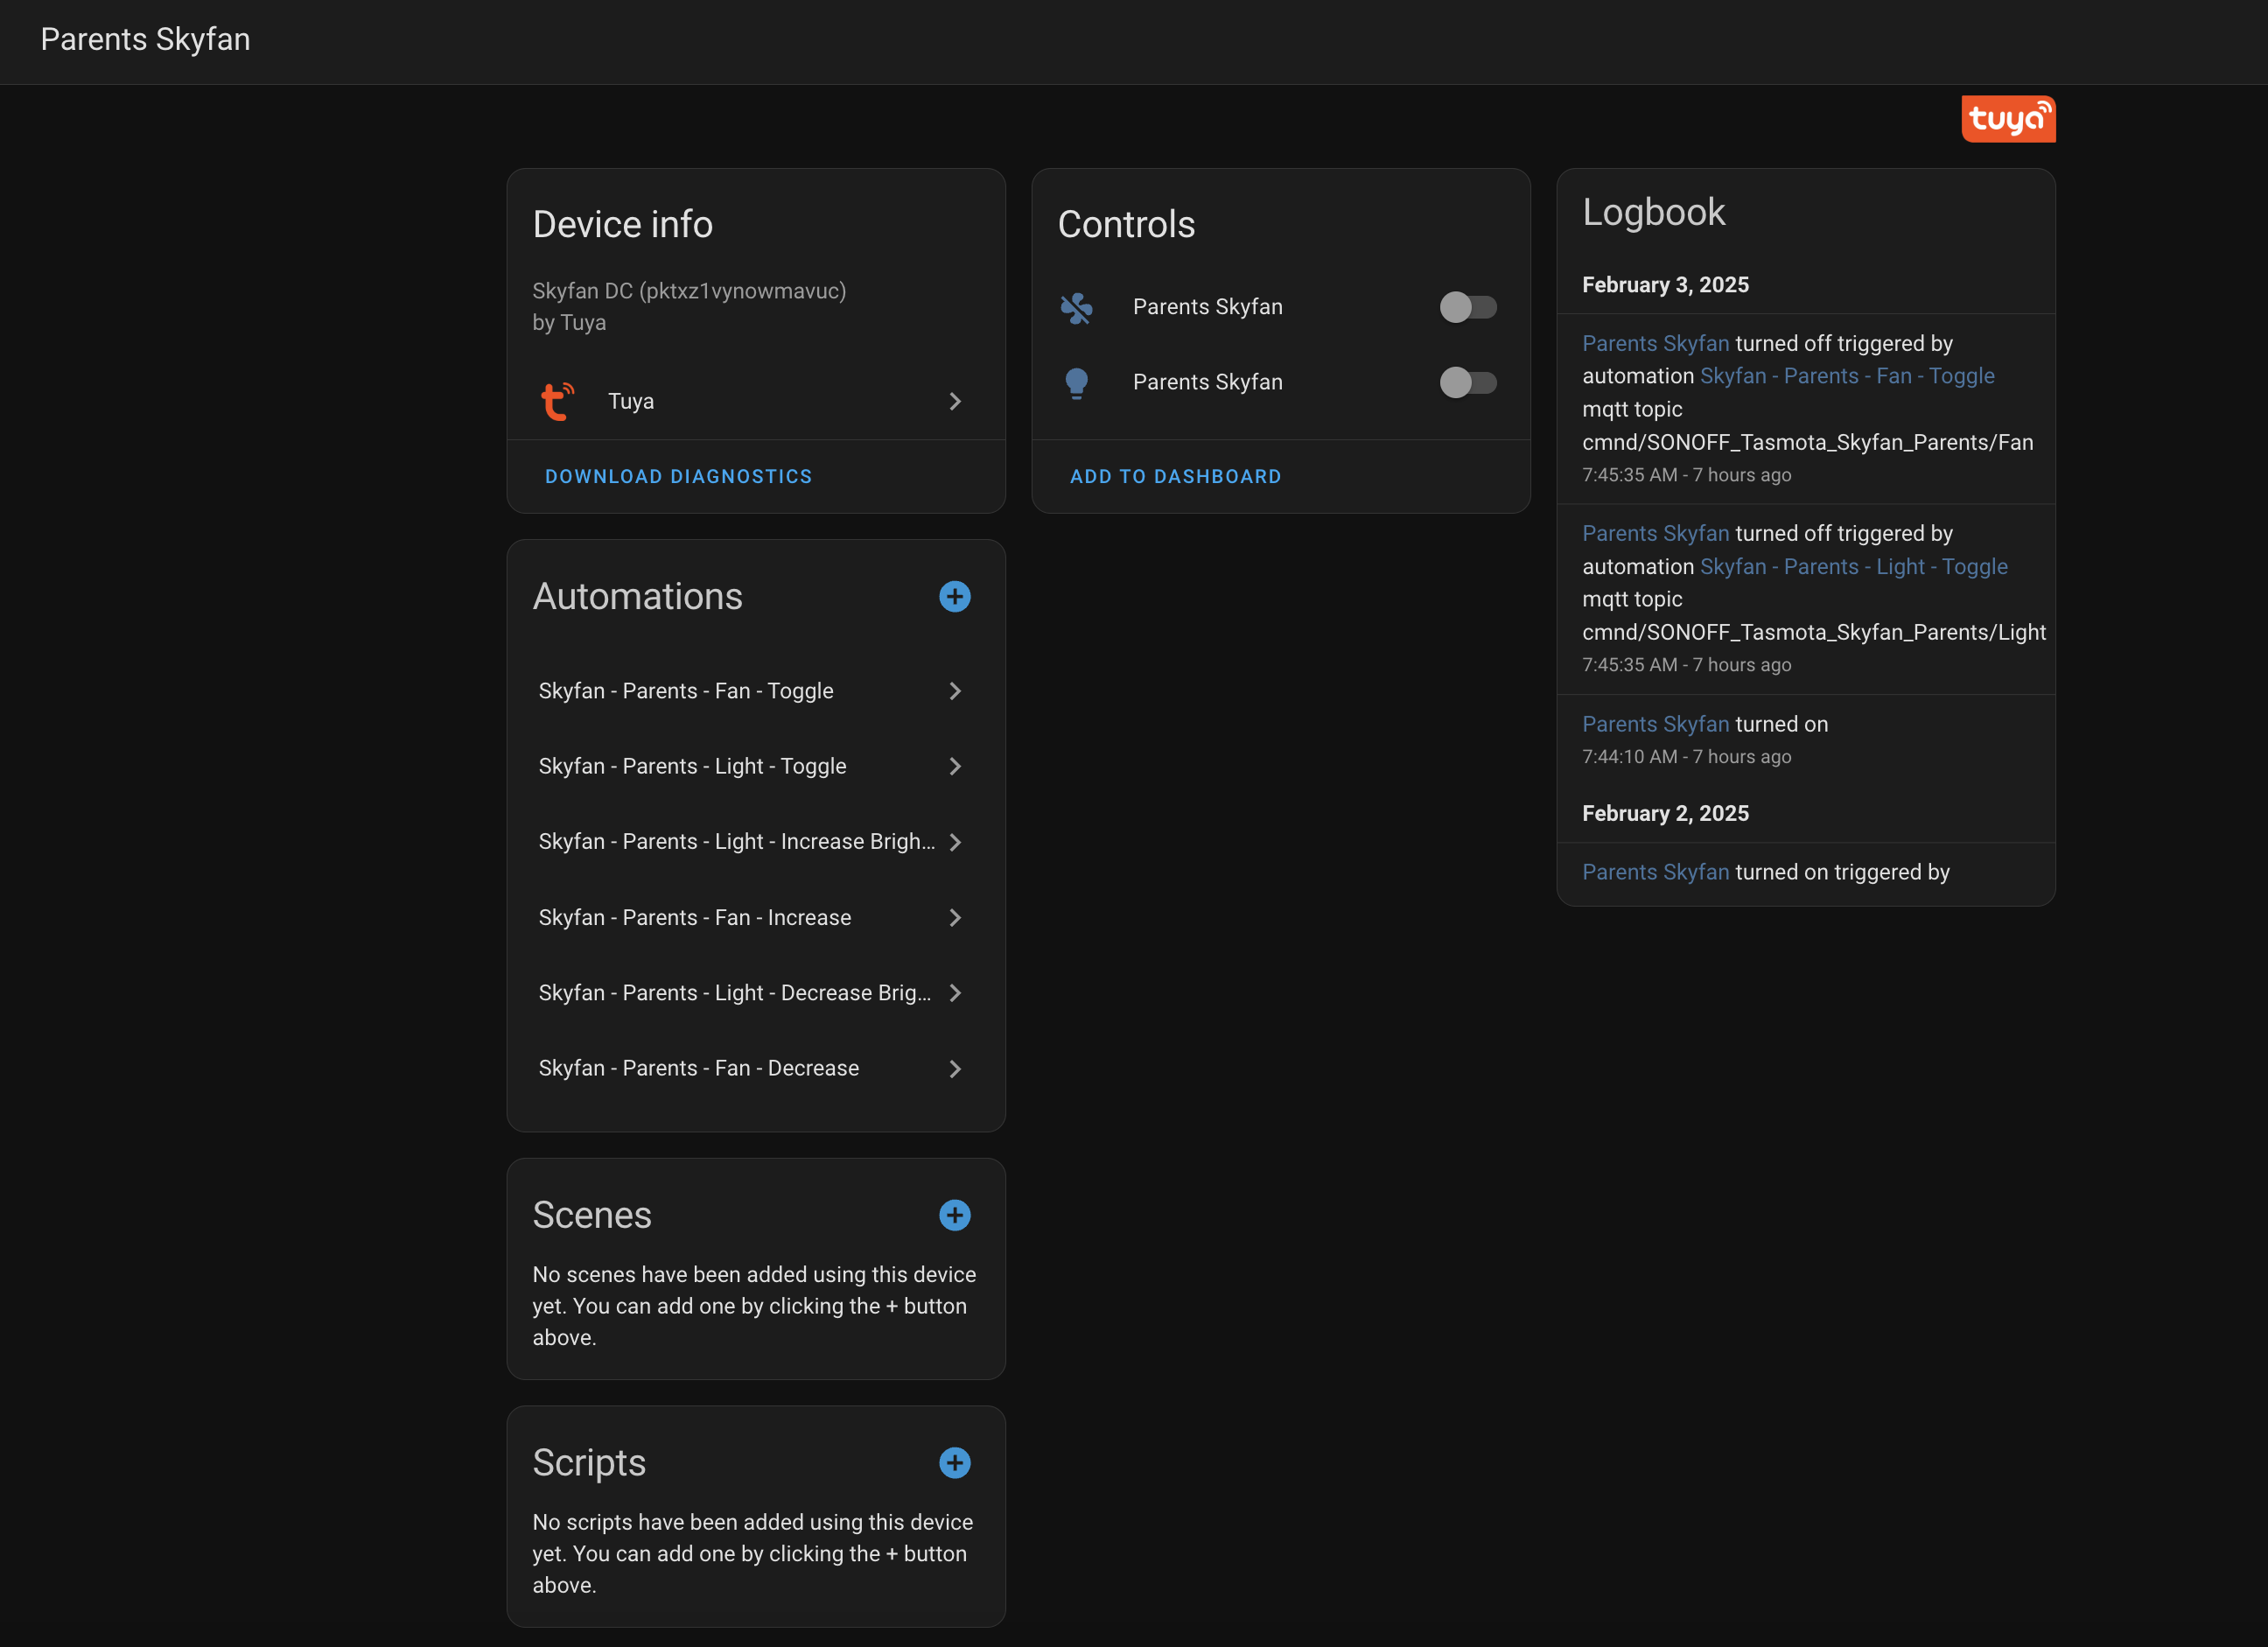
Now, in Home Assistant we need to define Home Assistant Automations. I am using 6 automations per SkyFan DC. The below table summarises the name, trigger and acton. If you get clever, you could combine these in to one automation with more logic, I decided to break each distinct action in to a seperate automation. You could make one automation by taking my approach further and evaluate the MQTT payload and then branching from there.
| HA Automation Name | Trigger | Action |
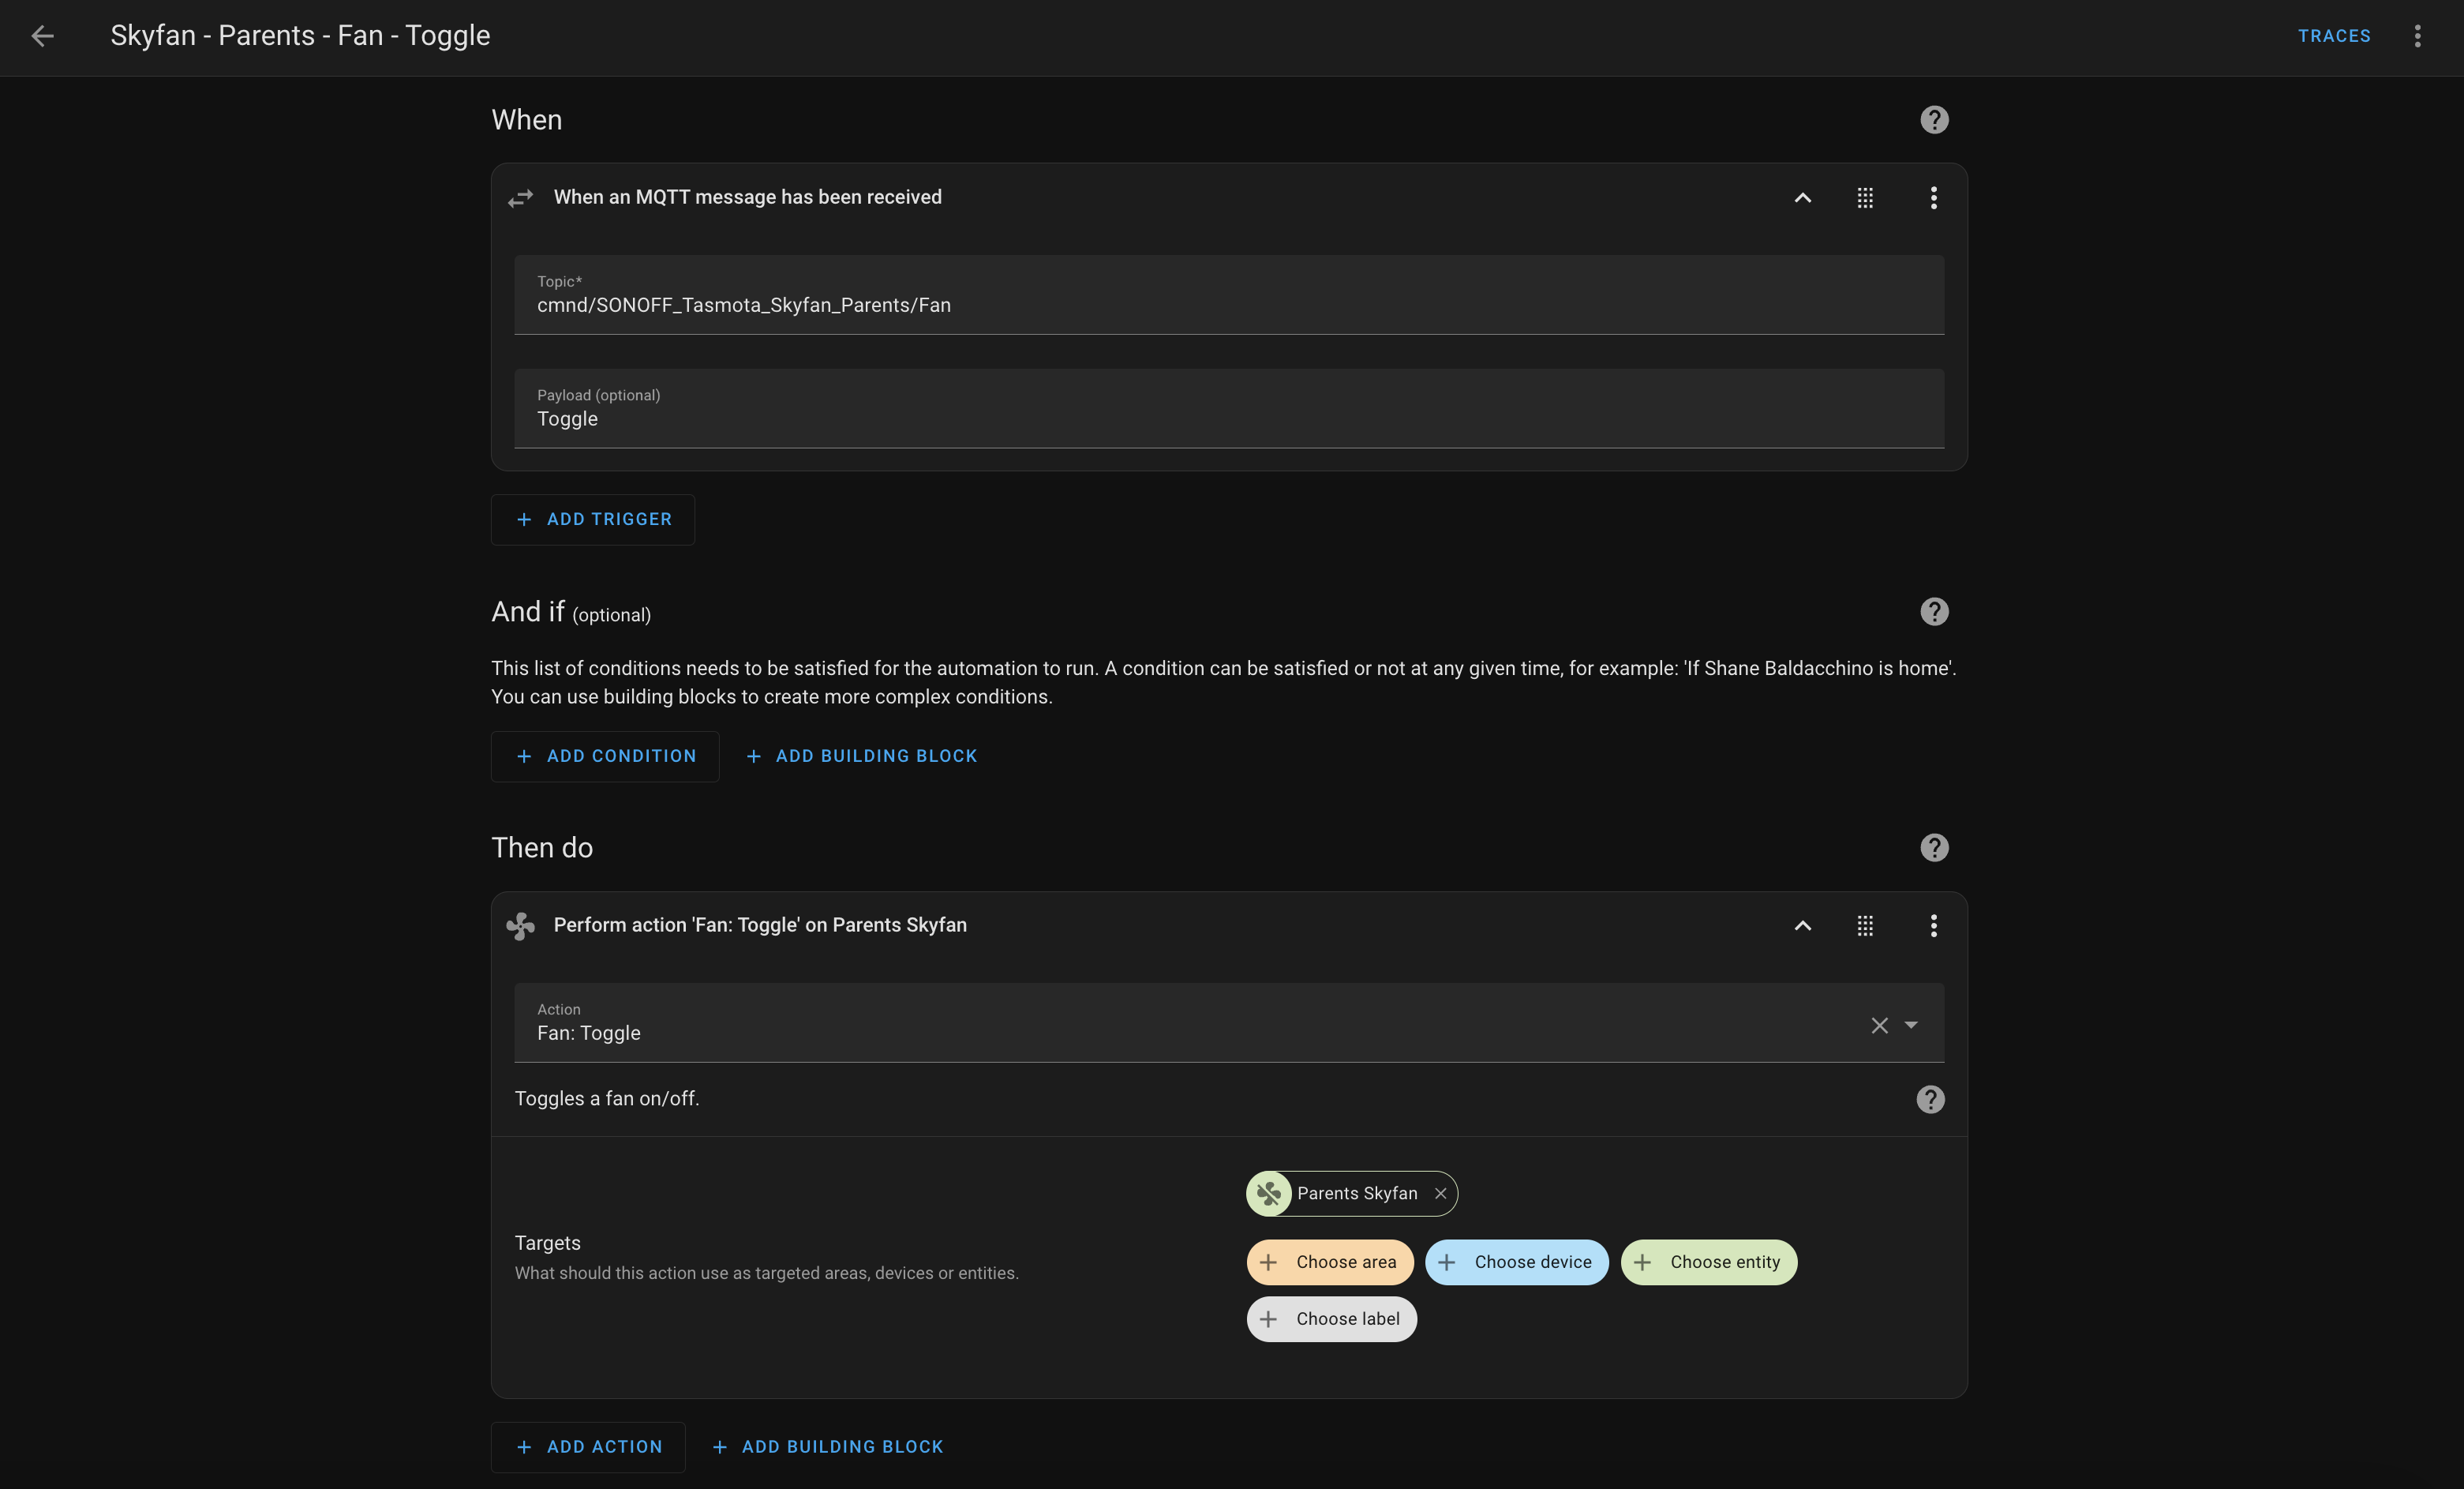
| Skyfan – Parents – Fan – Toggle | MQTT Topic cmnd/SONOFF_Tasmota_Skyfan_Parents/FanPayload Toggle | ActionToggle state (either on or off) |
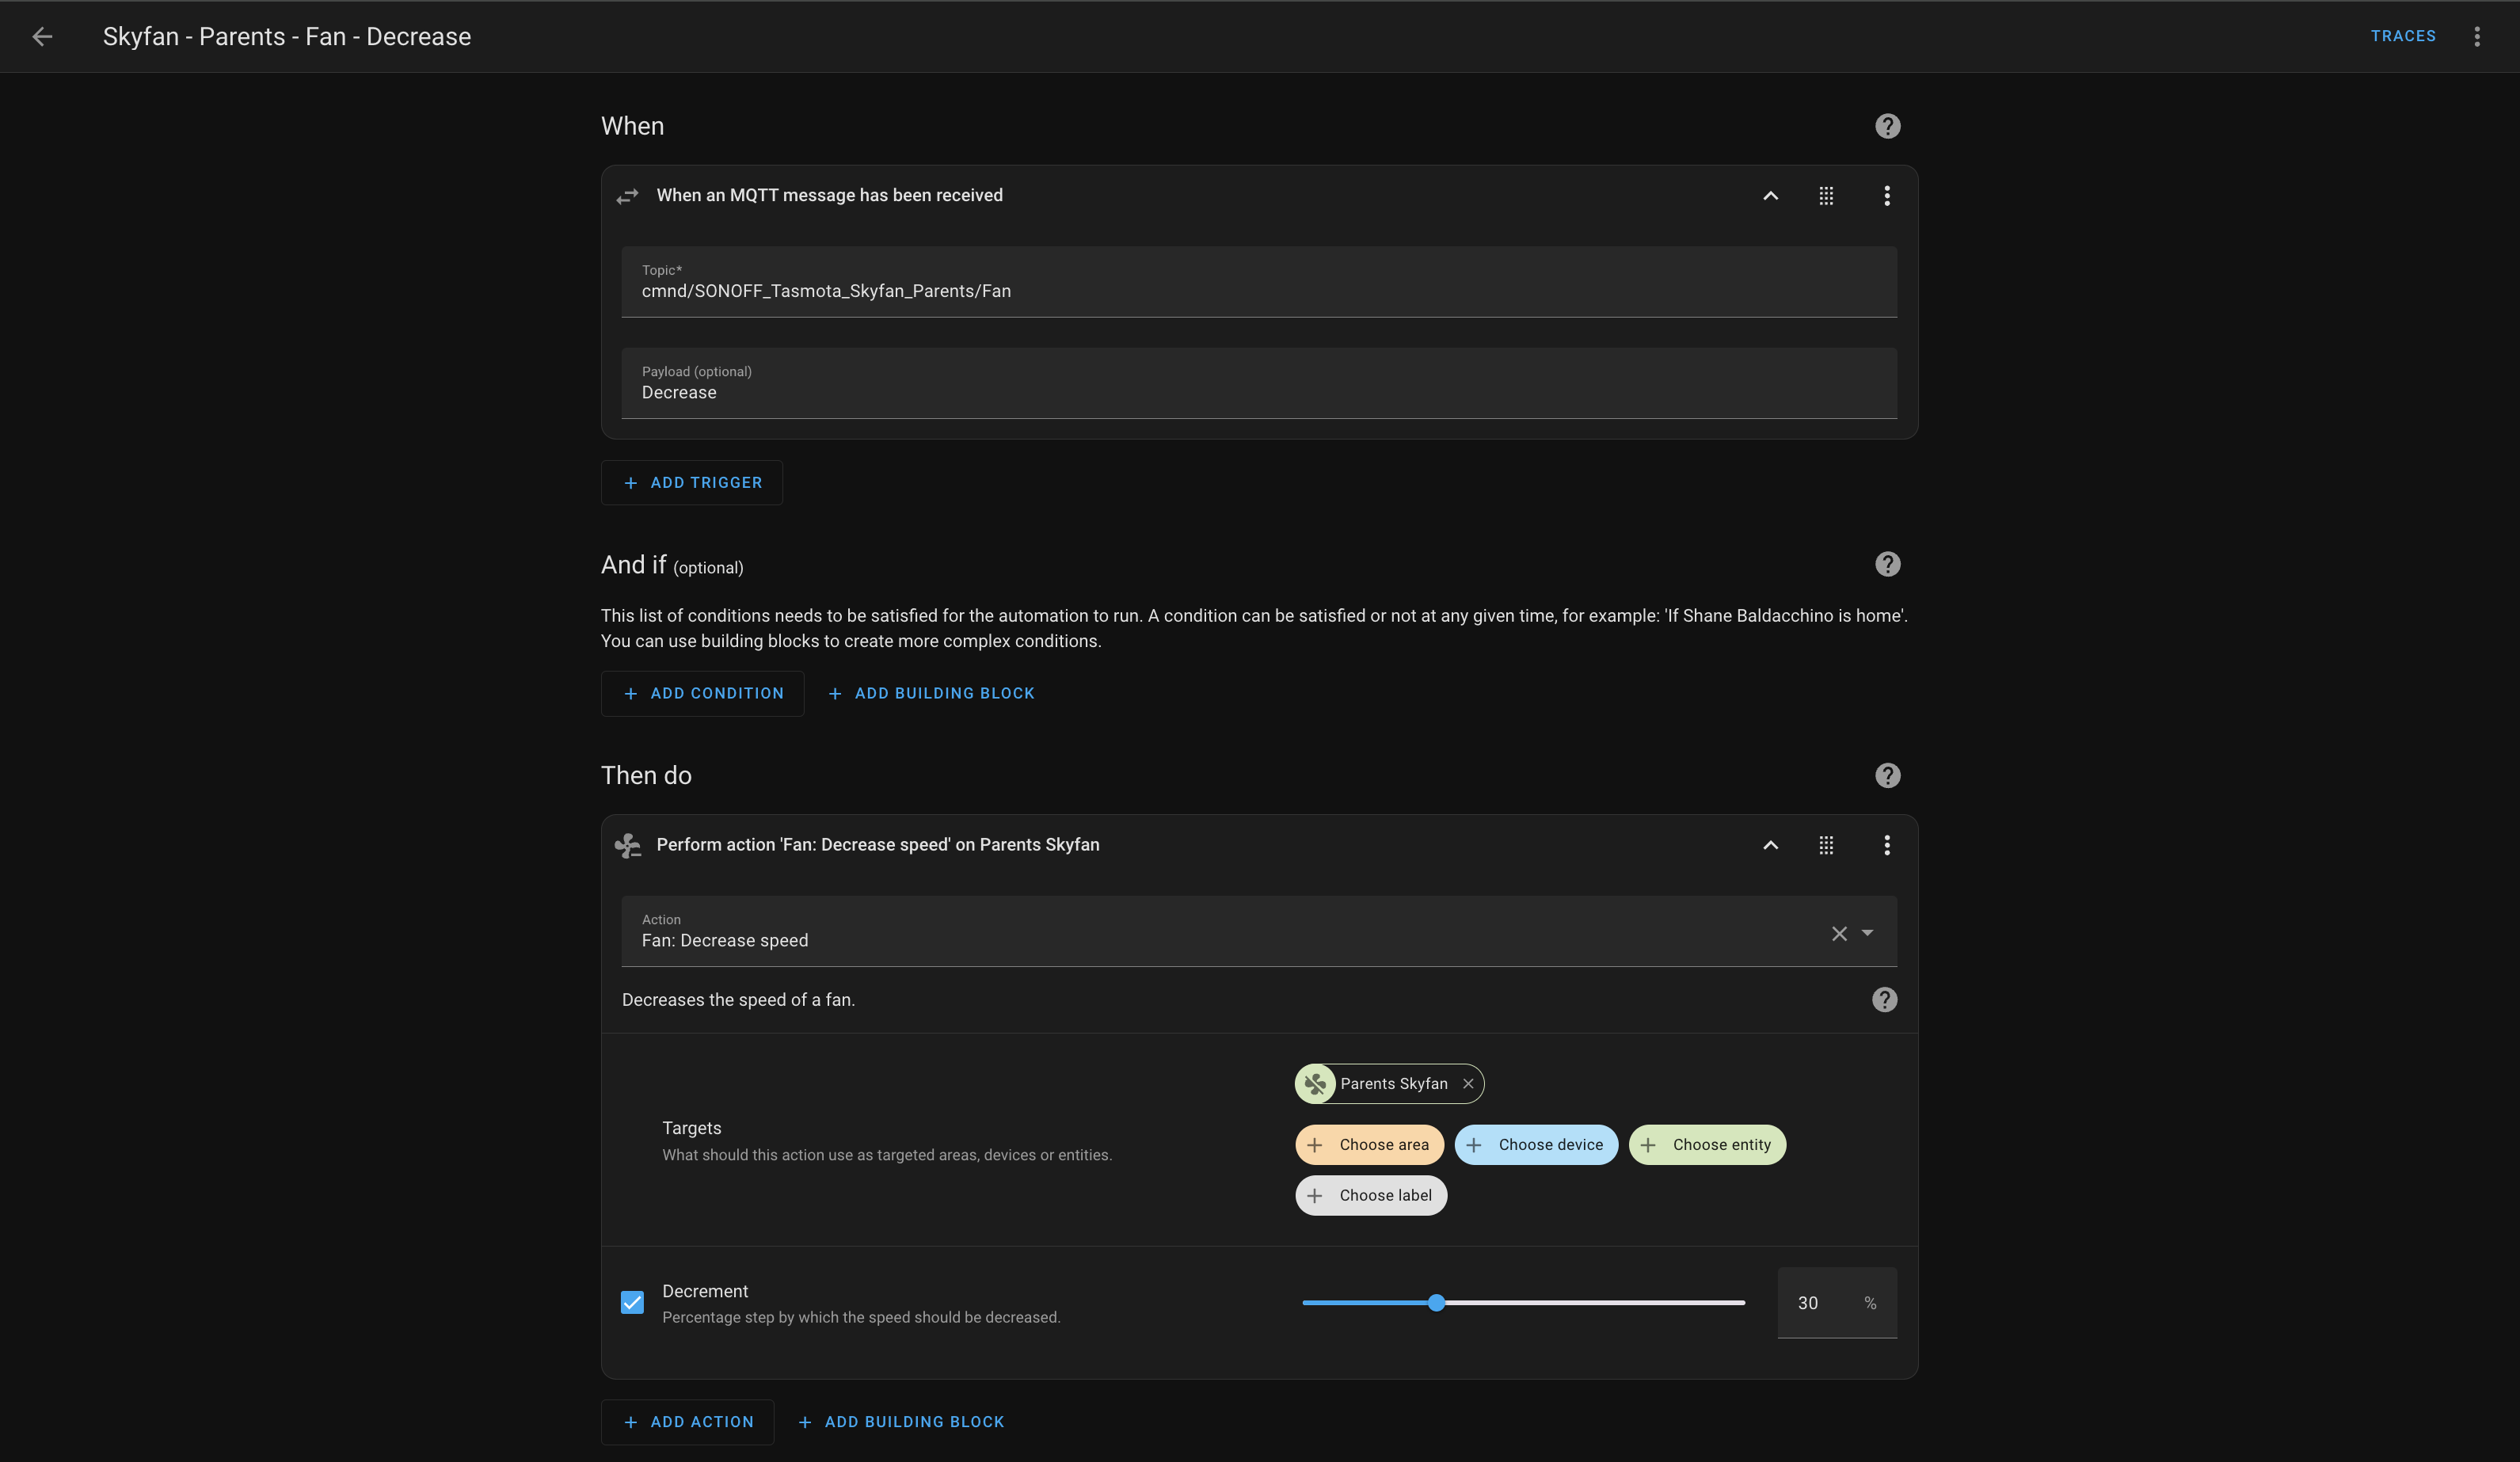
| Skyfan – Parents – Fan – Decrease | MQTT Topic cmnd/SONOFF_Tasmota_Skyfan_Parents/FanPayload Decrease | ActionFan: Decrease Speed - Decrement 30% |
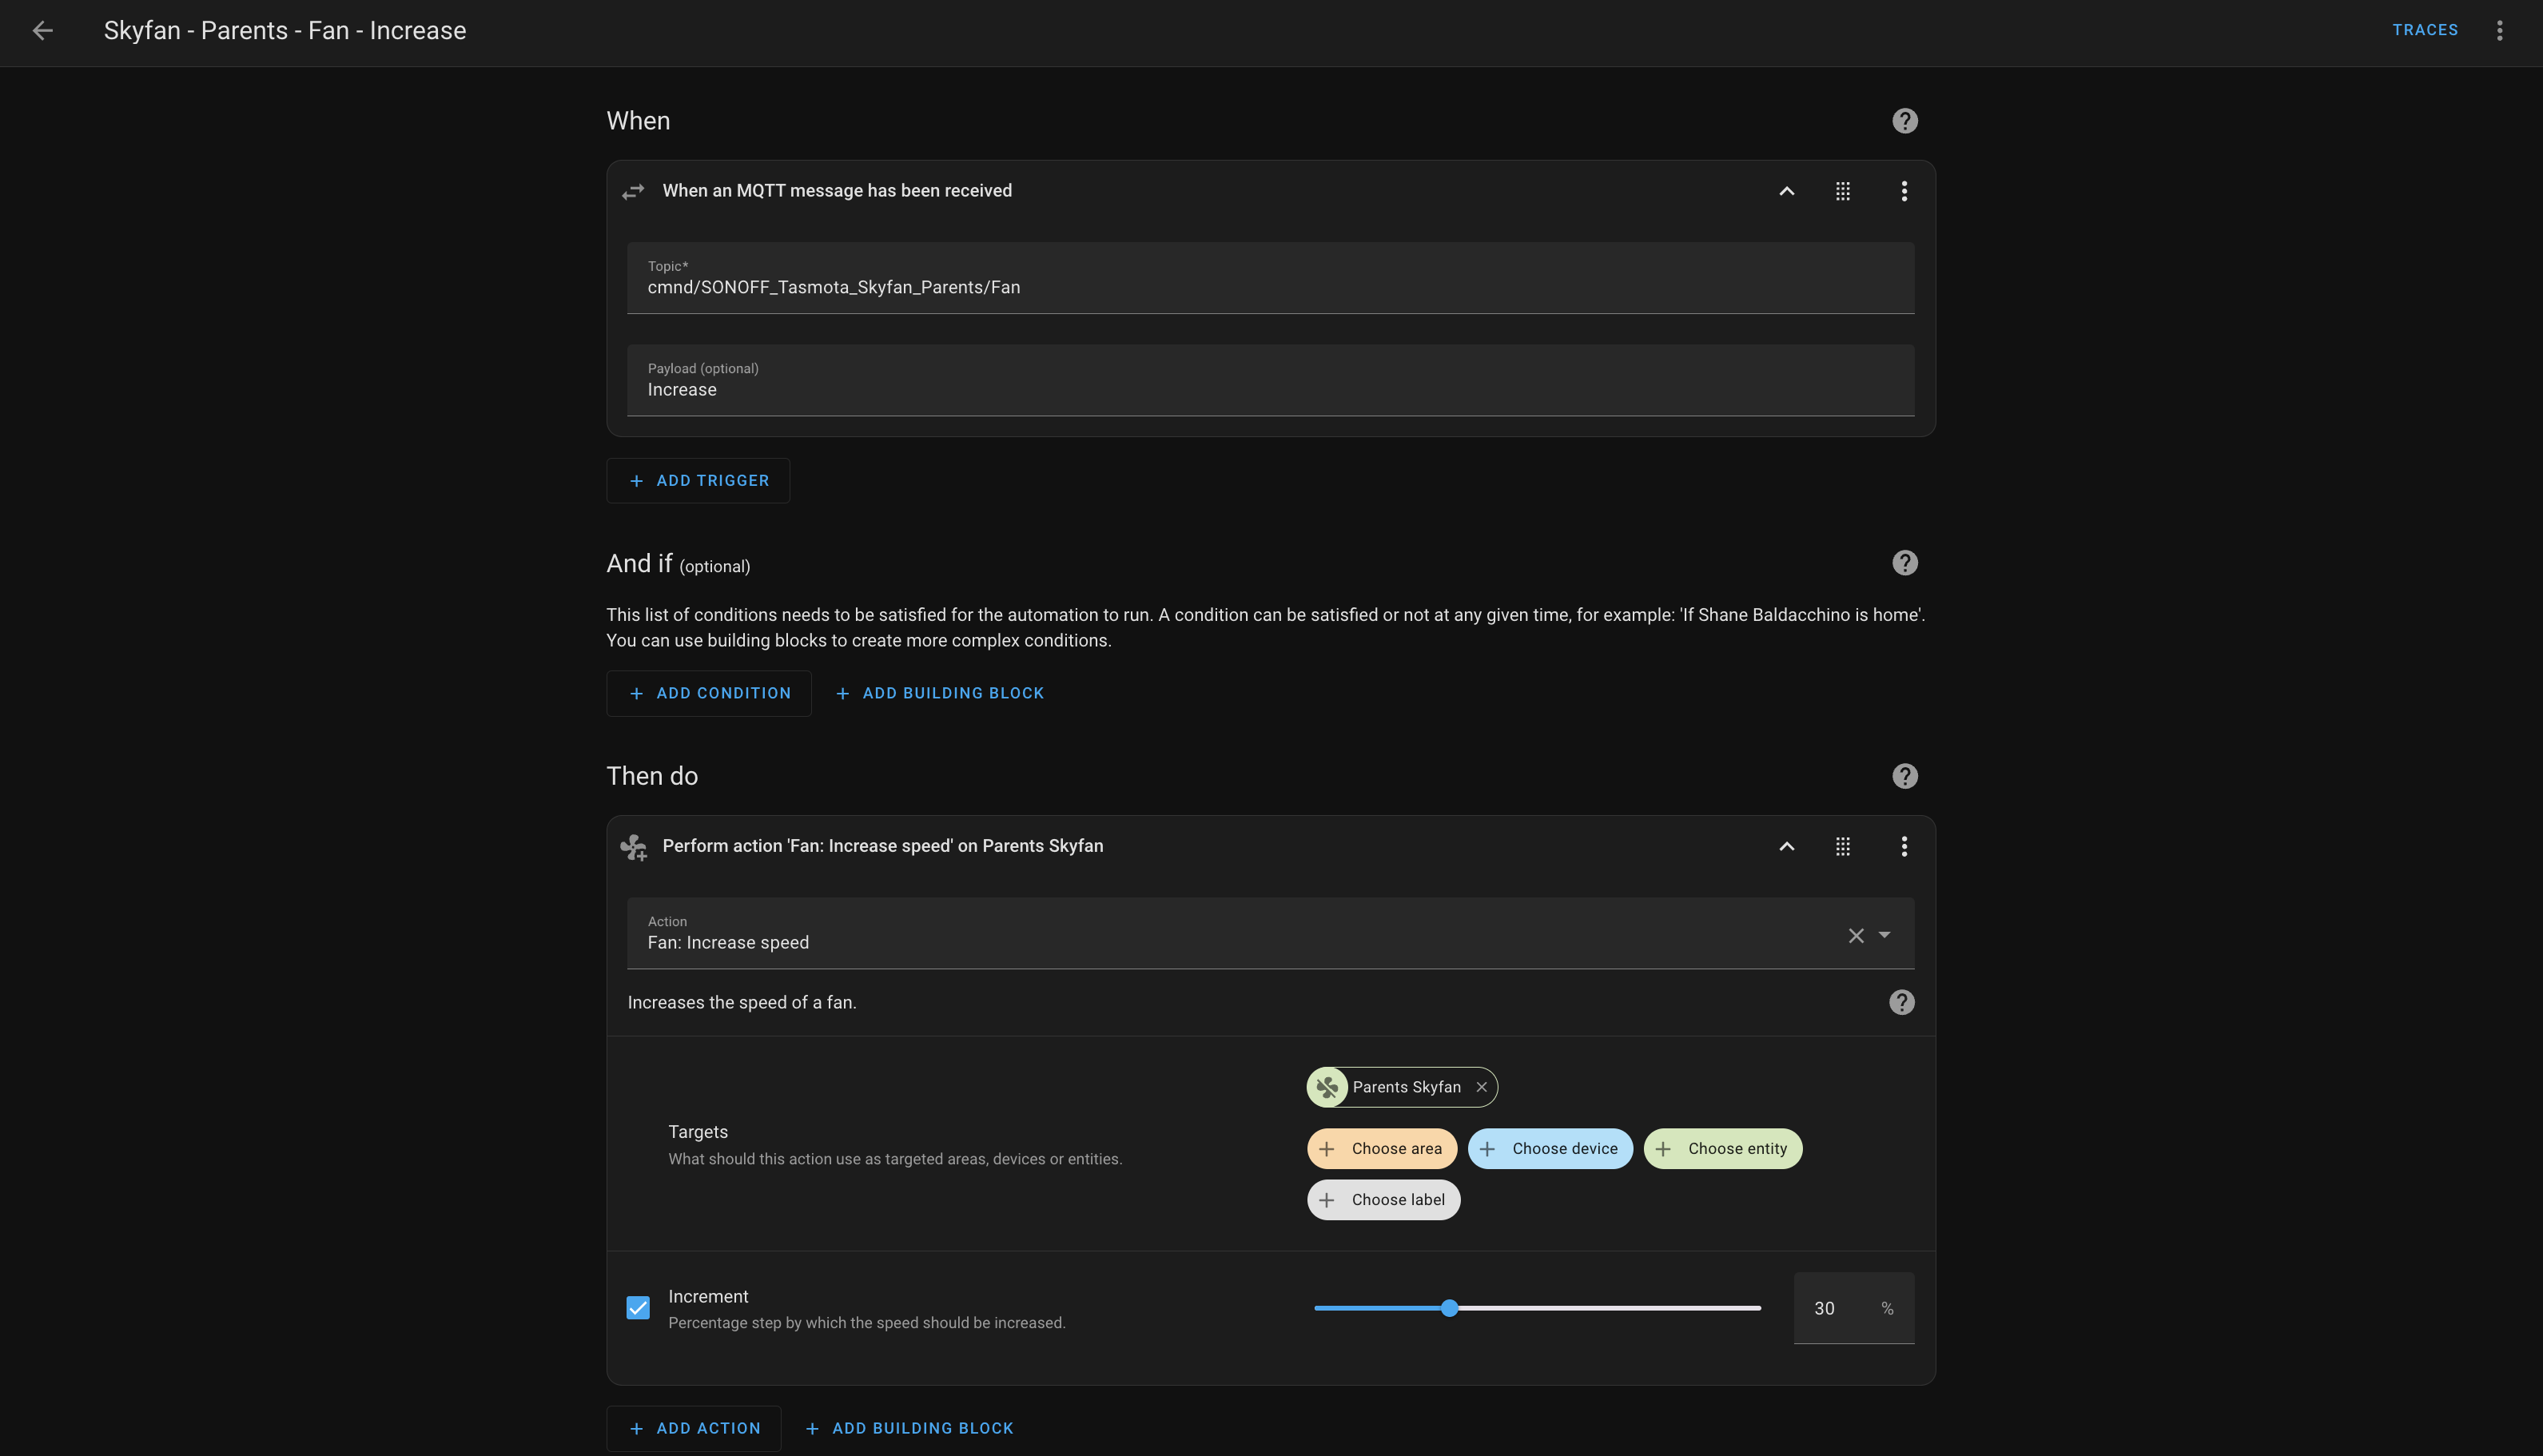
| Skyfan – Parents – Fan – Increase | MQTT Topic cmnd/SONOFF_Tasmota_Skyfan_Parents/FanPayload Increase | ActionFan: Increase Speed - Increment 30% |
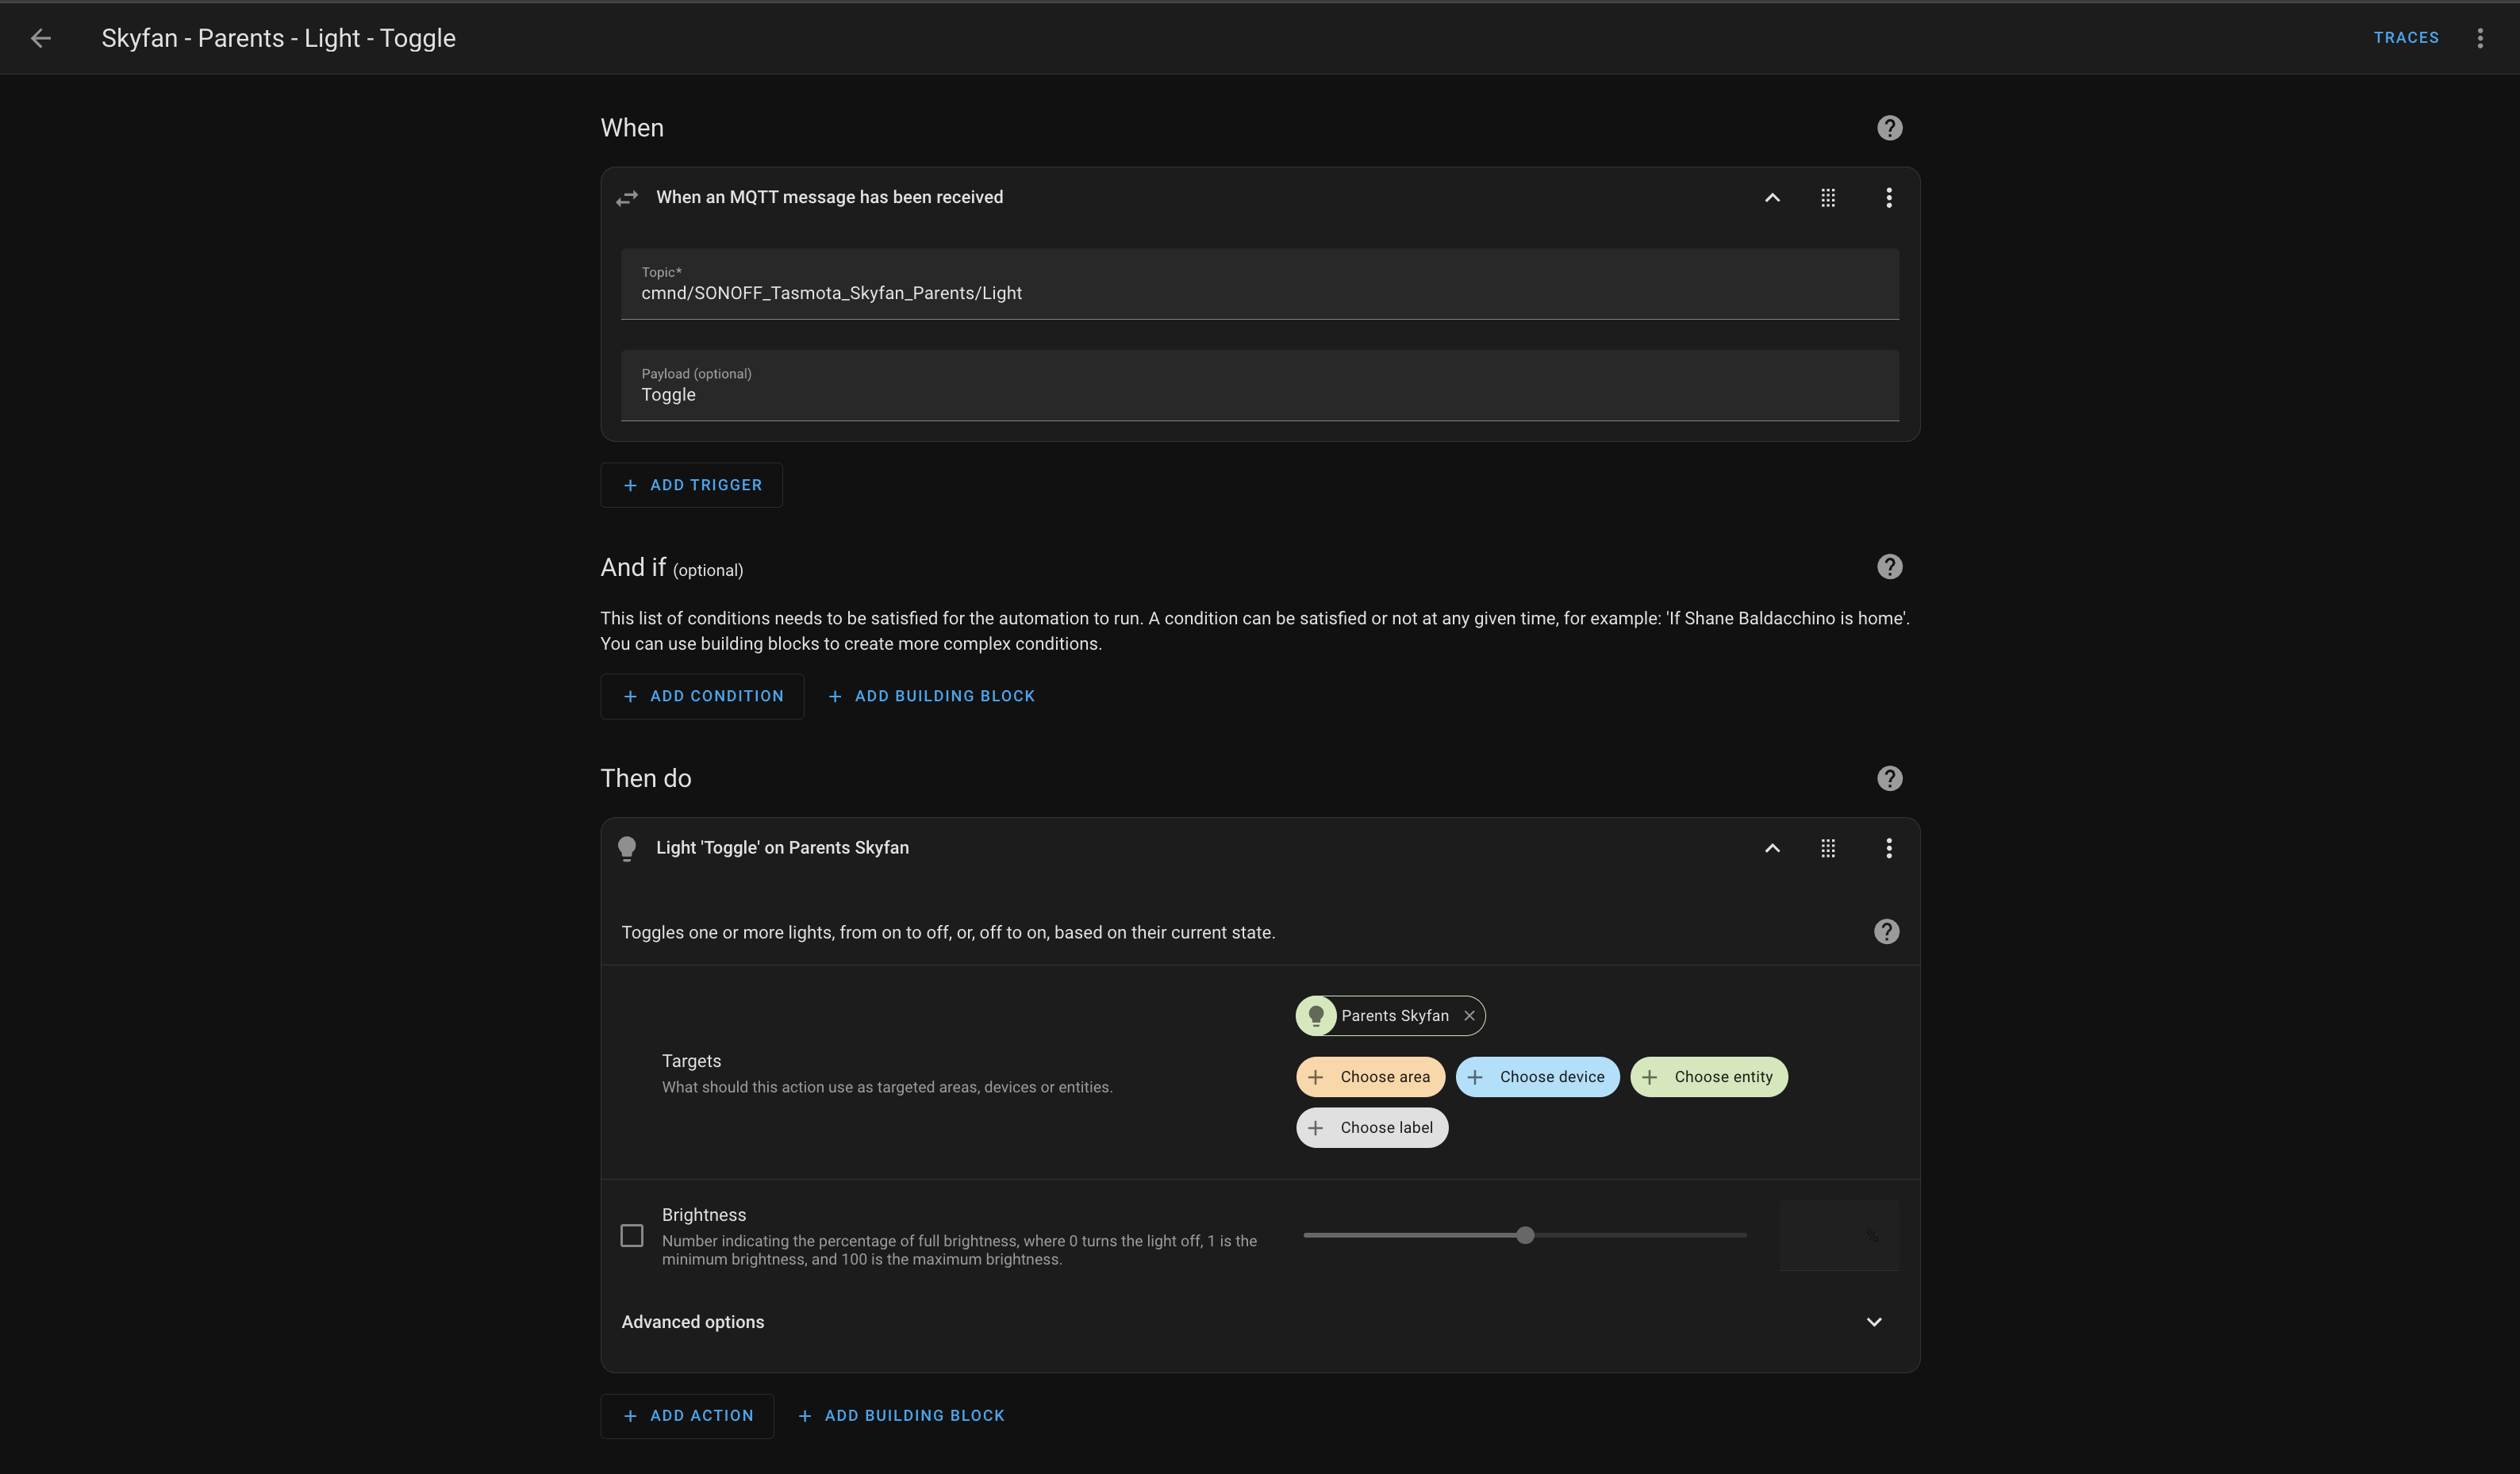
| Skyfan – Parents – Light – Toggle | MQTT Topic cmnd/SONOFF_Tasmota_Skyfan_Parents/LightPayload Toggle | ActionToggle state (either on or off) |
| Skyfan – Parents – Light – Decrease Dim | MQTT Topic cmnd/SONOFF_Tasmota_Skyfan_Parents/LightPayload Dim | ActionLight: Brightness Step - Decrease 20% |
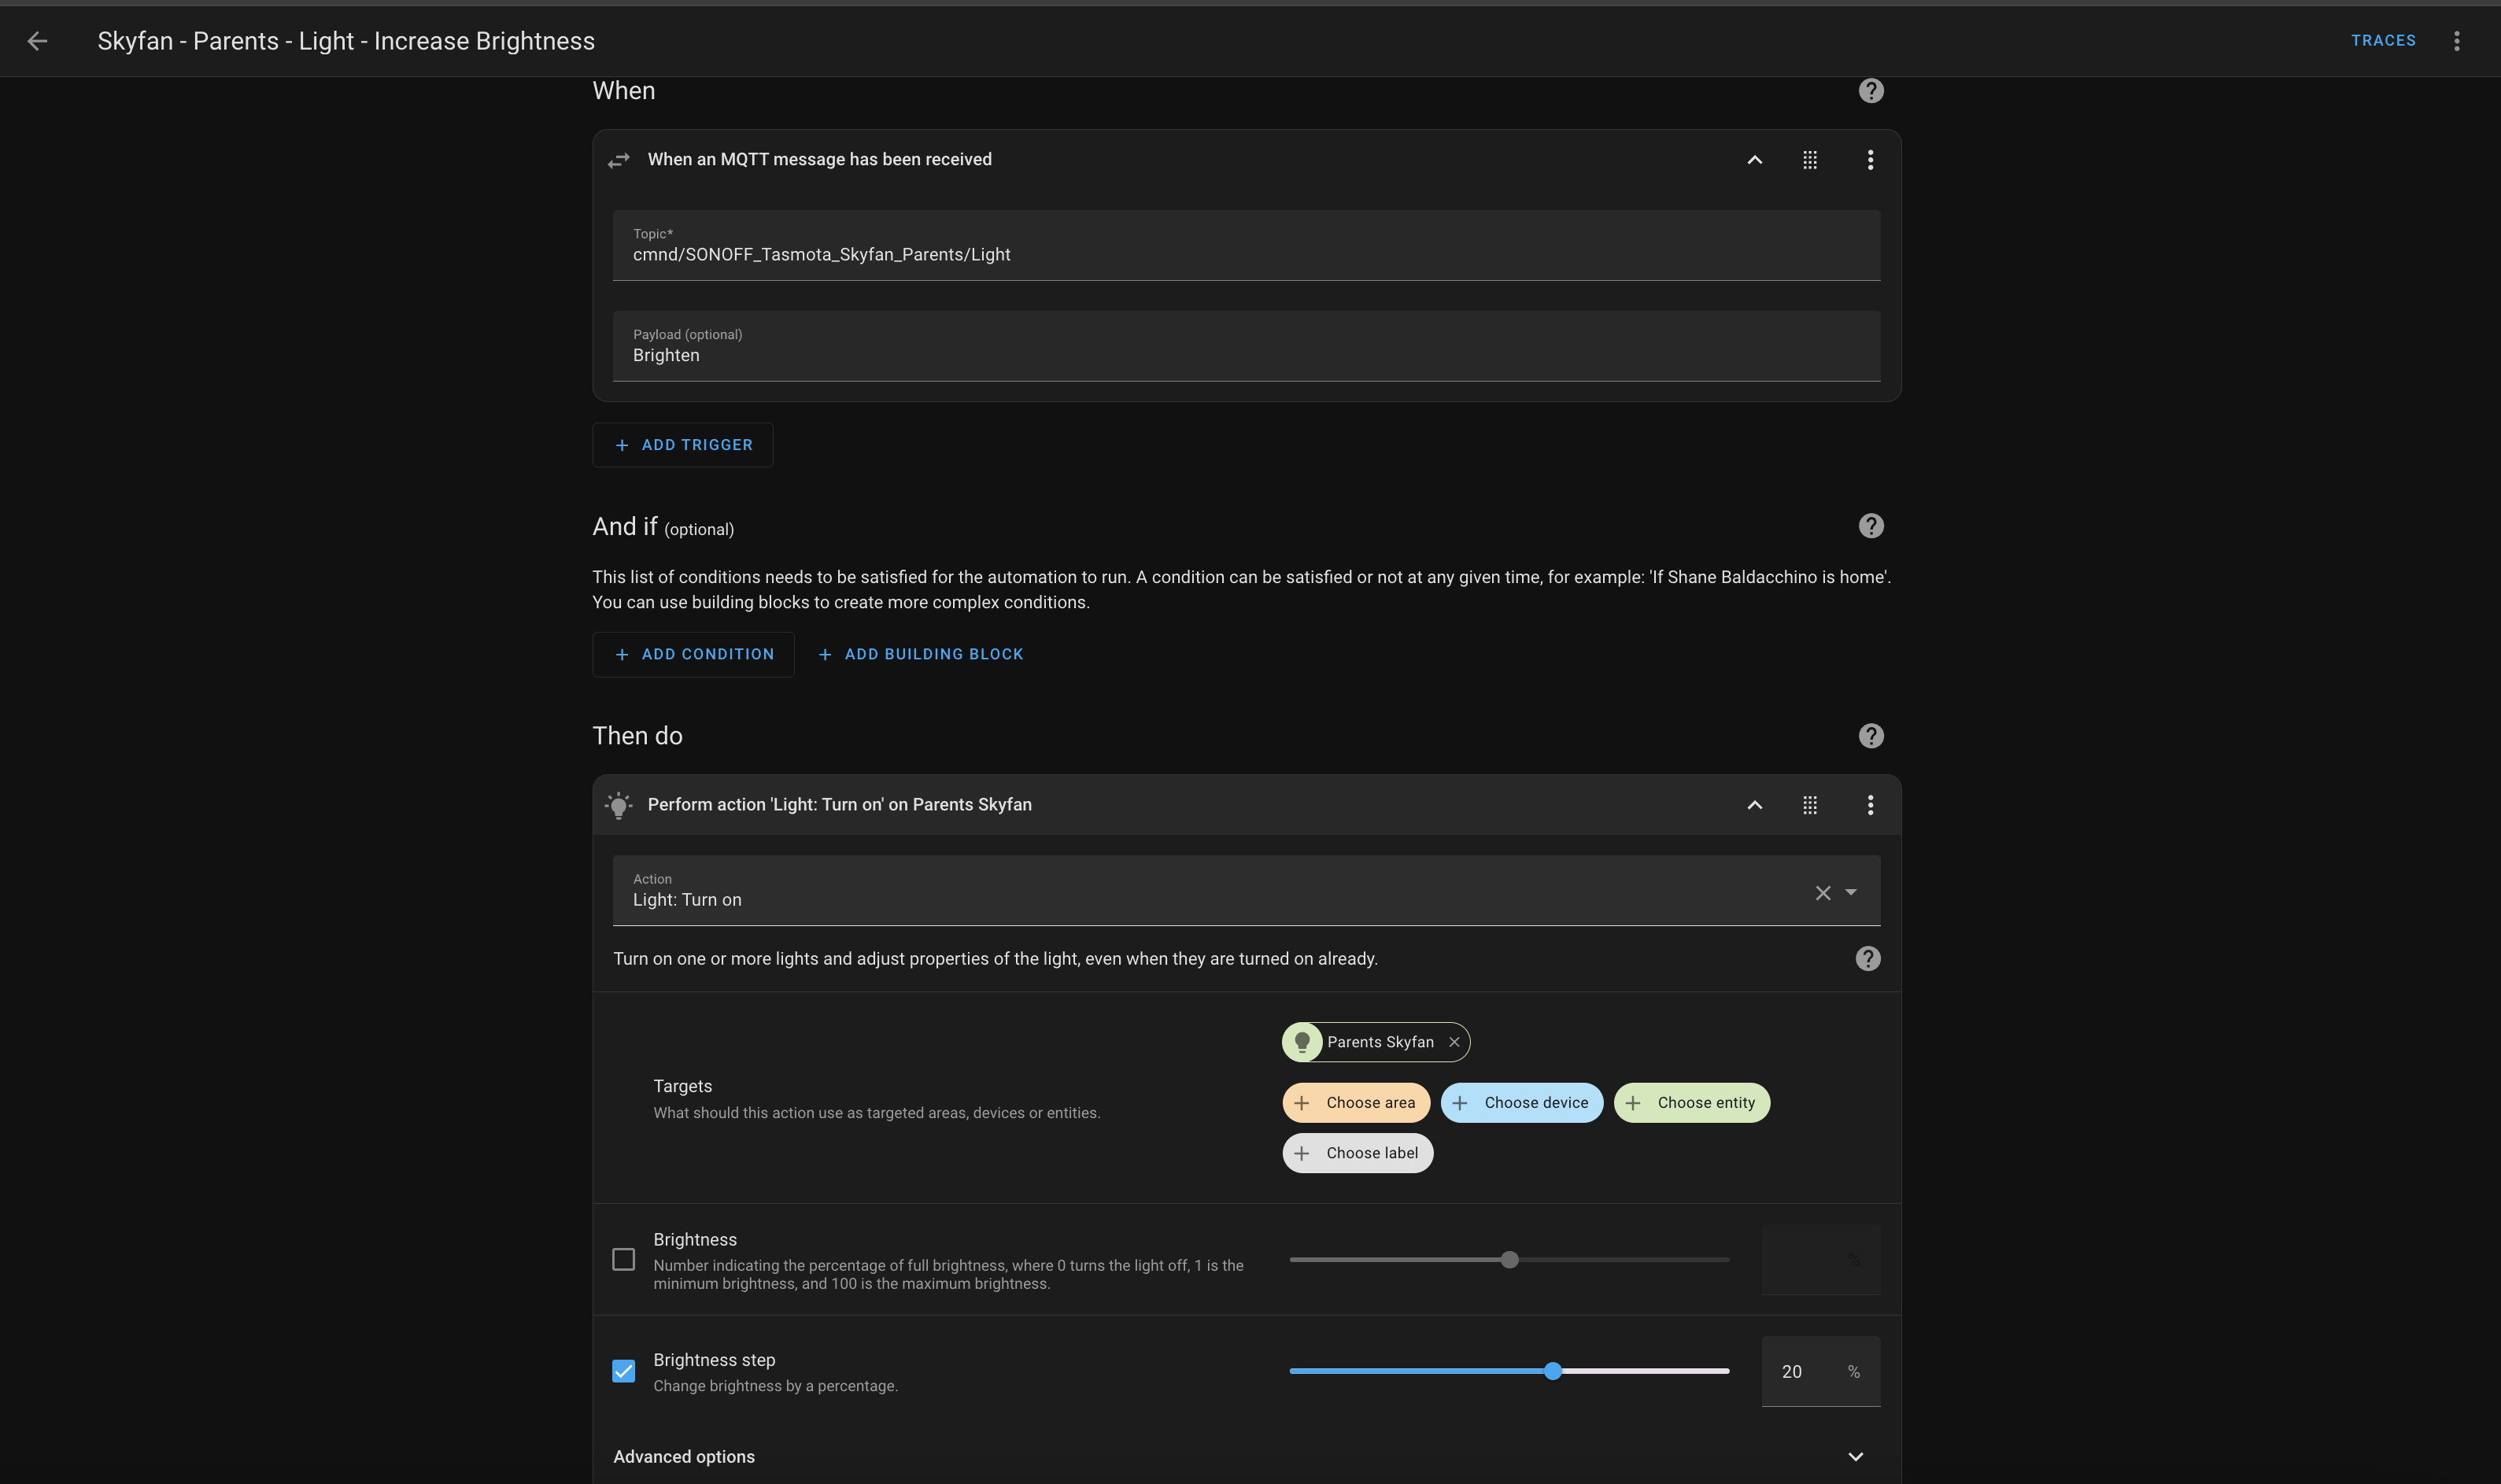
| Skyfan – Parents – Light – Increase Brightness | MQTT Topic cmnd/SONOFF_Tasmota_Skyfan_Parents/LightPayload Brighten | ActionLight: Brightness Step - Increase 20% |
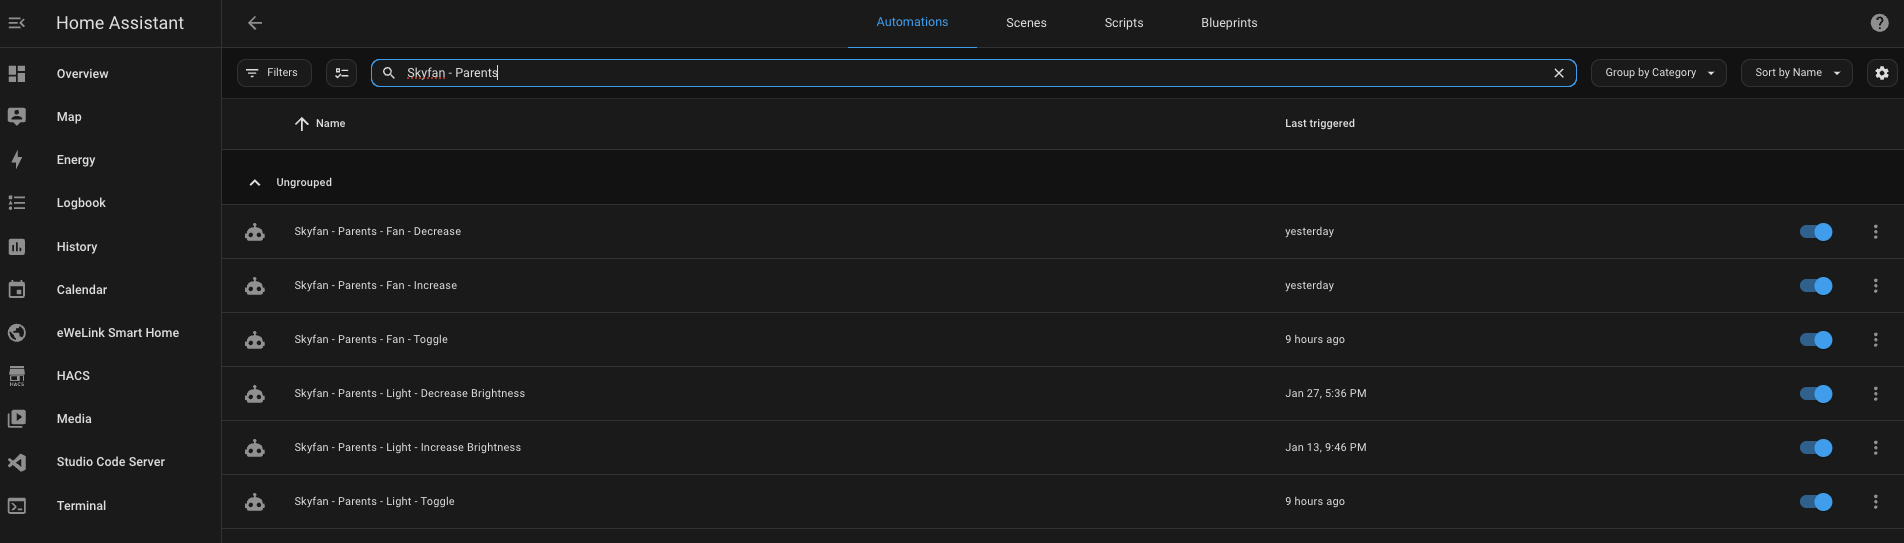
Below are screenshots for each of the 6 scenarios in Home Assistant as Automations. You should be able to use these screenshots to craft your own automations.

How ever you can edit your automations.yaml configuration file and inject the following code, obviously replacing entity names to suit your installation.
- id: '1735365809877'
  alias: Skyfan - Parents - Light - Toggle
  description: ''
  triggers:
  - trigger: mqtt
    topic: cmnd/SONOFF_Tasmota_Skyfan_Parents/Light
    payload: Toggle
  conditions: []
  actions:
  - action: light.toggle
    metadata: {}
    data: {}
    target:
      entity_id: light.skyfan_dc
  mode: single
- id: '1735366123723'
  alias: Skyfan - Parents - Light - Increase Brightness
  description: ''
  triggers:
  - topic: cmnd/SONOFF_Tasmota_Skyfan_Parents/Light
    payload: Brighten
    trigger: mqtt
  conditions: []
  actions:
  - target:
      entity_id: light.skyfan_dc
    data:
      brightness_step_pct: 20
    action: light.turn_on
  mode: single
- id: '1735366294023'
  alias: Skyfan - Parents - Light - Decrease Brightness
  description: ''
  triggers:
  - topic: cmnd/SONOFF_Tasmota_Skyfan_Parents/Light
    payload: Dim
    trigger: mqtt
  conditions: []
  actions:
  - target:
      entity_id: light.skyfan_dc
    data:
      brightness_step_pct: -20
    action: light.turn_on
  mode: single
- id: '1735450133869'
  alias: Skyfan - Parents - Fan - Toggle
  description: ''
  triggers:
  - topic: cmnd/SONOFF_Tasmota_Skyfan_Parents/Fan
    payload: Toggle
    trigger: mqtt
  conditions: []
  actions:
  - target:
      entity_id: fan.skyfan_dc
    action: fan.toggle
  mode: single
- id: '1735450401183'
  alias: Skyfan - Parents - Fan - Increase
  description: ''
  triggers:
  - topic: cmnd/SONOFF_Tasmota_Skyfan_Parents/Fan
    payload: Increase
    trigger: mqtt
  conditions: []
  actions:
  - action: fan.increase_speed
    target:
      entity_id: fan.skyfan_dc
    data:
      percentage_step: 30
  mode: single
- id: '1735450791708'
  alias: Skyfan - Parents - Fan - Decrease
  description: ''
  triggers:
  - topic: cmnd/SONOFF_Tasmota_Skyfan_Parents/Fan
    payload: Decrease
    trigger: mqtt
  conditions: []
  actions:
  - action: fan.decrease_speed
    target:
      entity_id:
      - fan.skyfan_dc
    data:
      percentage_step: 30
  mode: single
Summary & Wrap Up
Complicated, kind of, but really this isn’t that complex either. We are going from button press, to Sonoff Dual R3, to Tasmota, to MQTT, to Arduino, to Home Assistant and finally TUYA.
That sounds complex but hopefully after following along with this post it indeed is rather simple. It aesthetically cleans up your rooms, so put that remote in the draw and use it (or the TUYA Smart App) to change functions like fan direction or light colour (kelvin).
Any negatives? Cost, I love this approach, it is family approved but it is a luxury. If you are using Clipsal wall plates, with Clipsal push buttons (30PB) and a Sonoff Dual R3 / Shelly this does add up. There is close to $100 per bedroom in parts, but if you are using non Clipsal products you could reduce the cost by half.
In the end this is just another control plane. I hope you found this helpful, this pattern can be applied from fan’s to roller shutters or any other solution that uses a remote.
Thanks
Shane Baldacchino
I’m ecstatic to have found you youtube channel, and subsequently your blog.
A godsend for anyone trying to dip their feet in more custom and advanced home automation concepts specifically in the Australian market.
Did you have to run Neutral wiring into the switch boxes?
Cheers
Thanks – In Australia and modern houses have neutral wires. So I didnt need to run neutral wires. Thanks for the comment